智能视频创作SDK
智能视频创作SDK


- 文档首页
 智能视频创作SDK1.7.0SDK接入指引【iOS】接入指南其它语言接入React Native

安装RN可参考文档RN环境安装参考
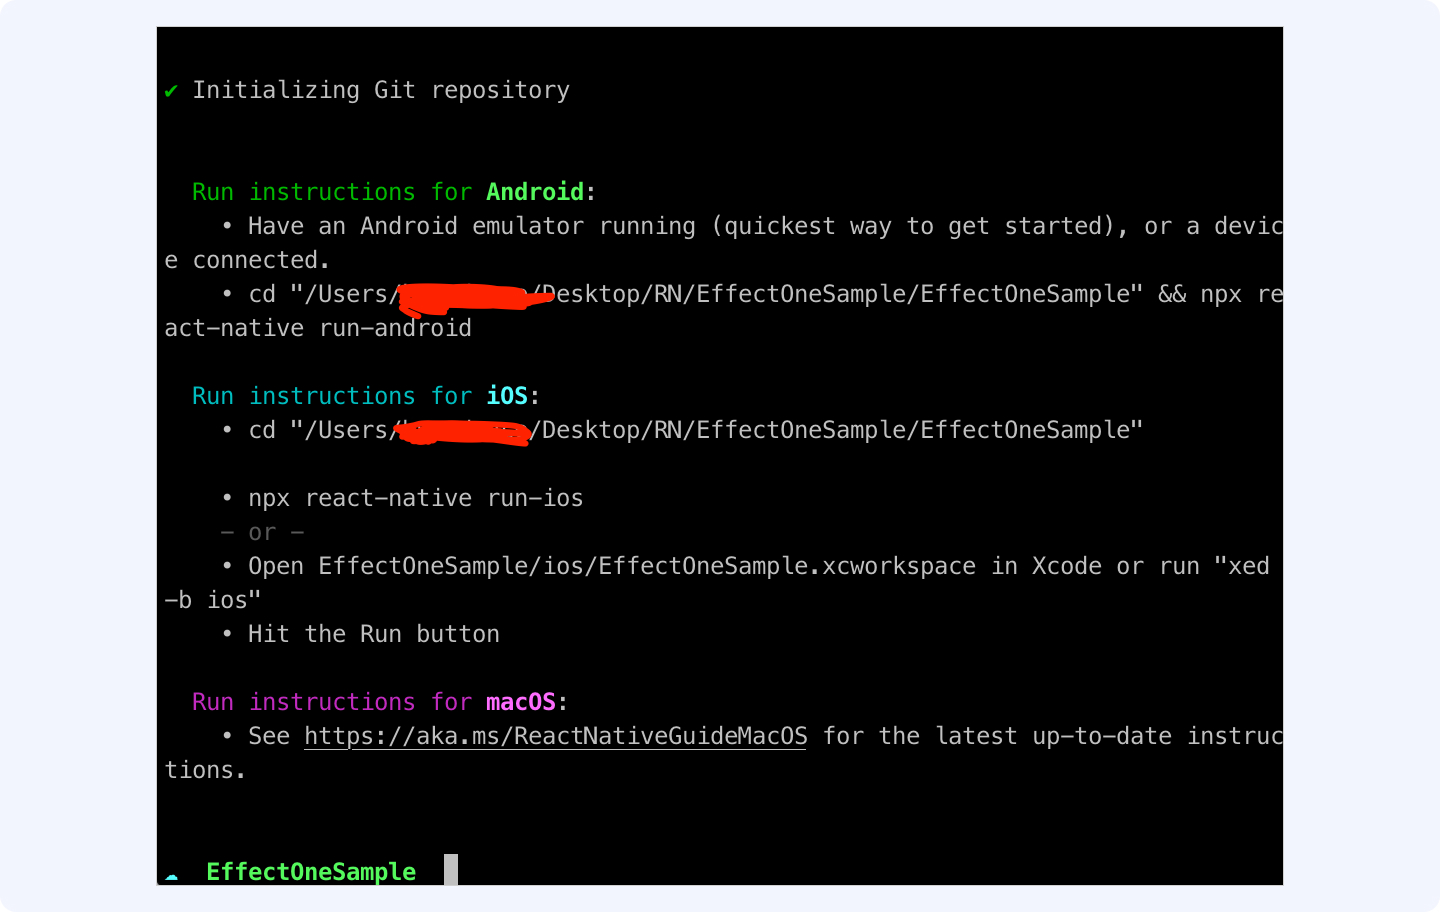
2.1 打开终端,进入到需要创建的RN项目所在的目录,执行命令:npx react-native init XXX

2.2 执行后,若遇到下面提示,输入:y。这个是询问是否install CocoaPods,本文需要CocoaPods来集成SDK
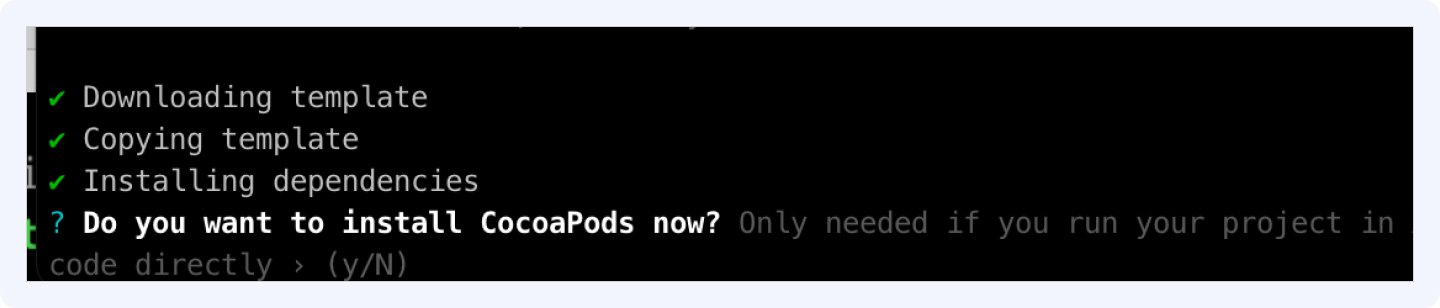
2.2.1 如果不小心输入n,怎么办?
等待RN项目创建完成,终端进入项目iOS文件夹下,先在终端输入bundle install,此时会创建CocoaPods环境,然后执行命令:pod install
2.3 至此创建RN项目结束
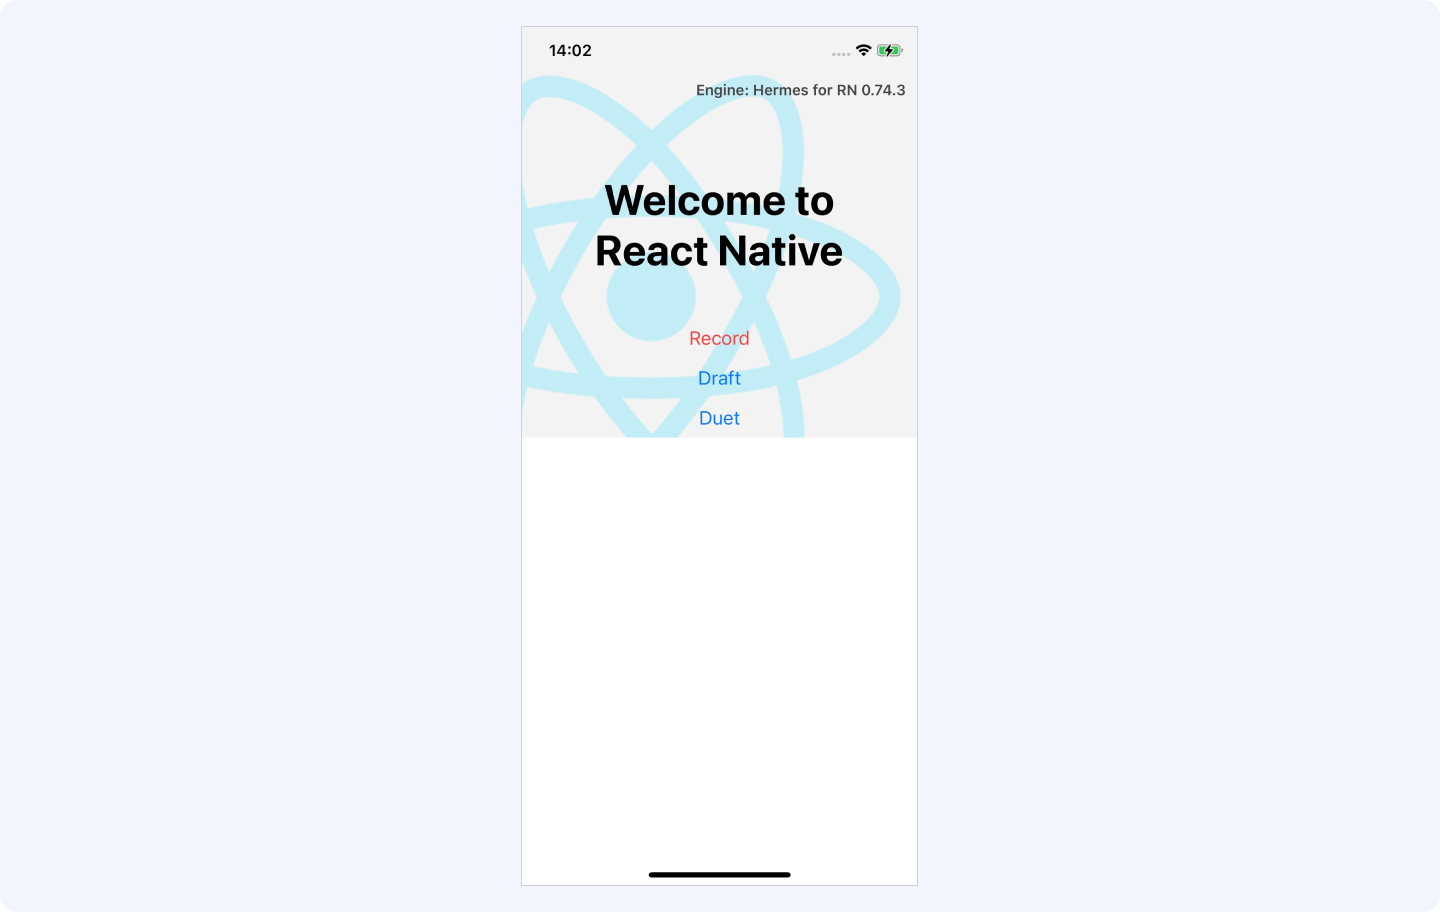
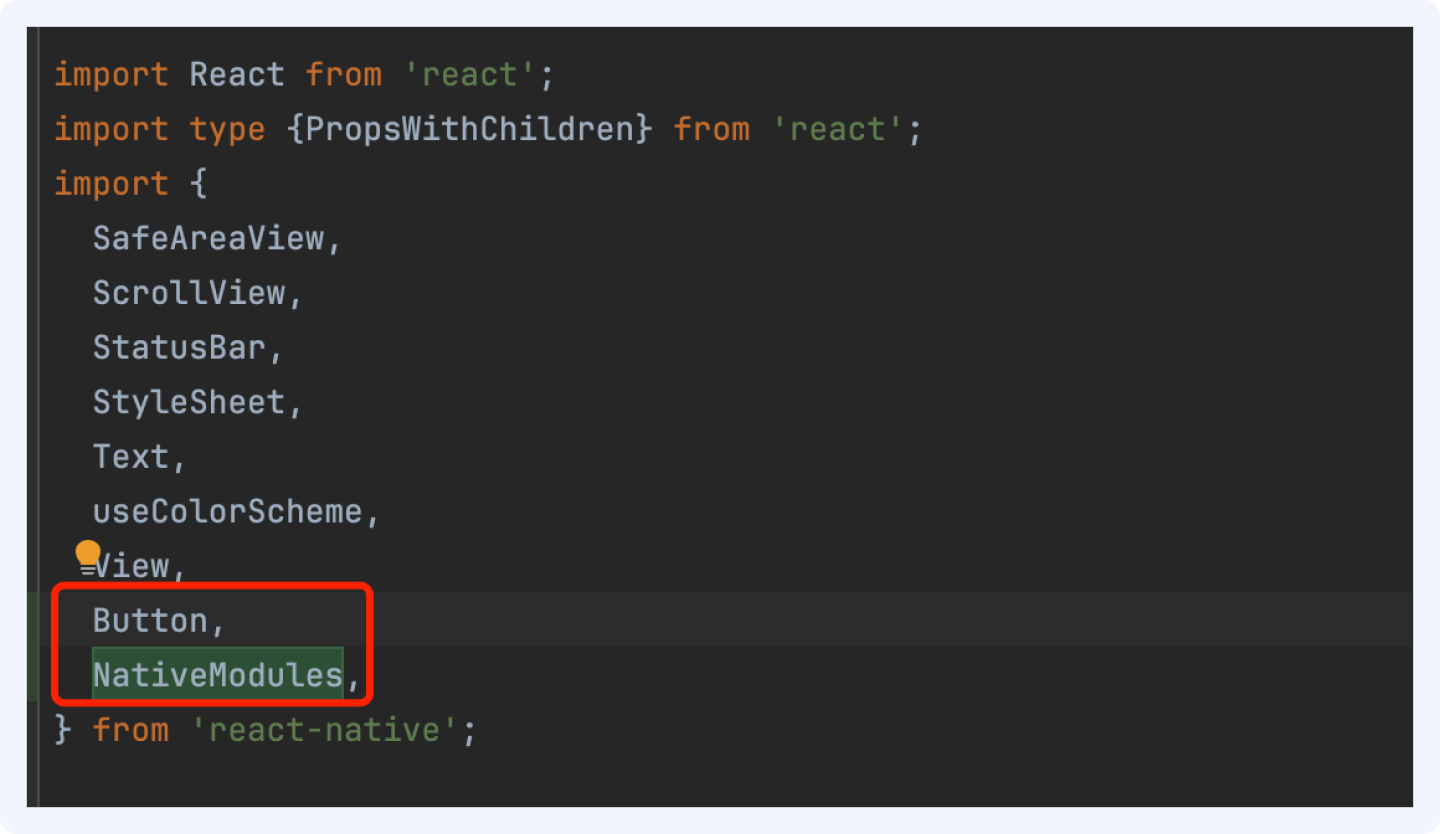
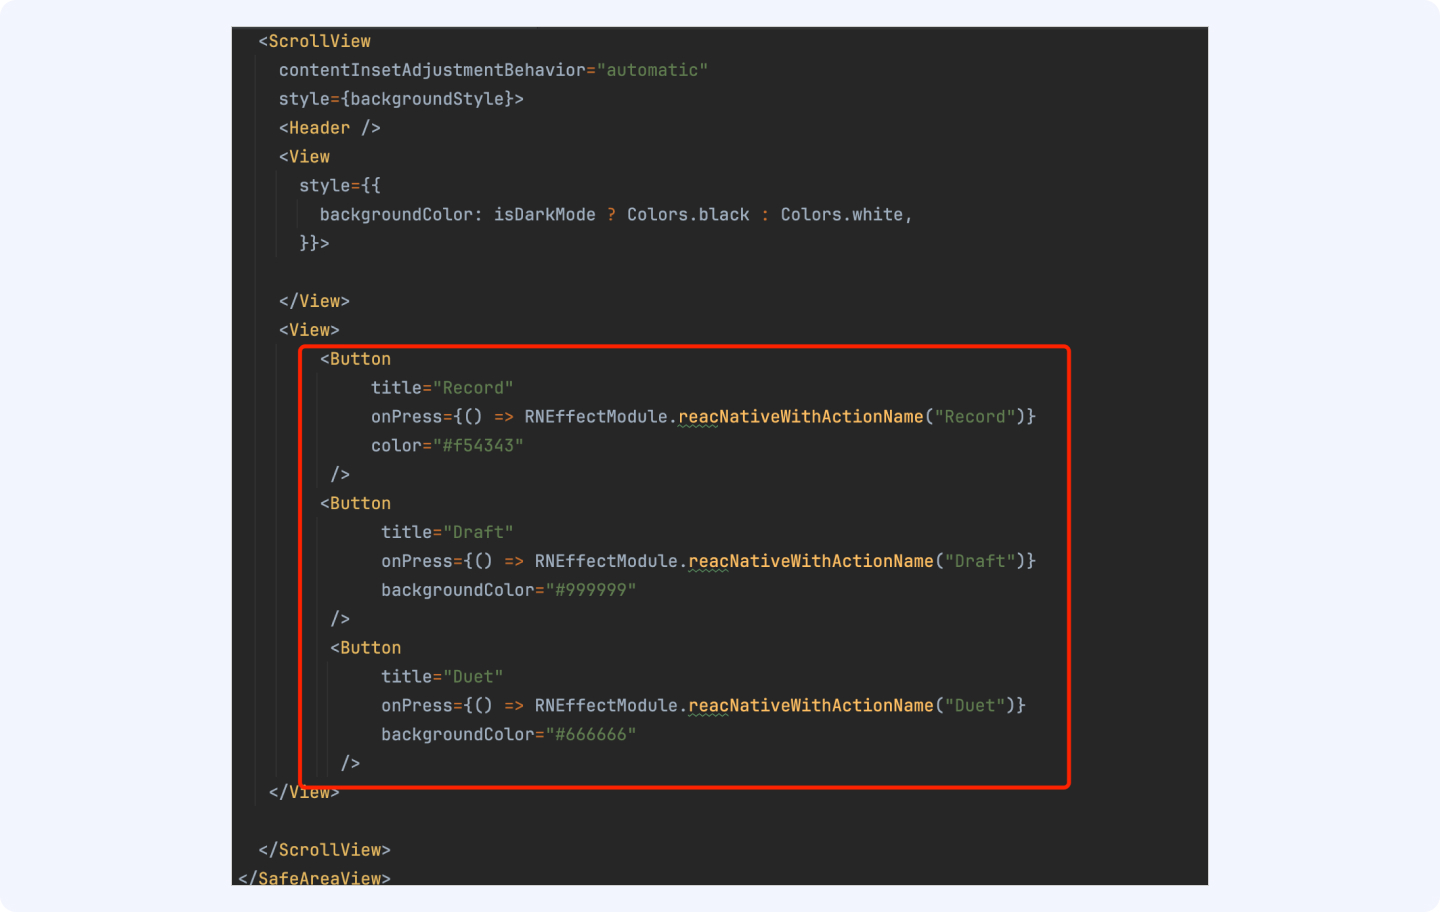
3.1 添加拍摄、草稿箱、视频合拍按钮
3.2 添加iOS向RN回调函数
这里以导出后向RN回传导出地址为例子,
在RN的
import中添加NativeEventEmitter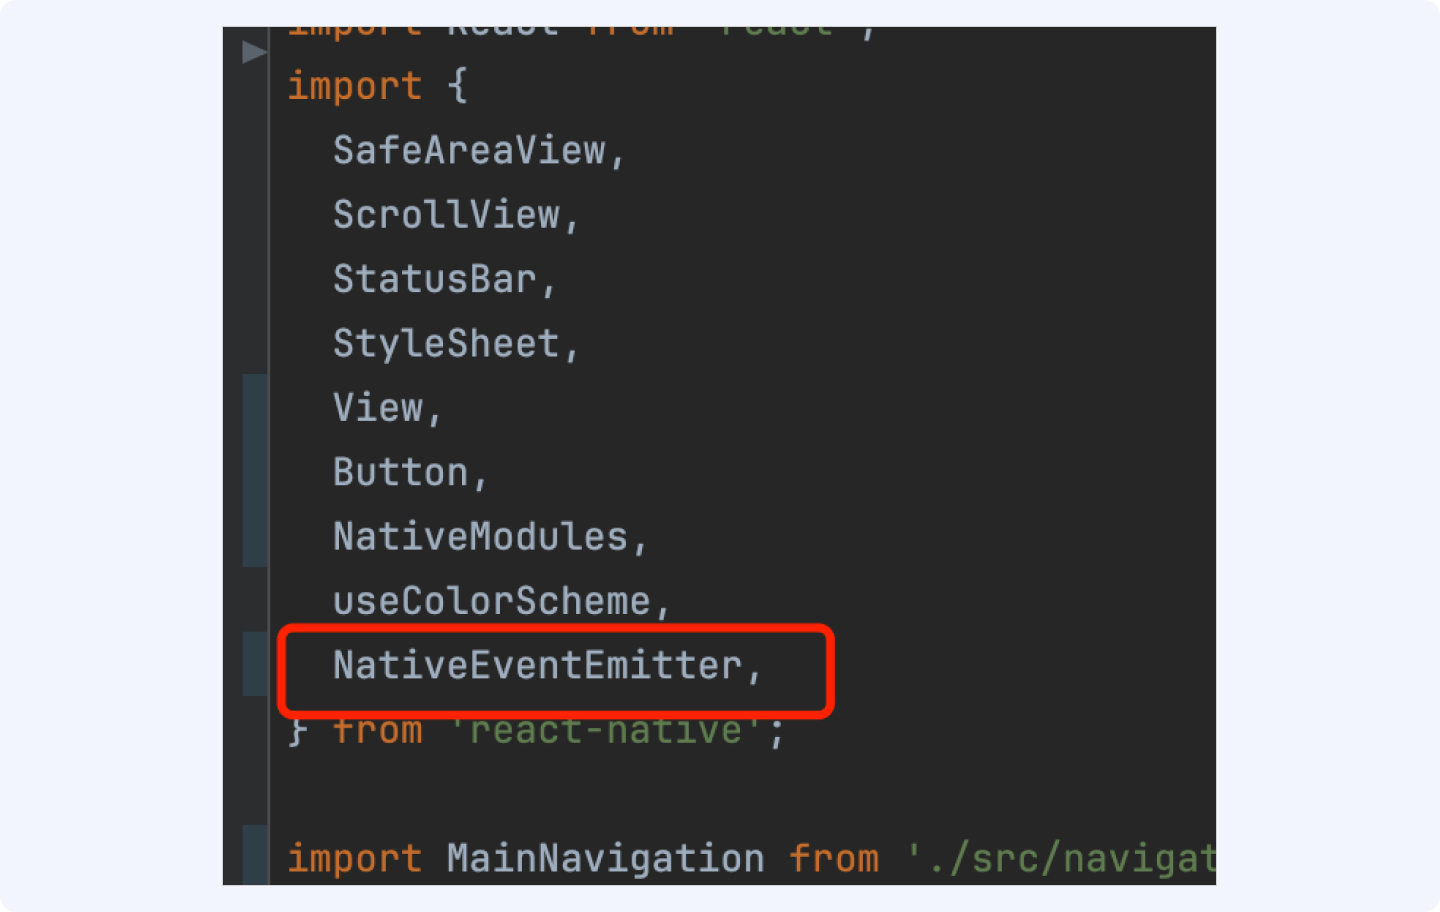
添加监听回调函数,用来监听原生向RN回调信息
EOCustomEventEmitter为iOS向RN传递消息的类,继承RCTEventEmitter,该类必须以**单例**的方式初始化对象;DataReceived是方法名字。具体的可参考demo中的EOCustomEventEmitter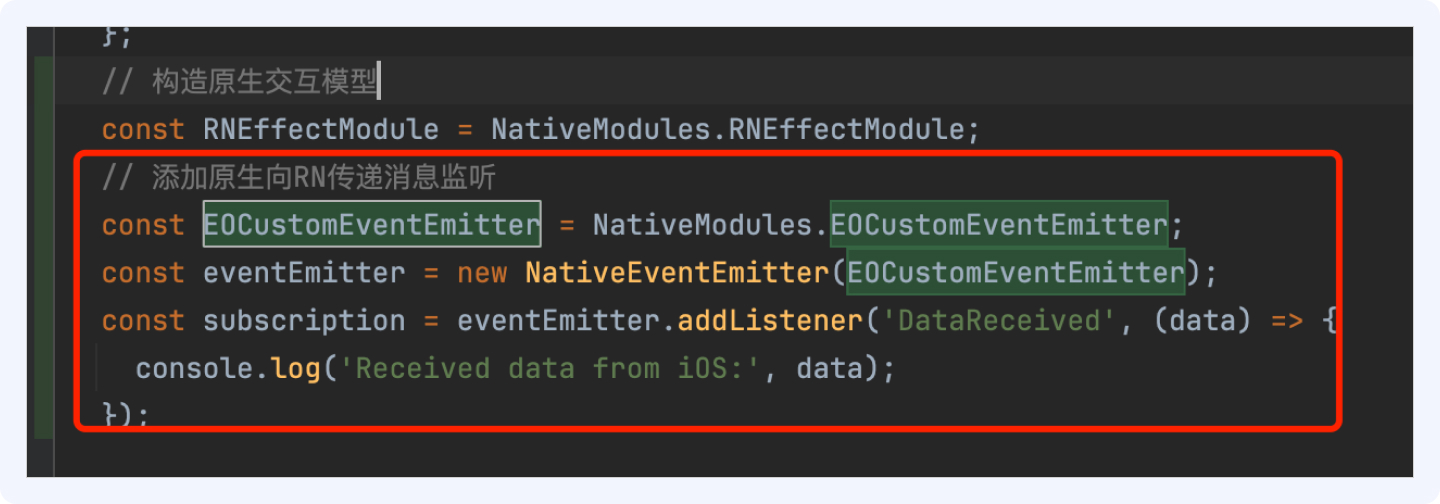
3.3 代码简析
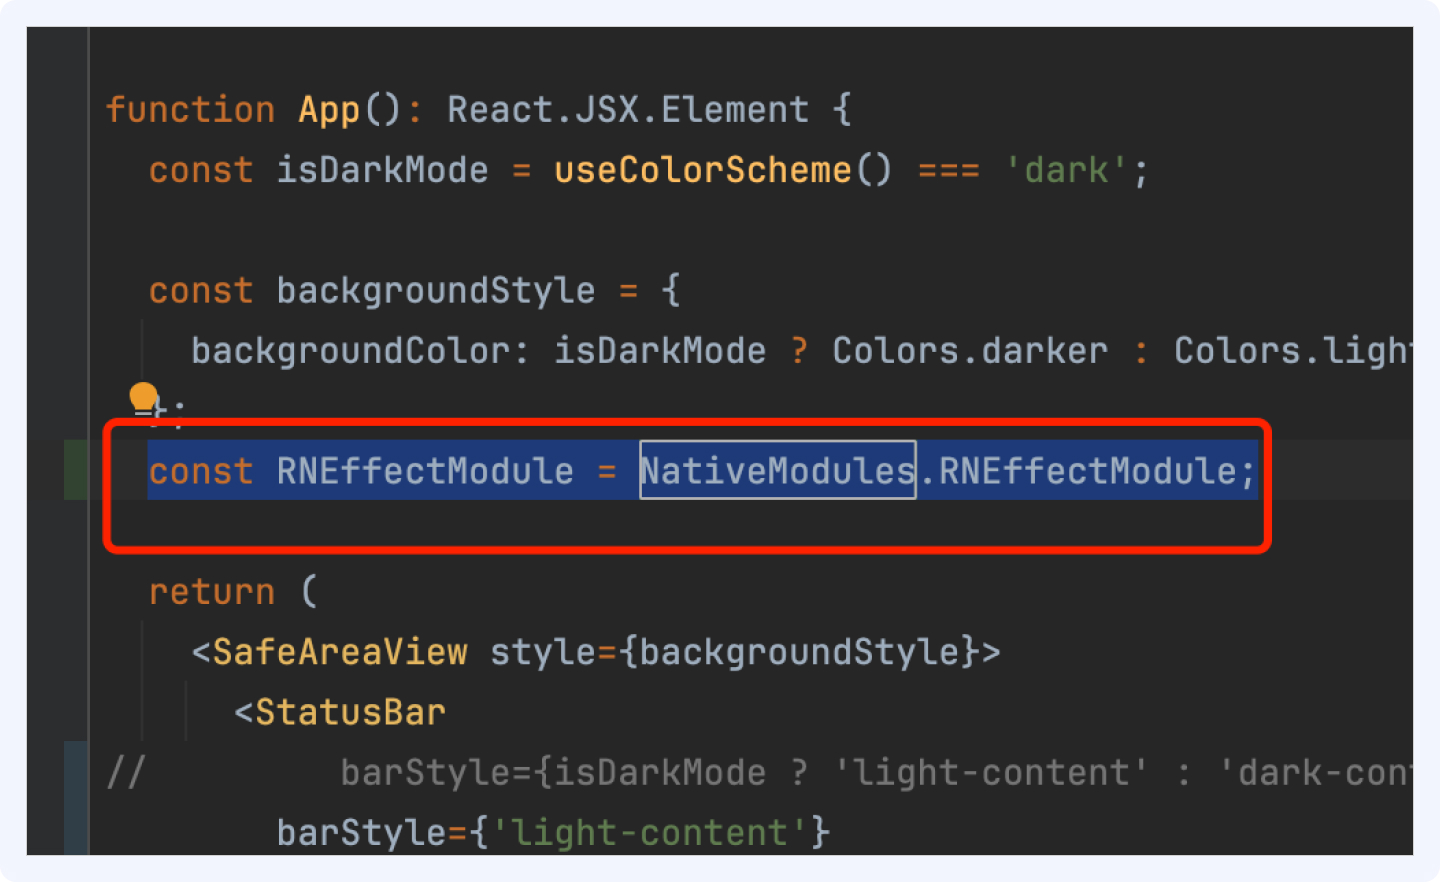
RNEffectModule、reacNativeWithActionName、EOCustomEventEmitter
RNEffectModule是RN与原生iOS交互的类,负责处理按钮点击与iOS交互;
reacNativeWithActionName是按钮点击的方法,通过传递的参数(Record、Draft、Duet)来确定点击的是哪个按钮
EOCustomEventEmitter负责iOS向RN传递消息
3.4 参考代码
import React from 'react';
import {
  SafeAreaView,
  ScrollView,
  StatusBar,
  StyleSheet,
  View,
  Button,
  NativeModules,
  useColorScheme,
  NativeEventEmitter,
} from 'react-native';

import MainNavigation from './src/navigation/MainNavigation';
import {store} from './src/redux/store';
import {Provider} from 'react-redux';

import {Colors, Header} from 'react-native/Libraries/NewAppScreen';


function App() {
  const isDarkMode = useColorScheme() === 'dark';

  const backgroundStyle = {
    backgroundColor: isDarkMode ? Colors.darker : Colors.lighter,
  };
  // 构造原生交互模型
  const RNEffectModule = NativeModules.RNEffectModule;
  // 添加原生向RN传递消息监听
  const EOCustomEventEmitter = NativeModules.EOCustomEventEmitter;
  const eventEmitter = new NativeEventEmitter(EOCustomEventEmitter);
  const subscription = eventEmitter.addListener('DataReceived', (data) => {
    console.log('Received data from iOS:', data);
  });

  return (
    <SafeAreaView style={backgroundStyle}>
      <StatusBar
        barStyle={isDarkMode ? 'light-content' : 'dark-content'}
        backgroundColor={backgroundStyle.backgroundColor}
      />
      <ScrollView
        contentInsetAdjustmentBehavior="automatic"
        style={backgroundStyle}>
        <Header />
        <View
          style={{
            backgroundColor: isDarkMode ? Colors.black : Colors.white,
          }}></View>
        <View>
          <Button
            //拍摄按钮
            title="Record"
            onPress={() => RNEffectModule.reacNativeWithActionName('Record')}
            color="#f54343"
          />
          <Button
            //草稿箱按钮
            title="Draft"
            onPress={() => RNEffectModule.reacNativeWithActionName('Draft')}
            backgroundColor="#999999"
          />
          <Button
            //视频合拍按钮
            title="Duet"
            onPress={() => RNEffectModule.reacNativeWithActionName('Duet')}
            backgroundColor="#666666"
          />
        </View>
      </ScrollView>
    </SafeAreaView>
  );
}

export default App;
4.1 添加指定的文件
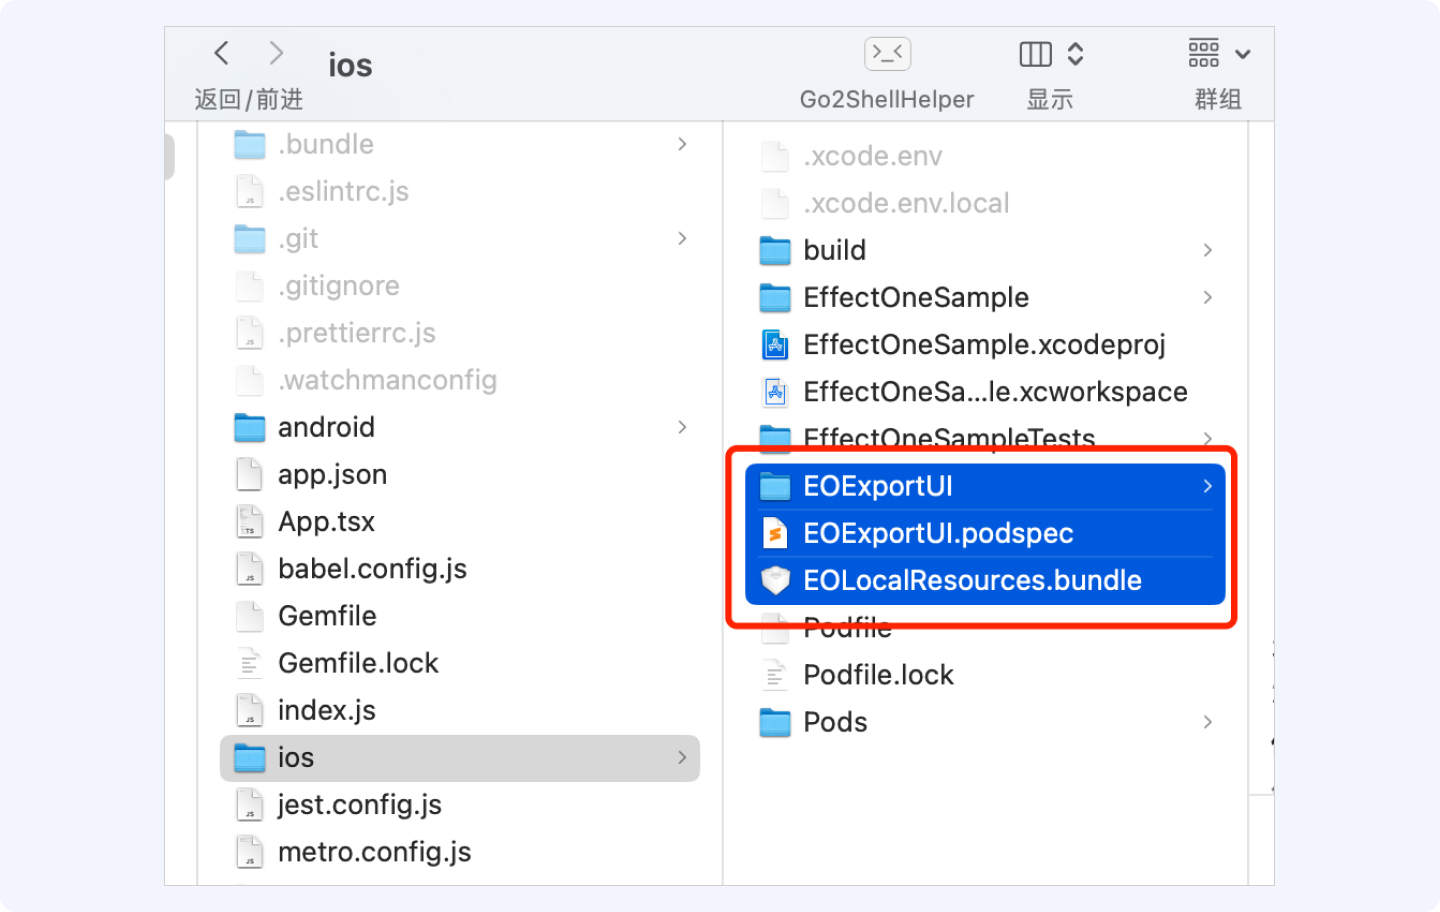
4.1.1 将demo中EOExportUI、EOExportUI.podspec、EOLocalResources.bundle的拖进到你自己的项目iOS文件夹中
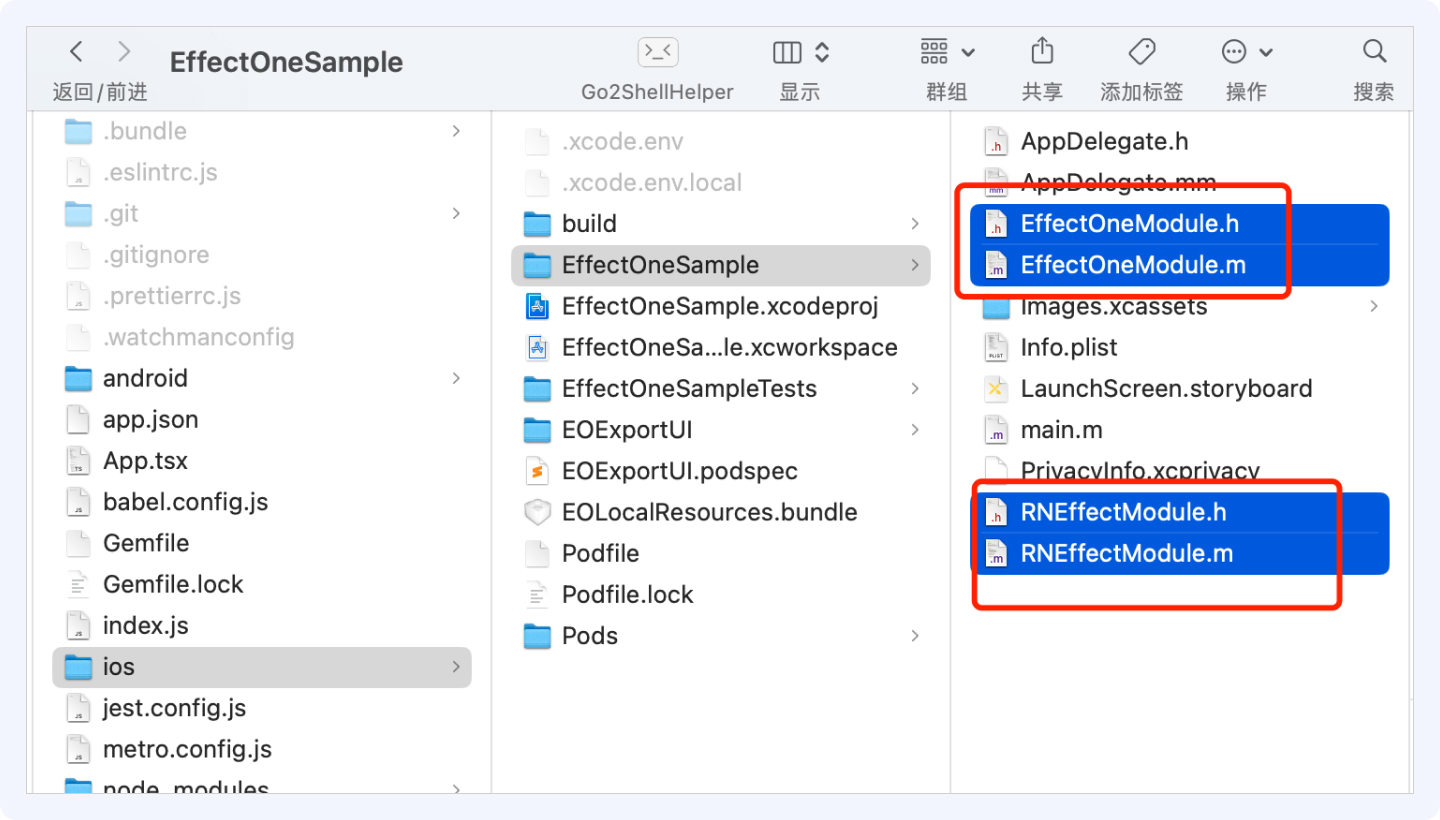
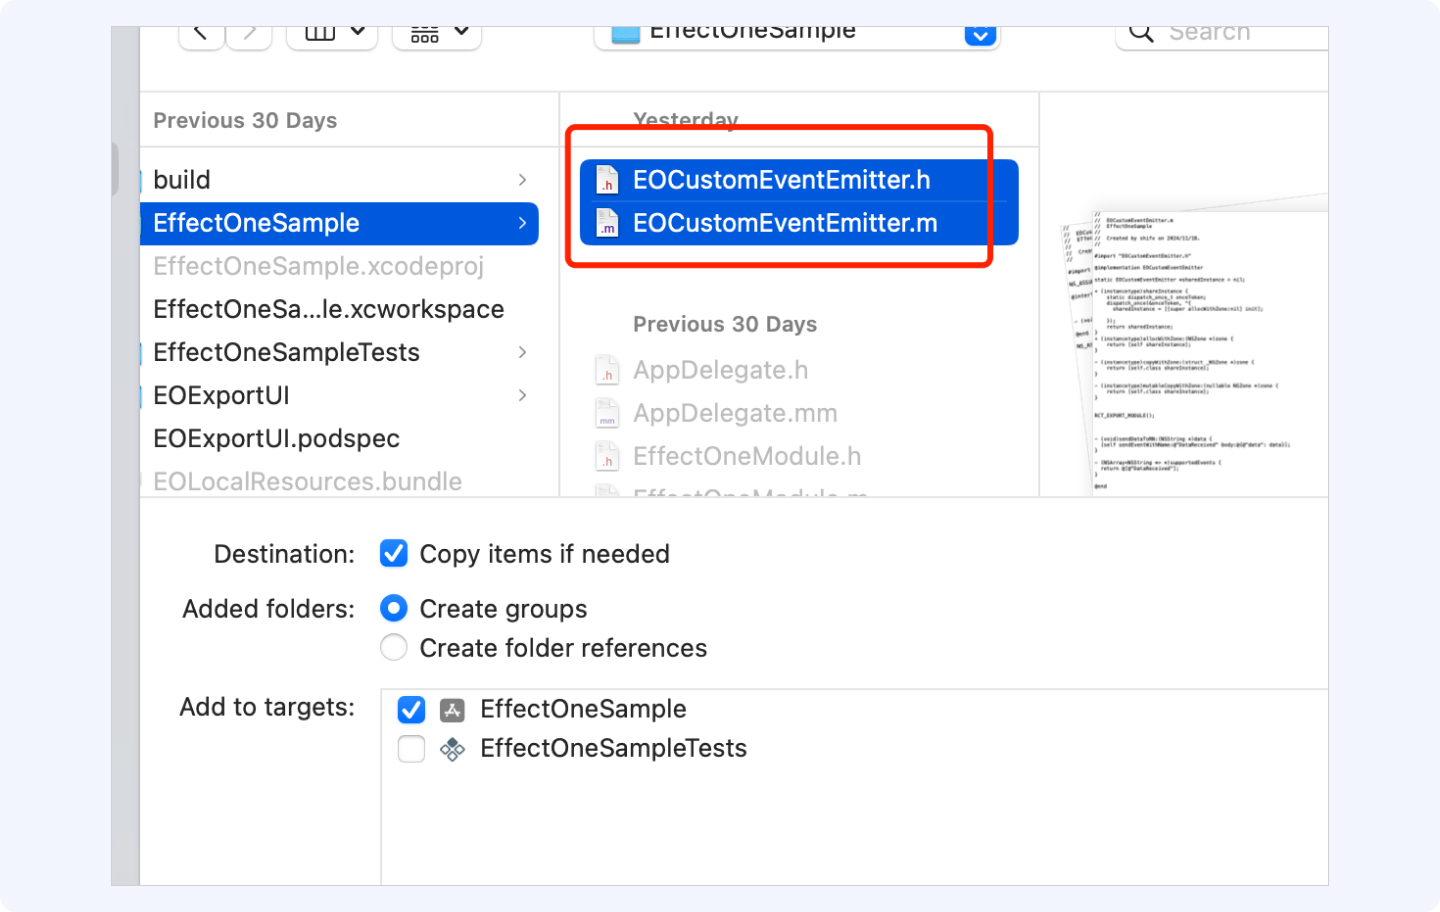
4.1.2 将demo中的EffectOneModule.h、EffectOneModule.m、RNEffectModule.h、RNEffectModule.m 、EOCustomEventEmitter.h、EOCustomEventEmitter.m文件拖进到你项目中AppDelegate文件所在位置
4.2 将4.1中的文件集成到iOS项目中
双击你项目中的xxx.xcworkspace文件(如果没有xxx.xcworkspace 文件,可能因为步骤2.2中没有点击y导致,参考步骤2.2.1)
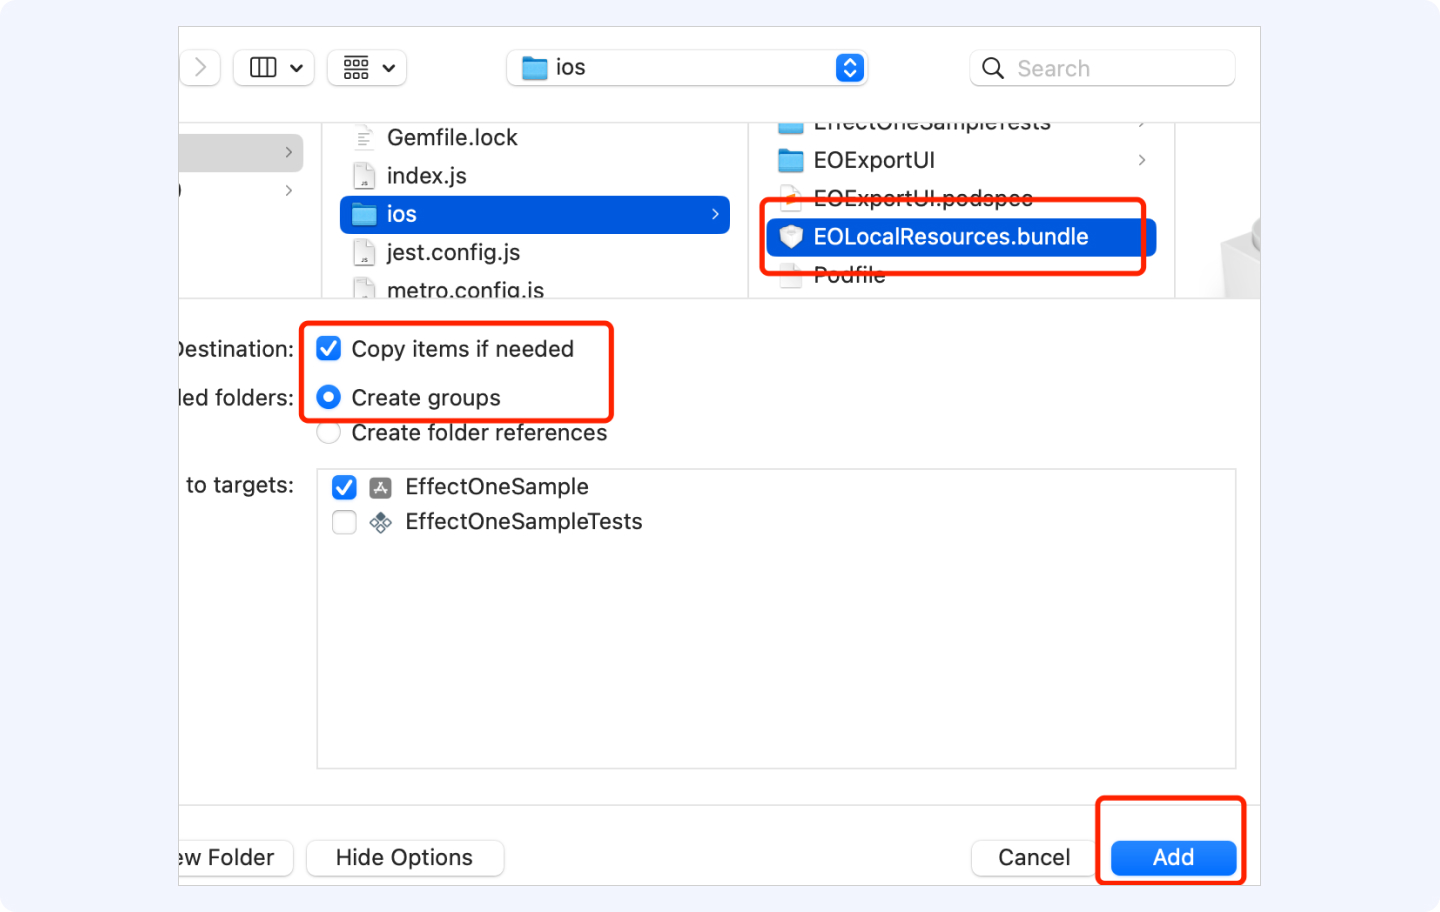
4.2.1 添加 4.1.1中的EOLocalResources.bundle文件到Xcode中,这个文件是资源文件

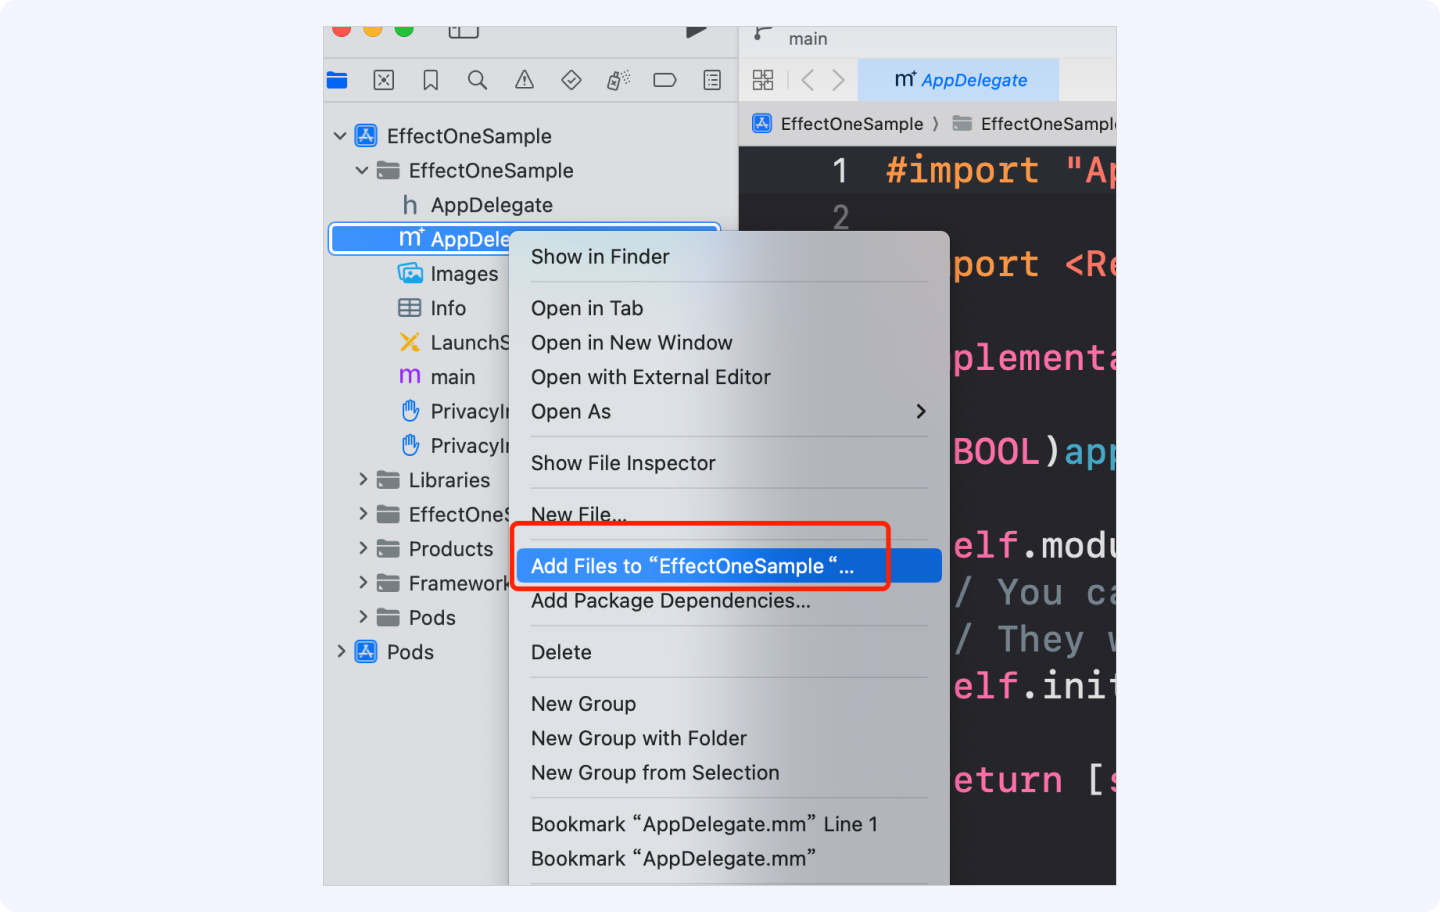
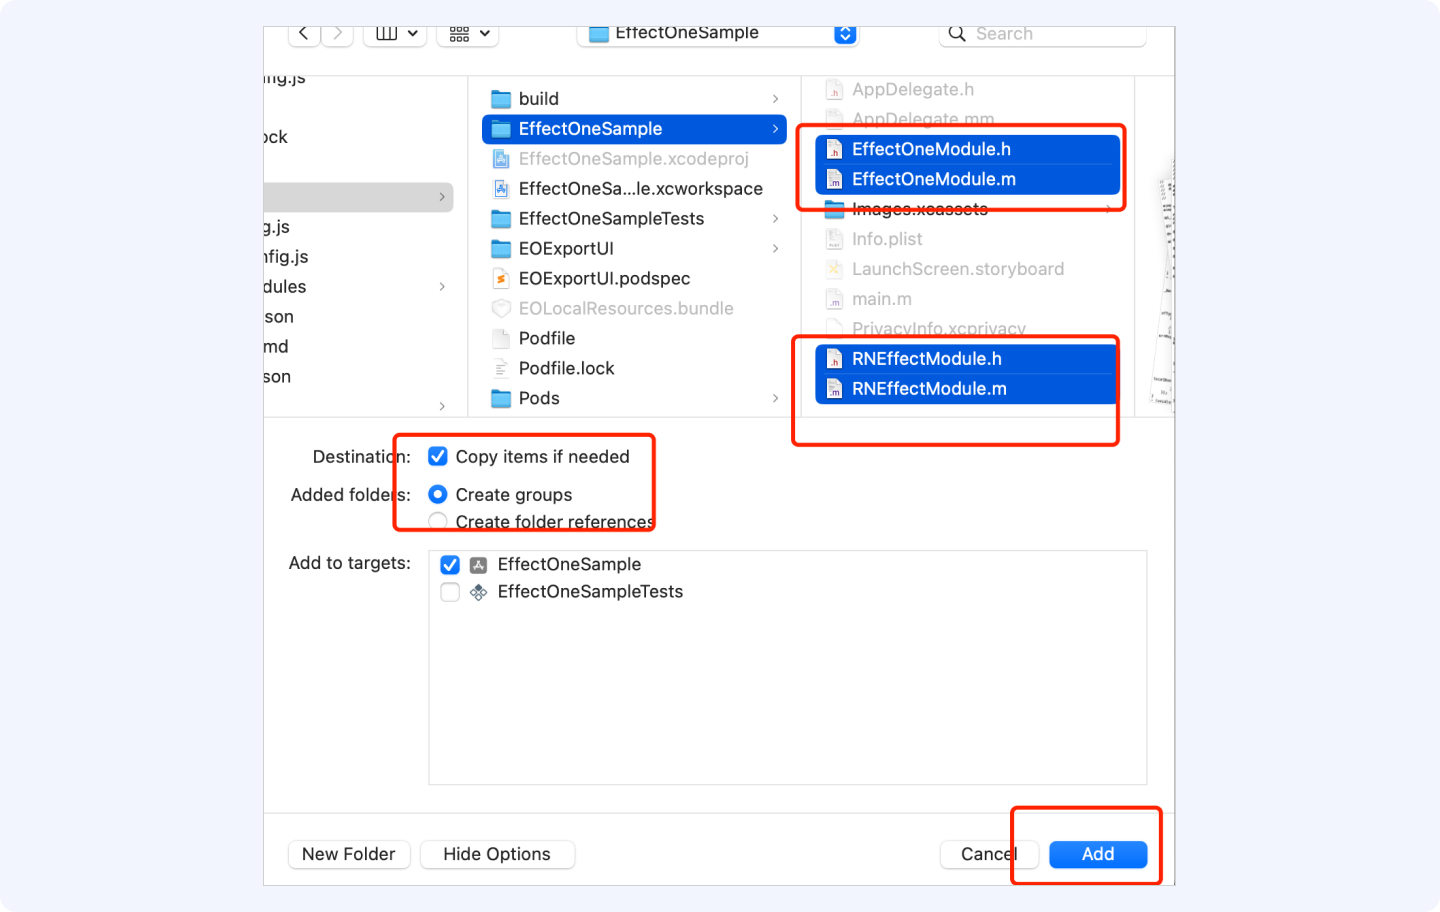
4.2.2 添加4.1.2中的文件到Xcode中
4.3 配置BundleId
将Xcode中的BundleId换成:com.volcengine.effectone.inhouse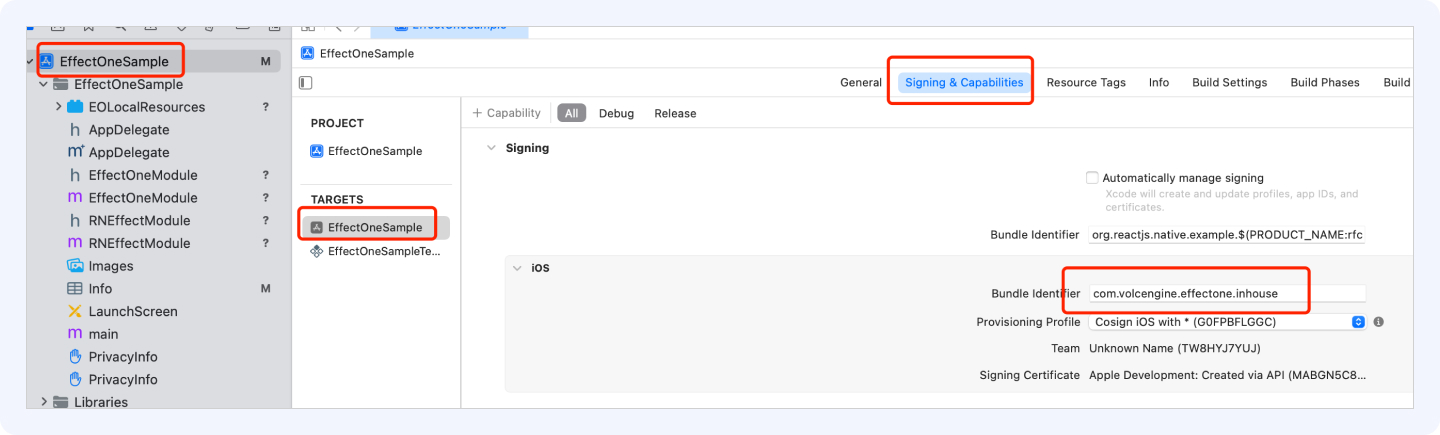
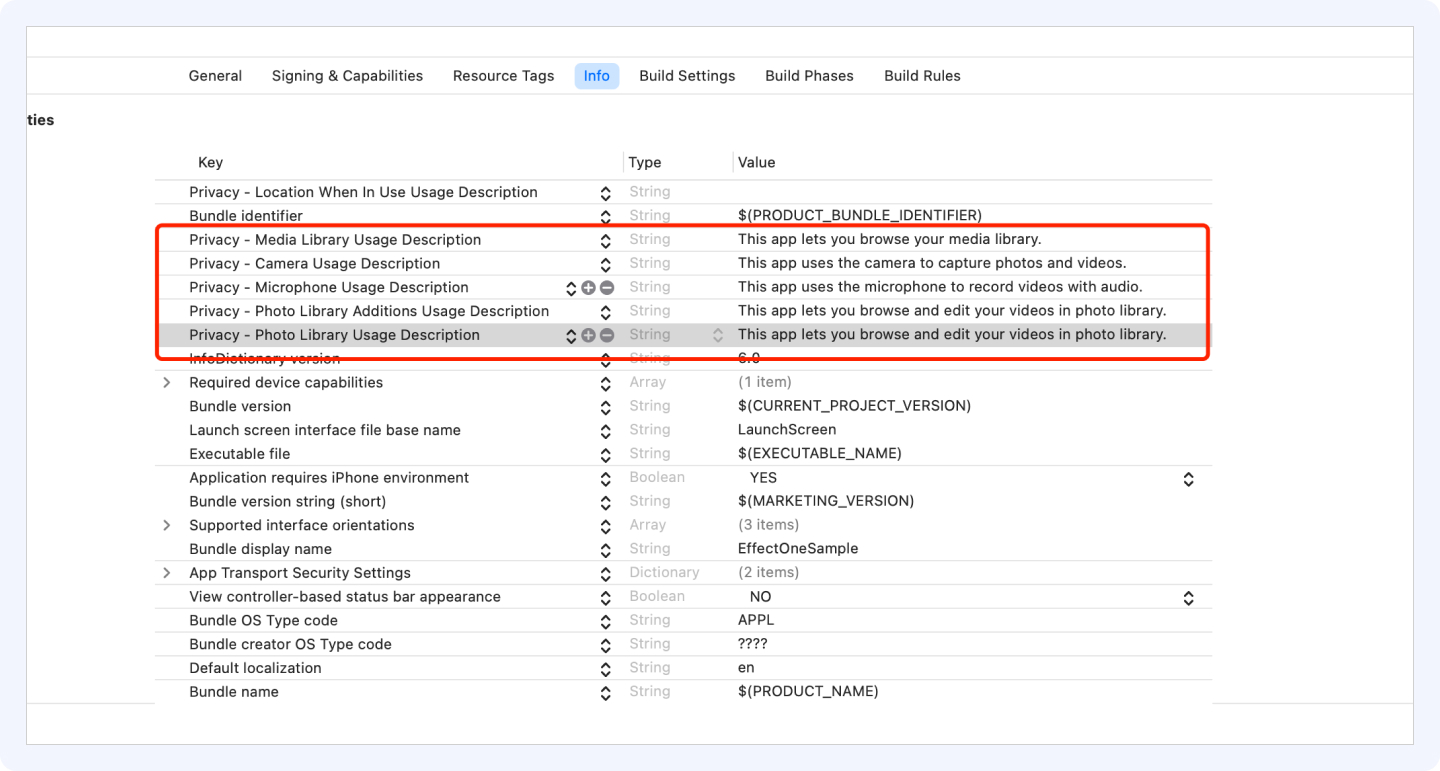
4.4 设置拍摄、相册、录音等权限在工程配置Info中配置相机、麦克风及相册访问权限
- EffectOneKit依赖了相机、麦克风及相册访问权限,需要在你的工程配置中开启,如下图
//是否允许App访问您的媒体资料库
<key>NSAppleMusicUsageDescription</key>
<string>This app lets you browse your media library.</string>//写出自己说明描述
//是否允许App使用您的相机
<key>NSCameraUsageDescription</key>
<string>This app uses the camera to capture photos and videos.</string>//写出自己说明描述
//是否允许App您的麦克风
<key>NSMicrophoneUsageDescription</key>
<string>This app uses the microphone to record videos with audio.</string>//写出自己说明描述
//是否允许App保存图片到手机
<key>NSPhotoLibraryAddUsageDescription</key>
<string>This app lets you browse and edit your videos in photo library.</string>//写出自己说明描述
//是否允许App您的相册
<key>NSPhotoLibraryUsageDescription</key>
<string>This app lets you browse and edit your videos in photo library.</string>//写出自己说明描述
4.5 修改PodFile文件
如果没有PodFile文件可能因为步骤2.2中没有点击y导致,参考步骤2.2.1
PodFile文件中添加依赖的其他组件,如下所示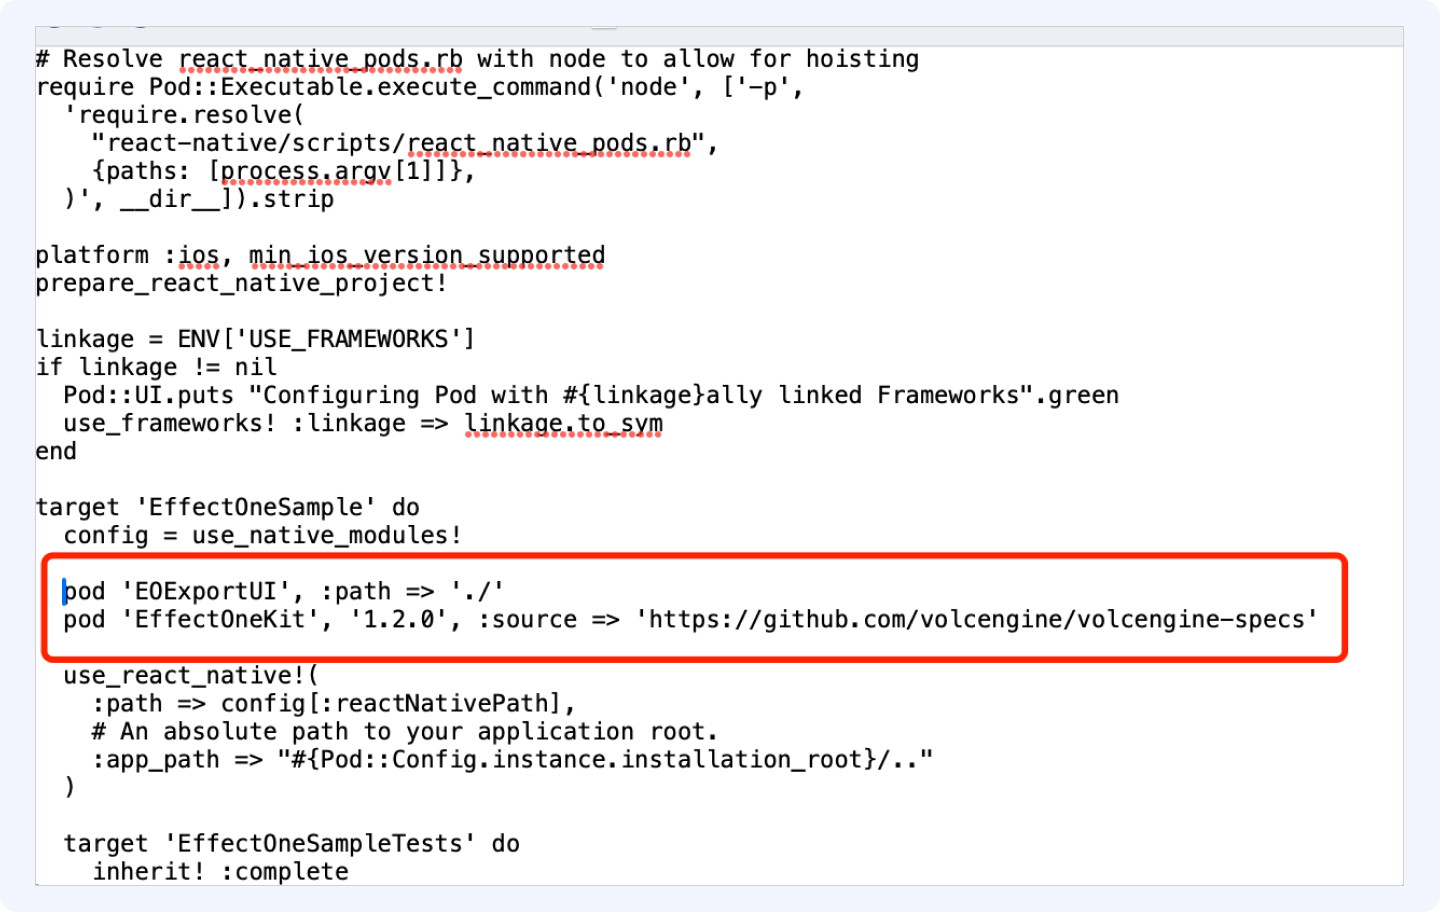
pod 'EOExportUI', :path => './'
pod 'EffectOneKit', '1.2.0', :source => 'https://github.com/volcengine/volcengine-specs'
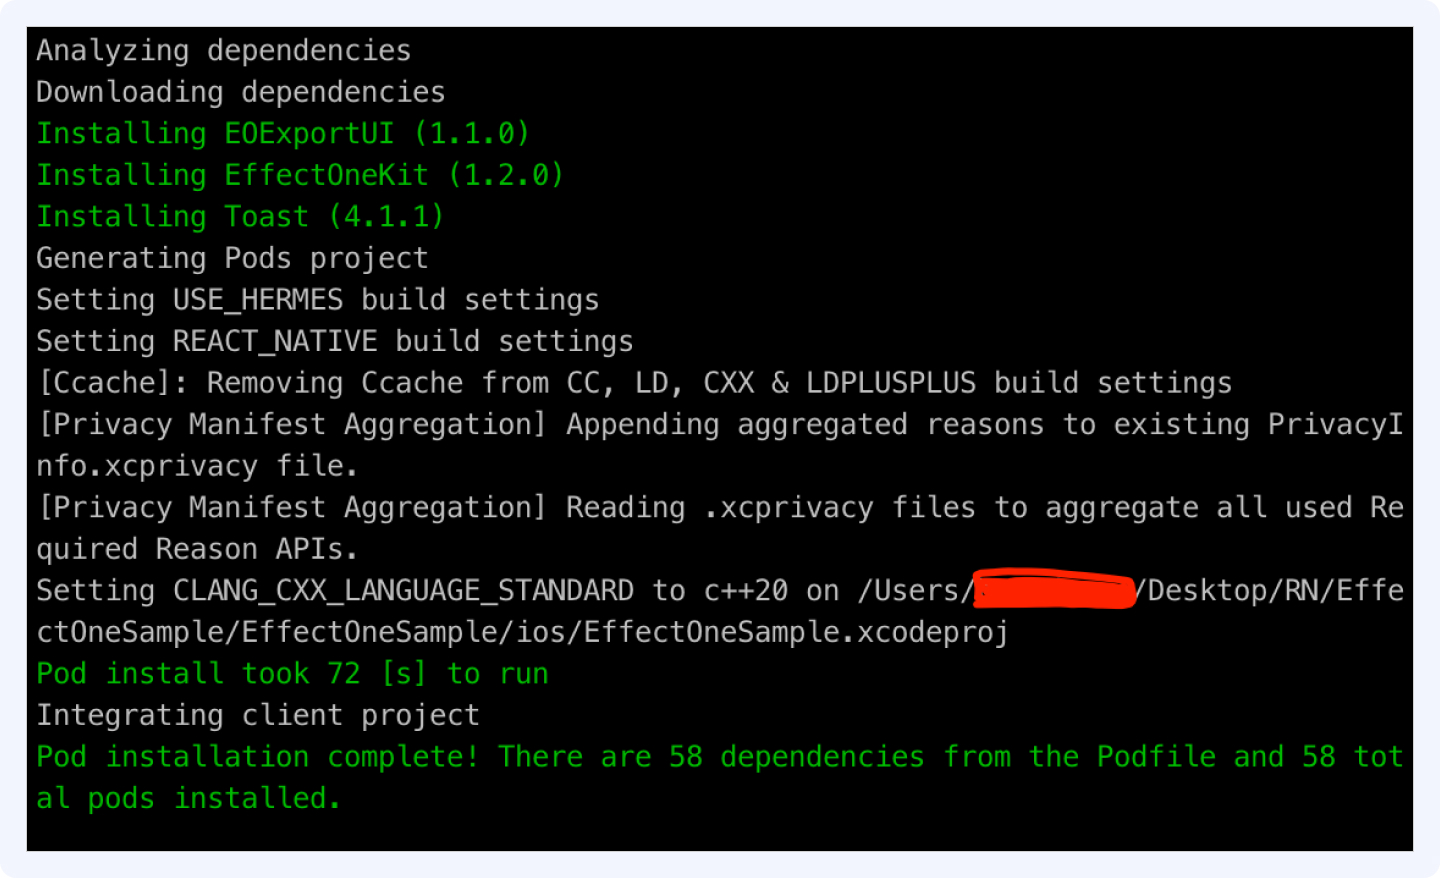
4.6 拉取三方组件
在终端进入项目的iOS目录下,执行命令:pod install

至此,RN集成EffectOne完毕,可以在Xcode中运行你的项目了
5.1 模拟器运行
在模拟器运行时,终端RN项目根目录下,执行npx react-native run-ios或者yarn react-native run-ios(如果安装了yarn)。注意:模拟器运行时不要链接真机,否则可能导致运行失败。
5.2 真机运行
真机运行需要配置开发者证书,iOS开发者都会处理,这里不在赘述。配置好证书后,进入RN项目iOS文件中,双击xxx.xcworkspace打开项目,在Xcode中运行项目,参考文档