IAM
IAM


- Documentation
 IAMUser GuideIdentitiesSingle Sign-onRole SSOExampleExample of Configuring SAML Role SSO with KeyCloak
 Copy page
 Download PDFCopy pageDownload PDF
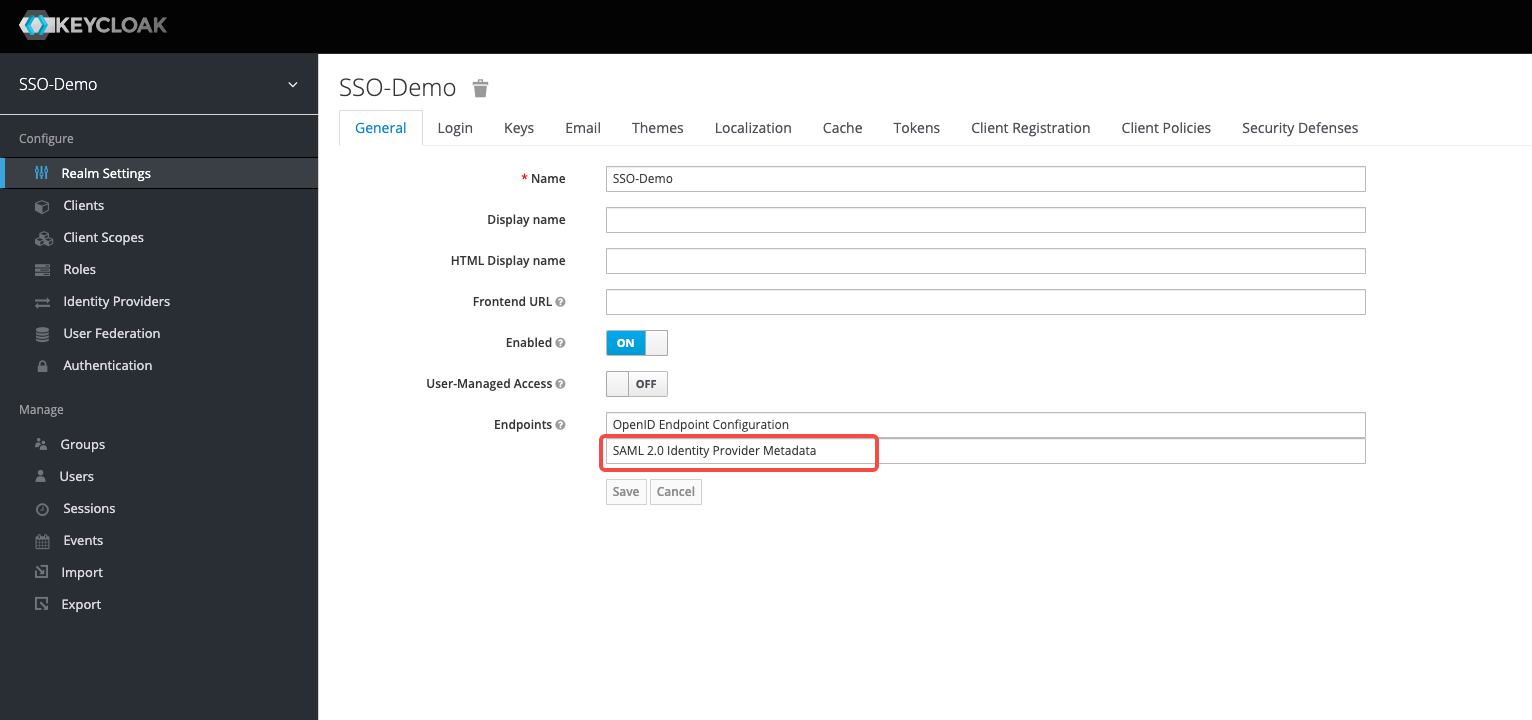
- In KeyCloak, view and save the KeyCloak IDP metadata file as an XML file
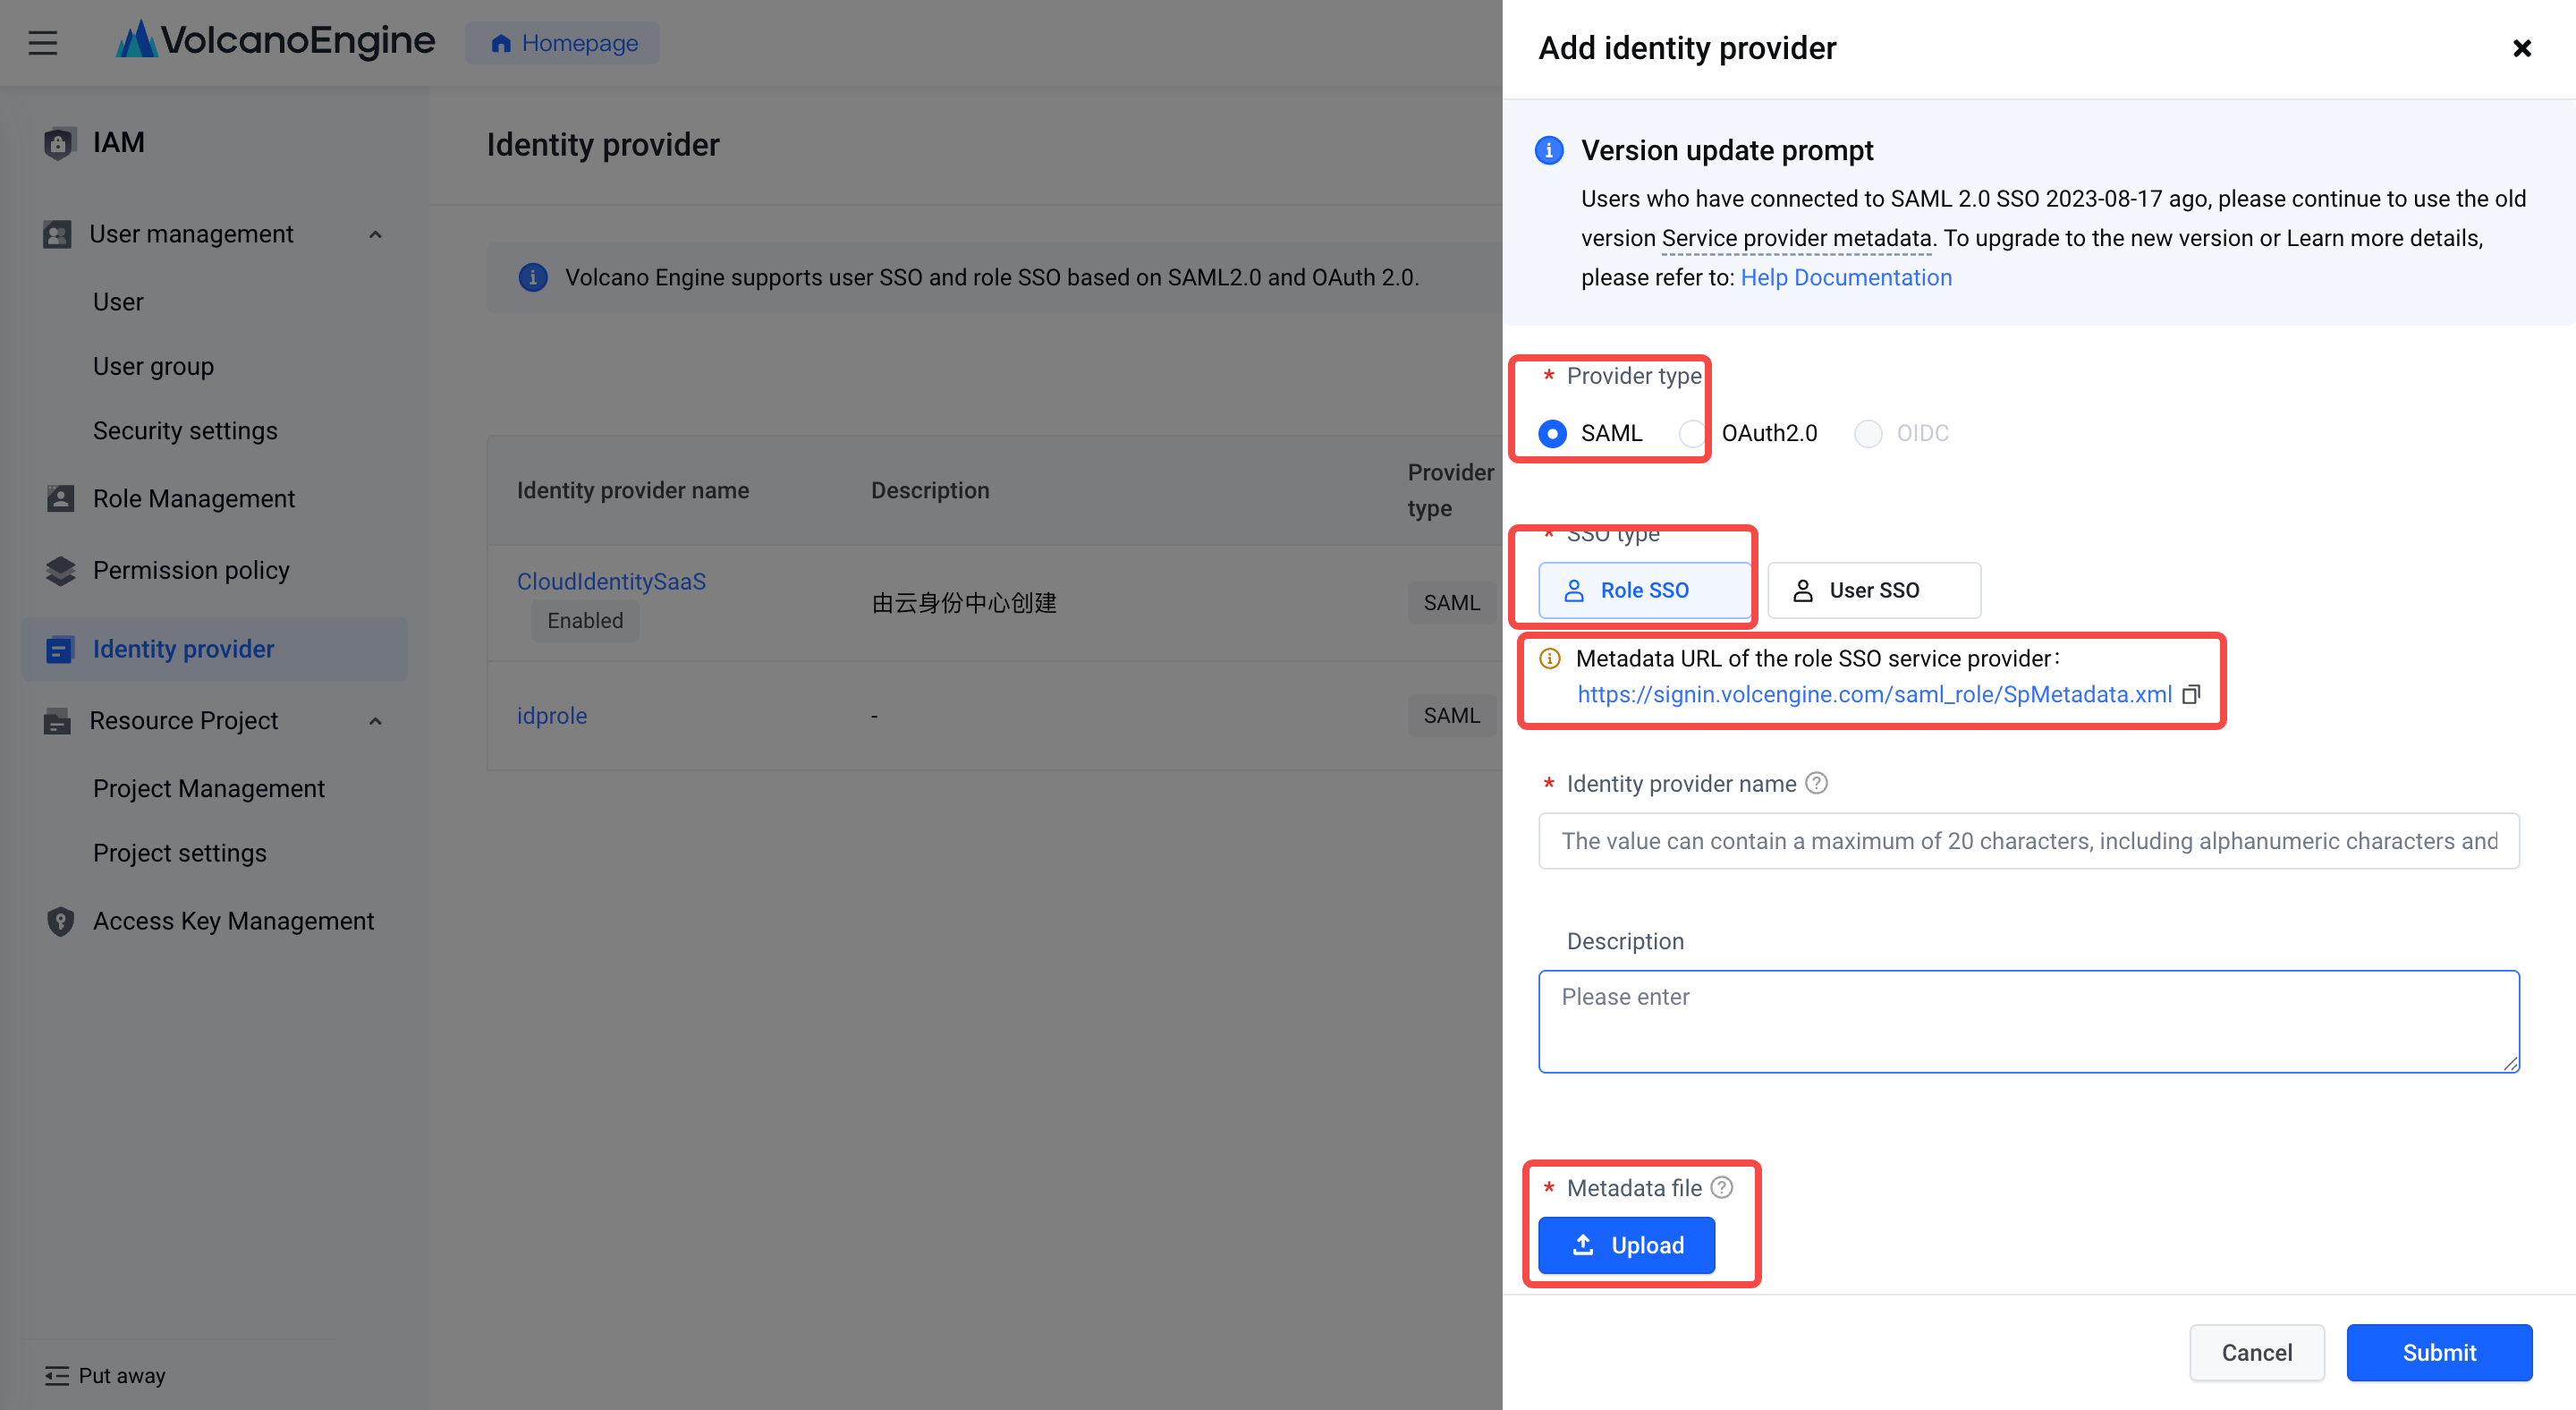
- In Volcano Engine - Access Control, create a new identity provider , select SAML for the identity provider type, download the service provider metadata file for the Volcano Engine role SSO, and save it as an XML file. Upload KeyCloak IDP metadata file.
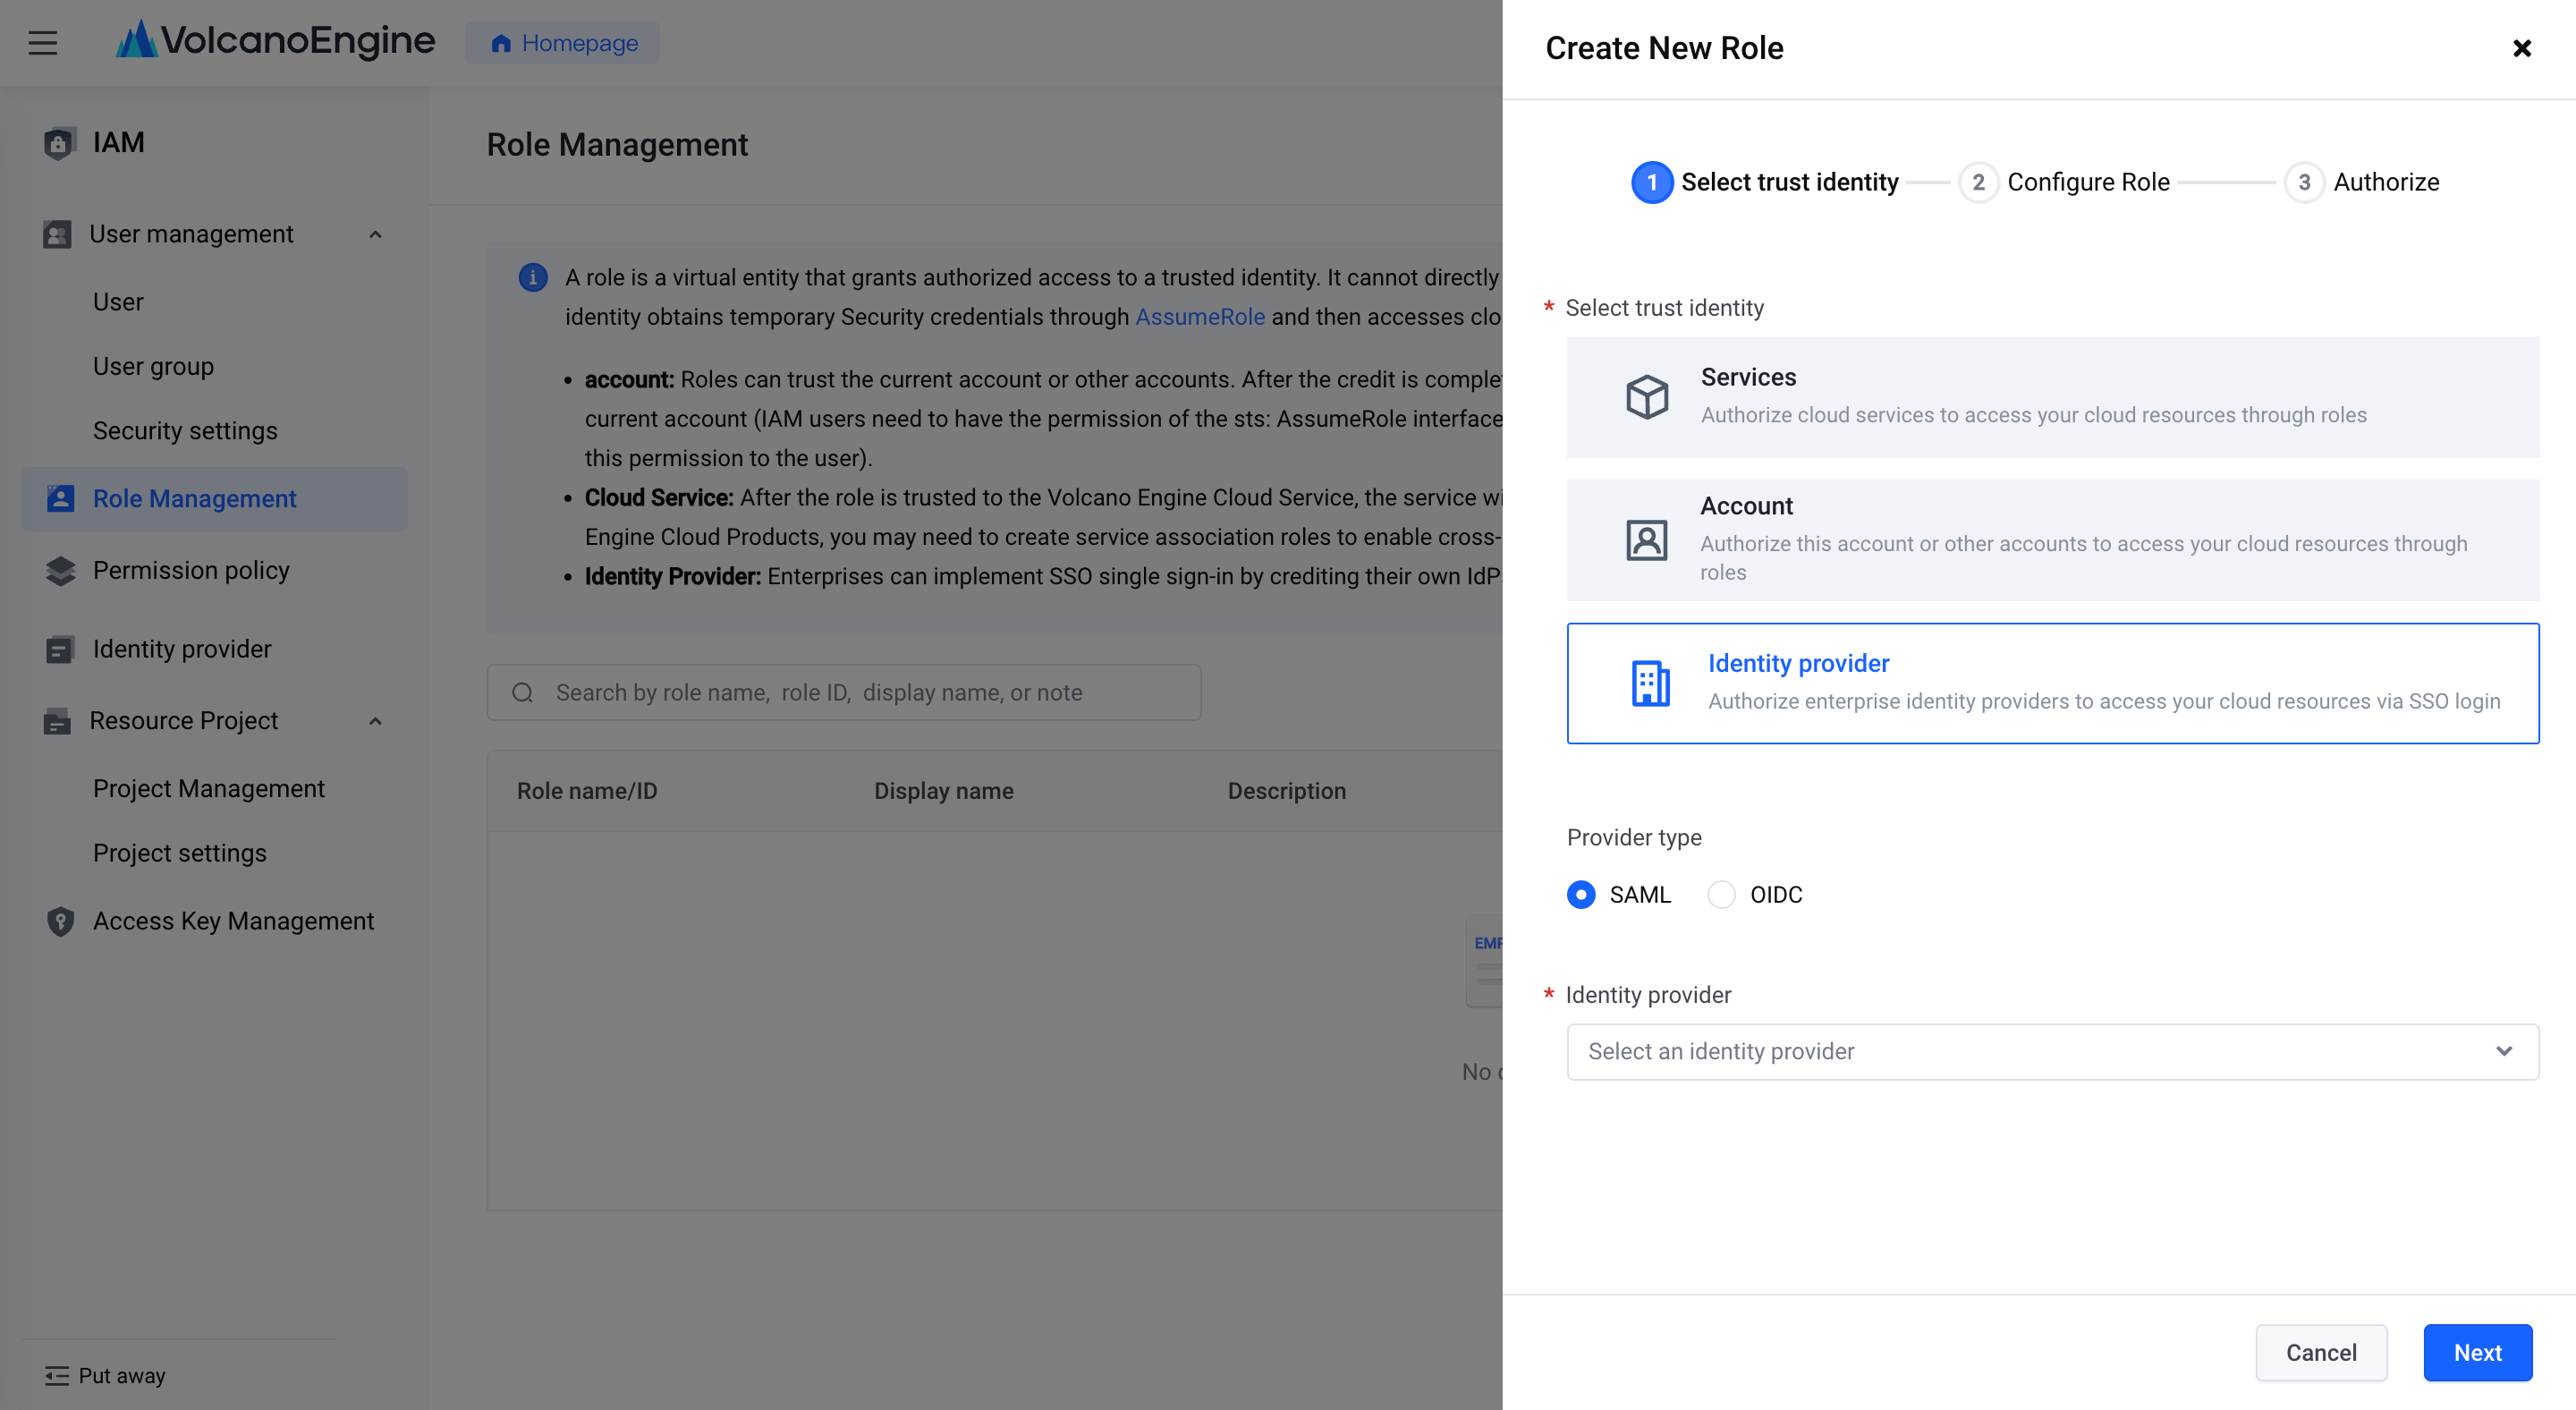
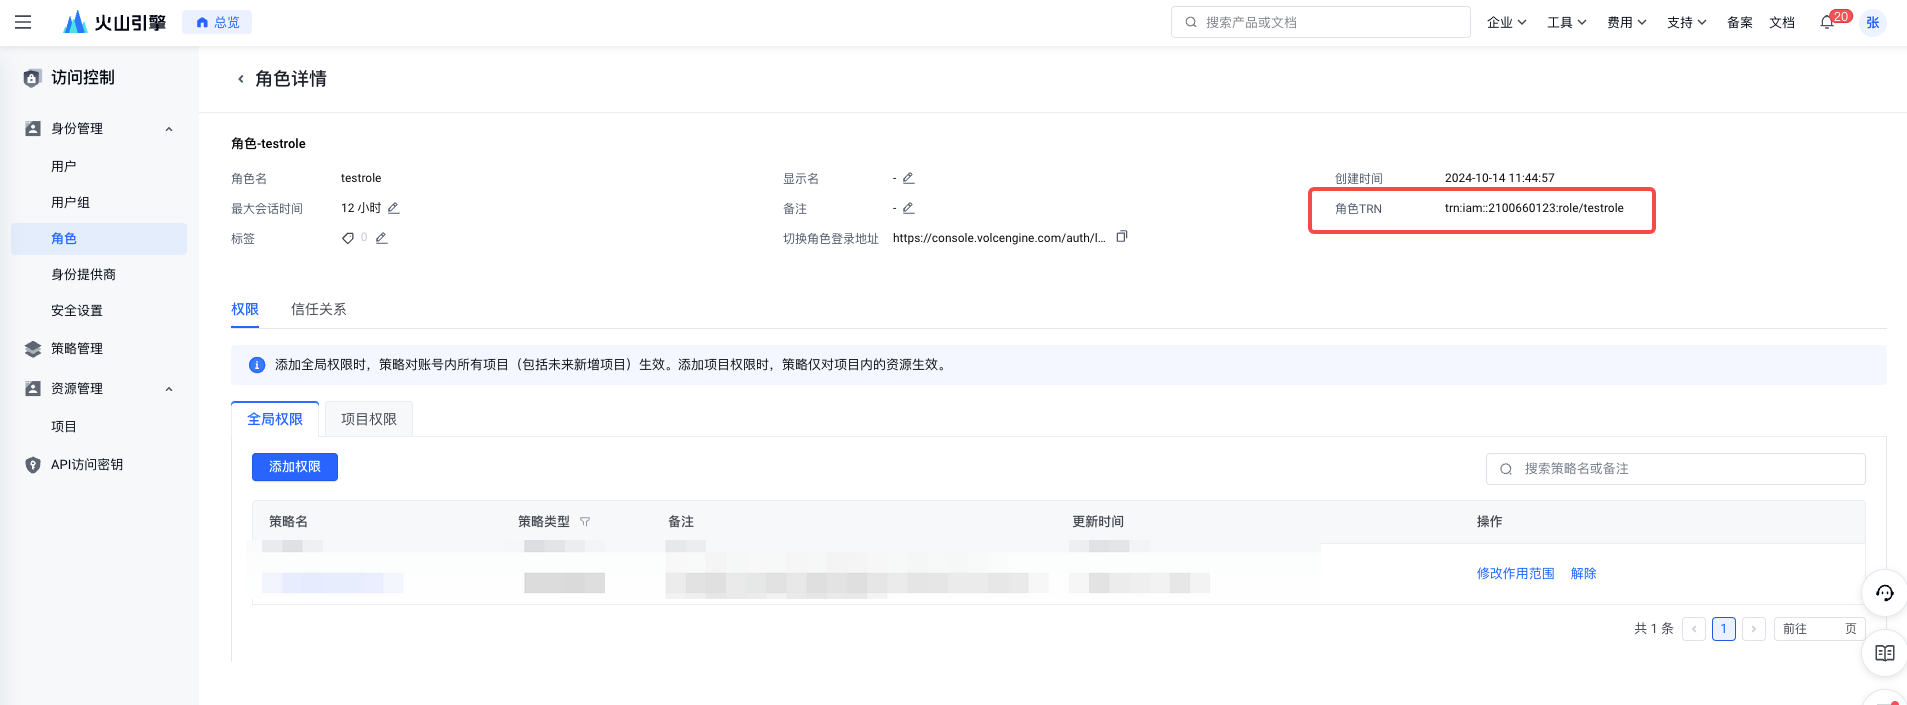
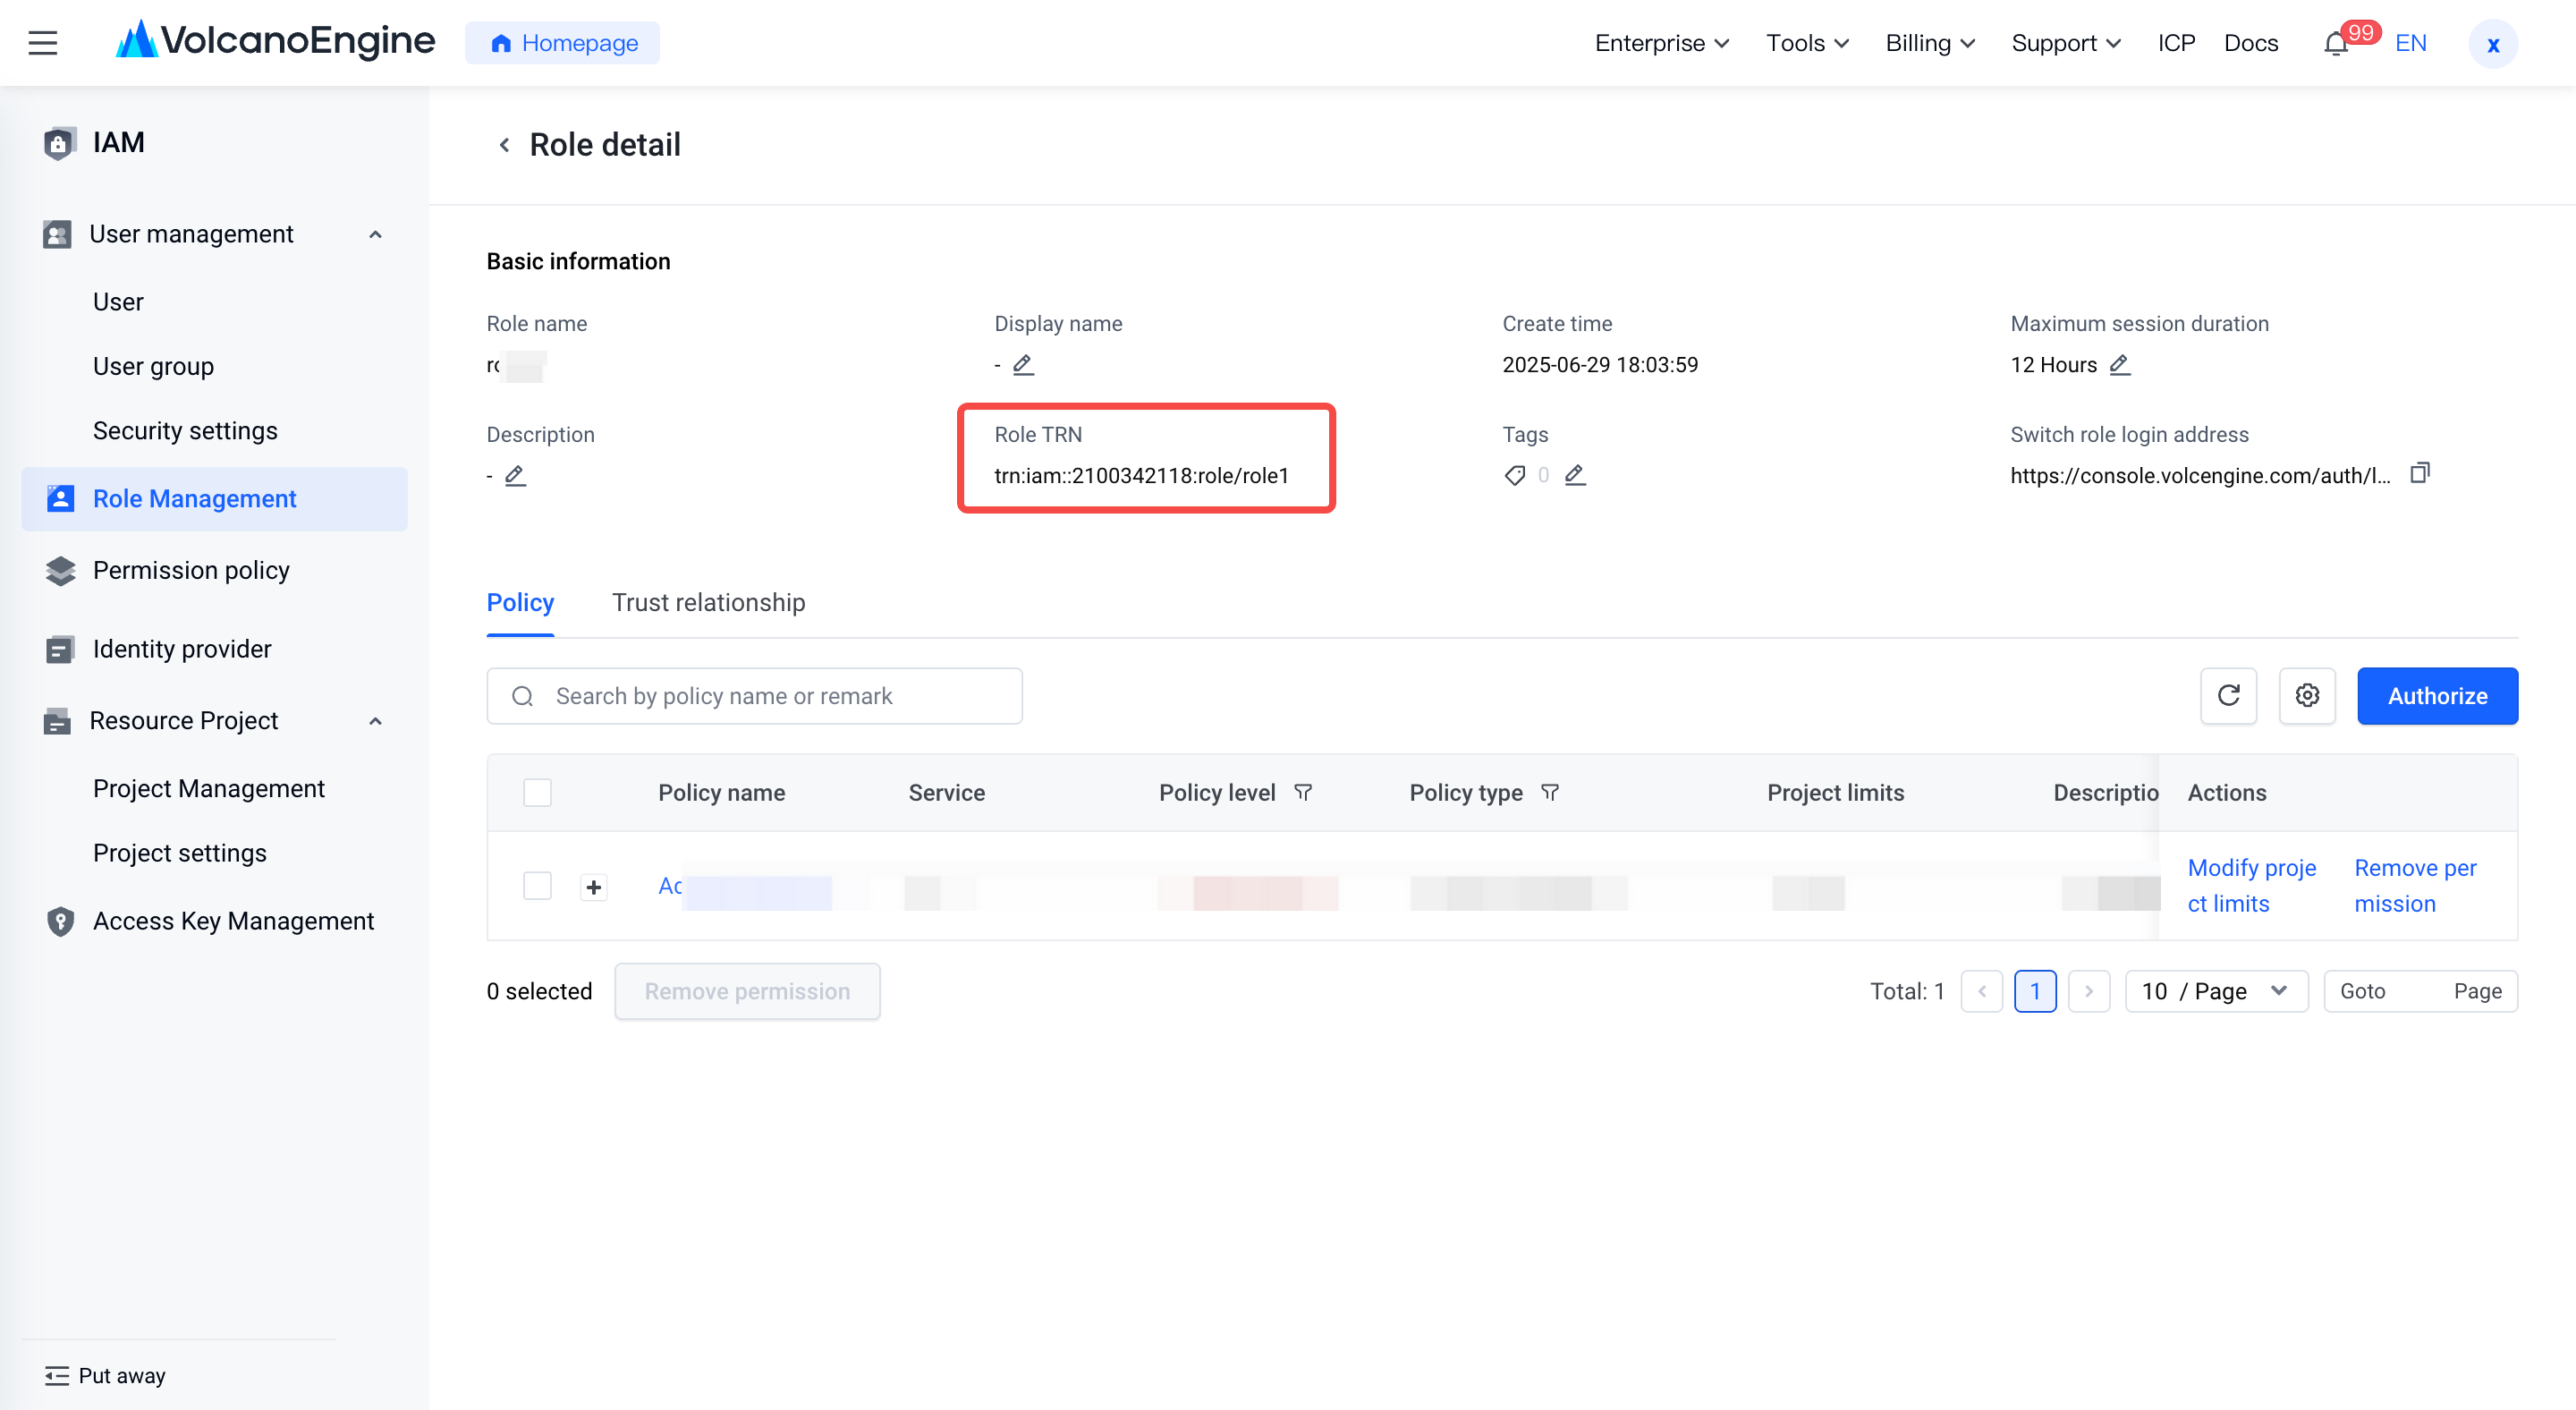
- In Volcano Engine - Access Control, create a new role , select "Identity Provider" for the trust identity type and "SAML" for the identity provider type, select the identity provider for which the role SSO has been created, and configure the role to correspond to the role name and corresponding authorization. Save the role TRN information for later configuration.
- Add the client side in KeyCloak and upload the service provider metadata file for the Volcano Engine user SSO.
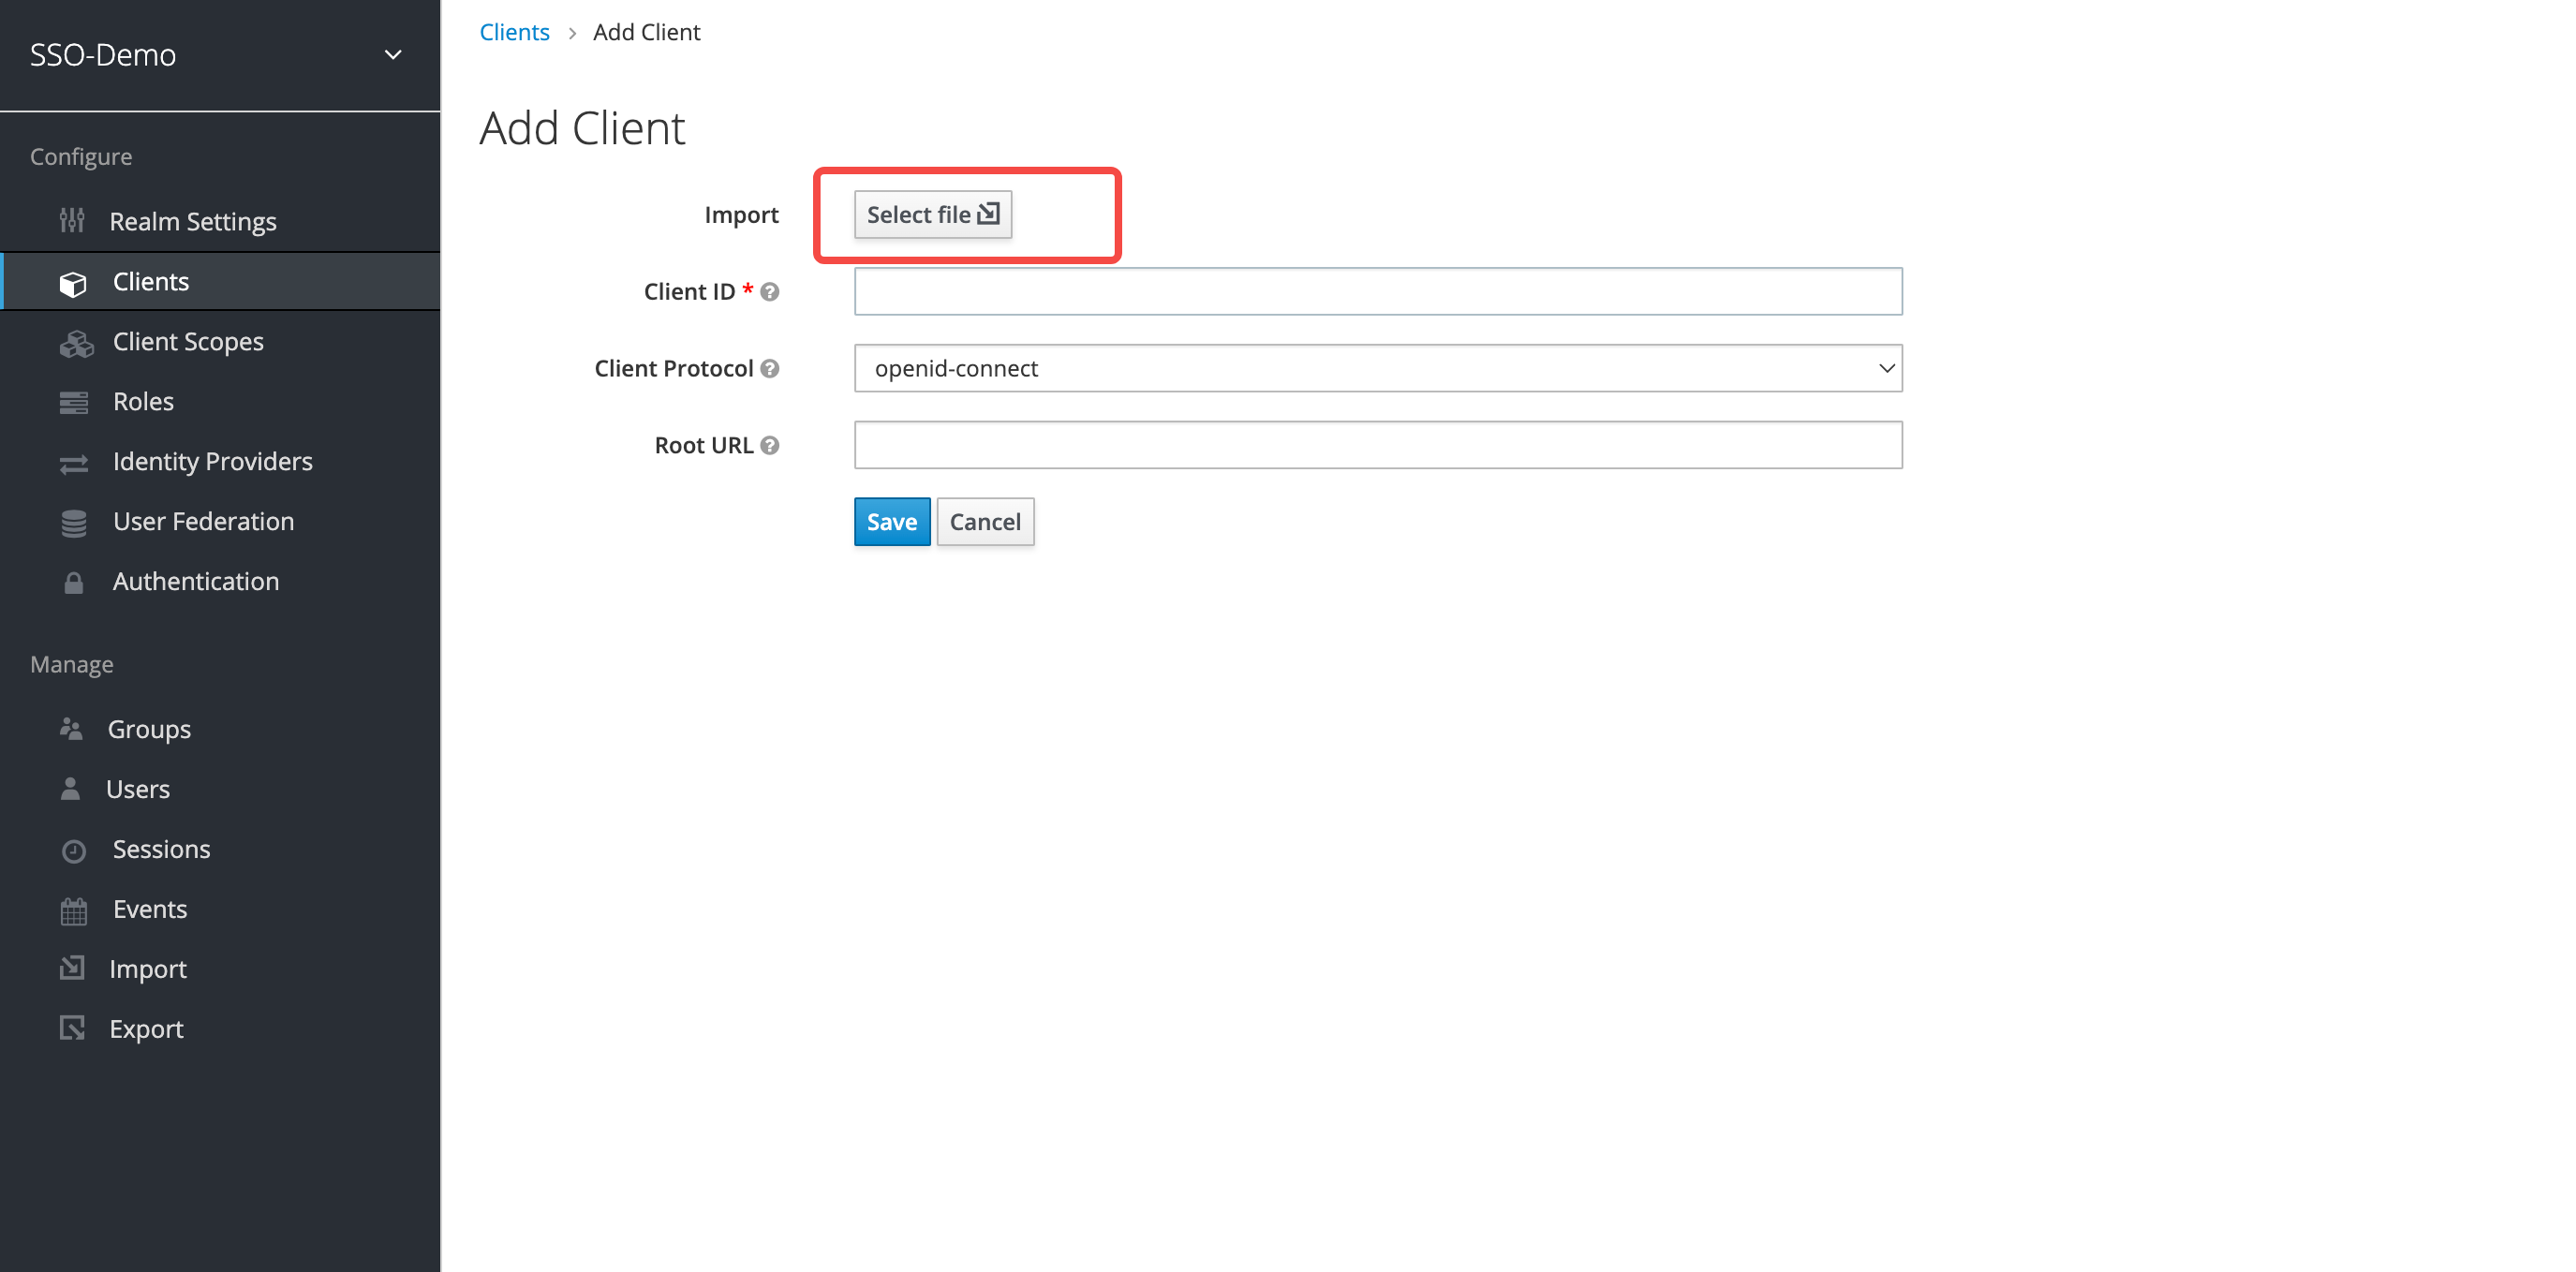
- To set up client side related information, please refer to the following:
Client side ID: Automatically recognized by the service provider metadata file of the Volcano Engine role SSO, it is the entityID provided by Volcano Engine.
Name ID Format: transient
Valid Redirect URIs: https://signin.volcengine.com/saml/sso, ACS URL provided by Volcano Engine
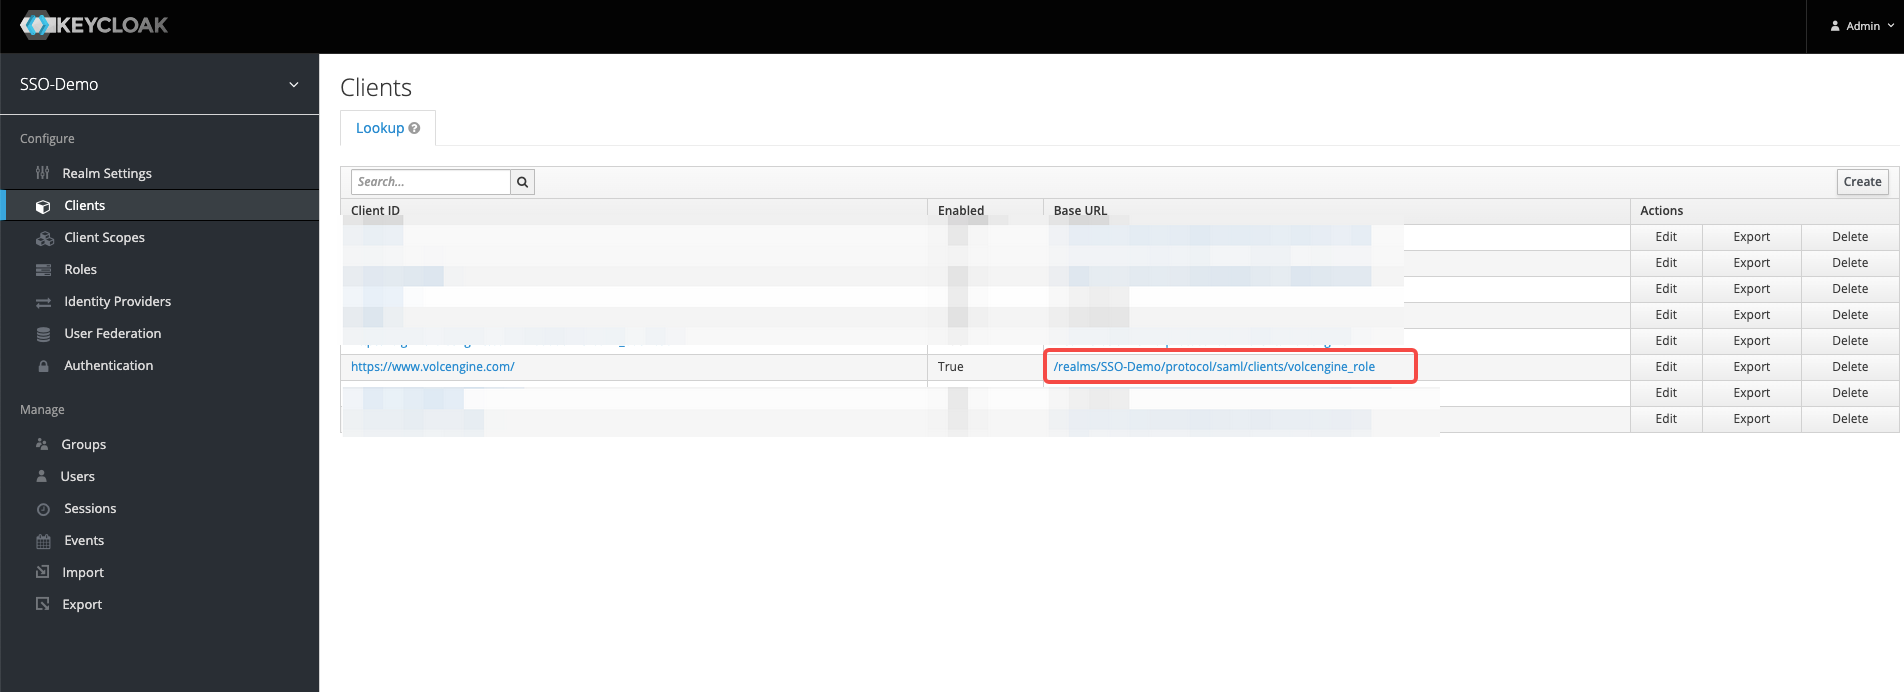
Root URL (Base URL): Fill in the "IDP initiated SSO URL name" and intercept the root URL in "Target IDP initiated SSO URL".
IDP Initiated SSO URL Name: volcengine_role

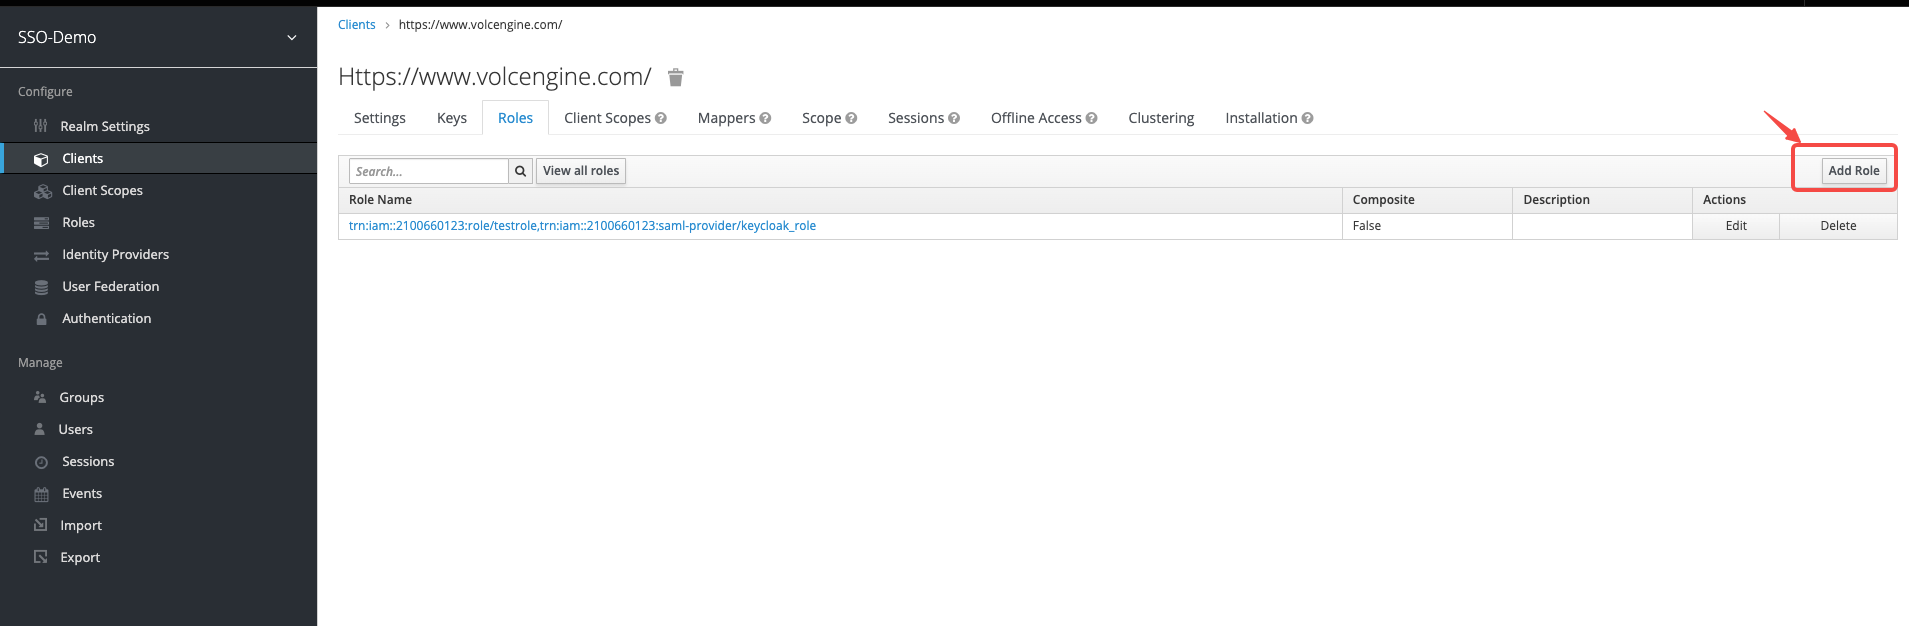
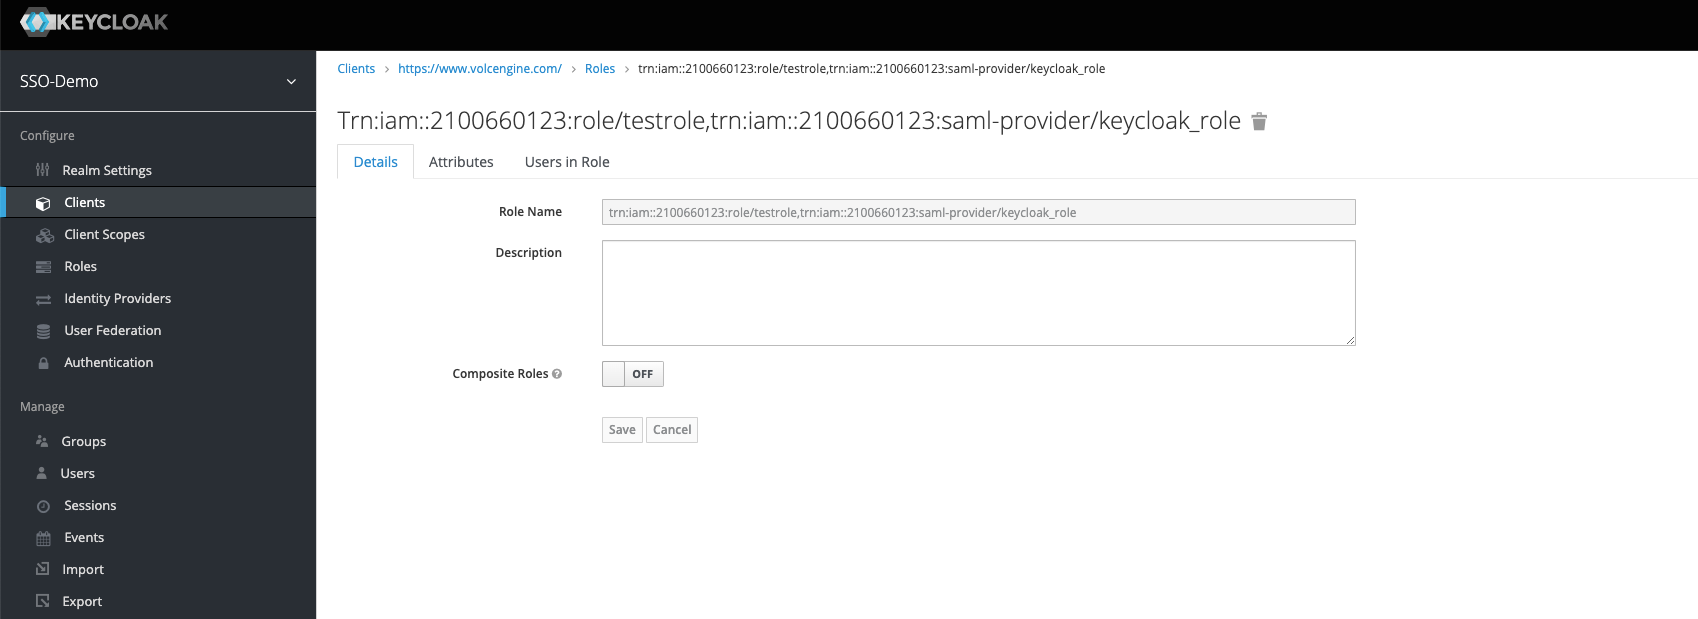
- Configure KeyCloak role information: Add a role in the client side created by KeyCloak, the role name is the role TRN, and the format is: trn: iam:: $ {AccountID}: role/ ${RoleName}, trn: iam:: $ {AccountID}: saml-provider/ ${SAMLProviderName}. Where AccountID is your Volcano Engine account ID, RoleName is the IAM role name, and SAMLProviderName is the identity provider name, separated by English commas.
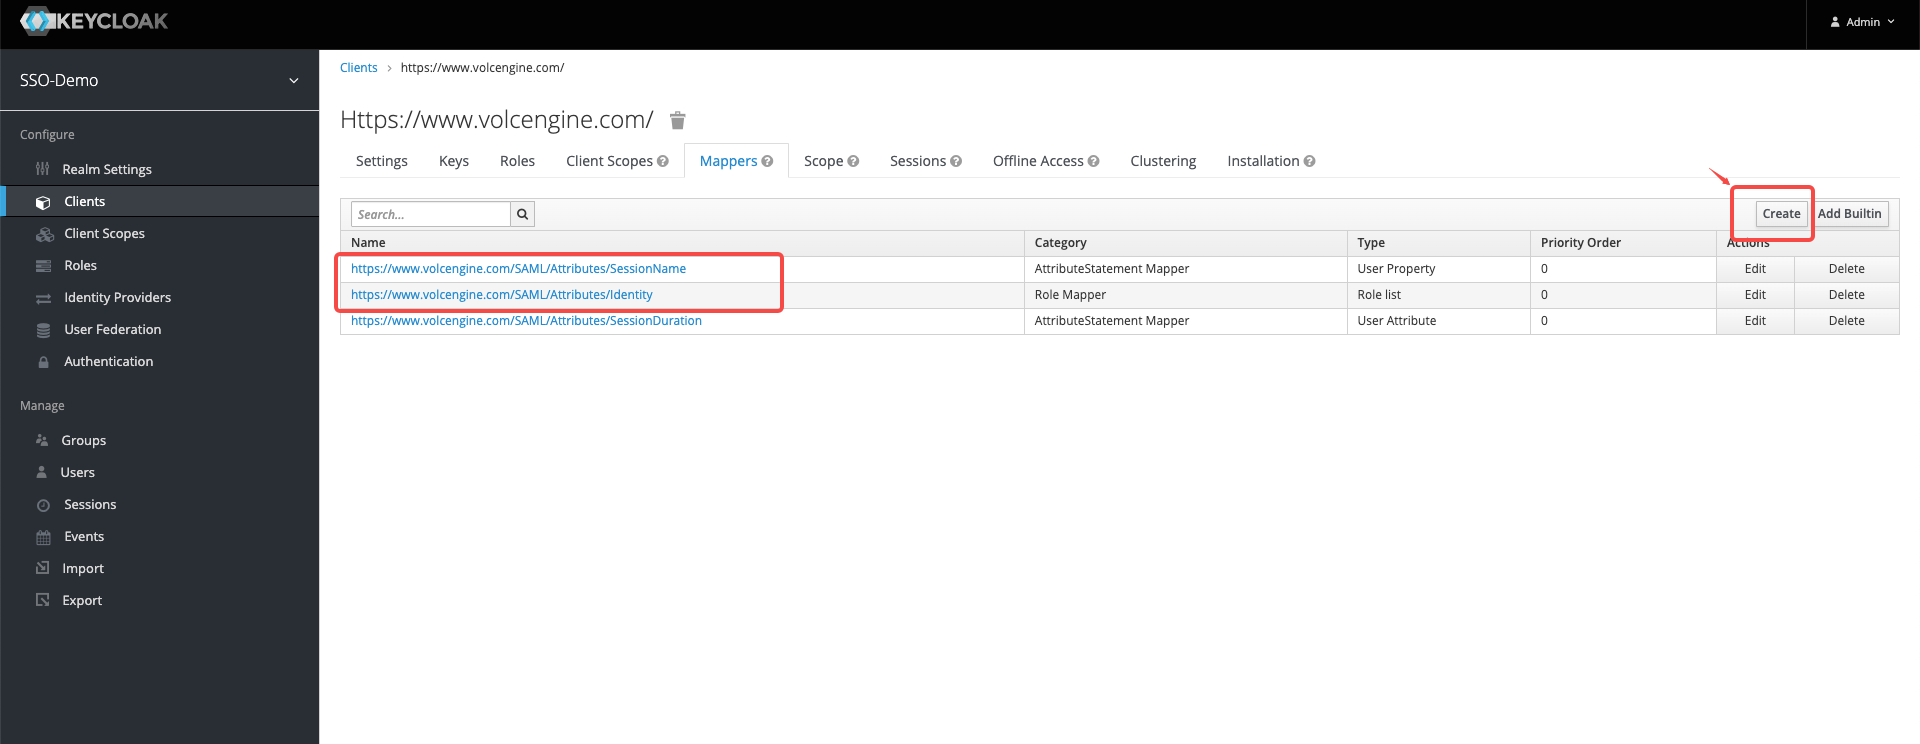
Configure KeyCloak assertion properties: Create assertion properties on the client side where KeyCloak has been created. Assertion attributes include at least the identity attribute and the session name attribute.
If the service provider metadata file for uploading Volcano Engine user SSO has been automatically generated, it needs to be deleted and recreated.
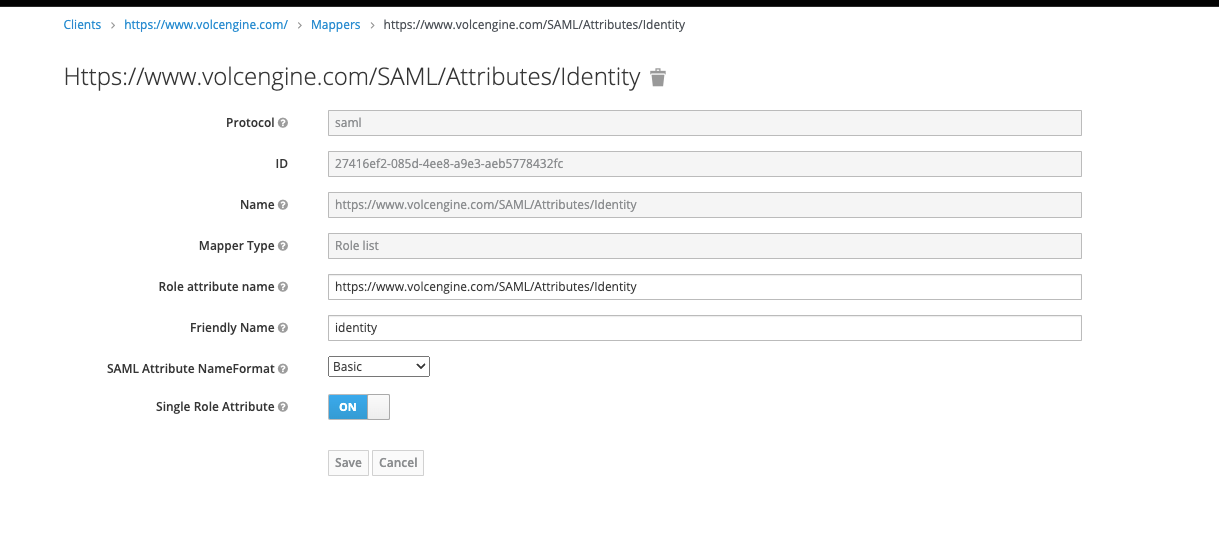
- Create identity attributes, and refer to the following for configuration information:
- Name:https://www.volcengine.com/SAML/Attributes/Identity
- Mapper Type: Role list
- Role attribute name:https://www.volcengine.com/SAML/Attributes/Identity
- Friendly Name: identity
- SAML Attribute NameFormat: Basic
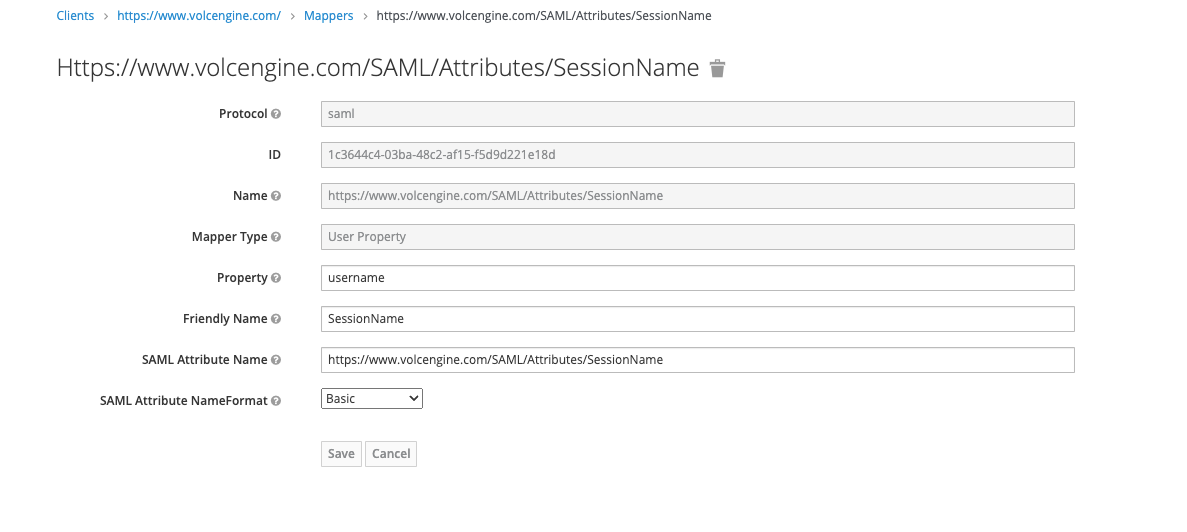
- Create the session name property, and refer to the following for configuration information:
- Name: https://www.volcengine.com/SAML/Attributes/SessionName
- Mapper Type: User Properties.
- Attribute: username.
- Friendly Name: SessionName
- SAML Attribute Name: https://www.volcengine.com/SAML/Attributes/SessionName
- SAML Attribute NameFormat: Basic
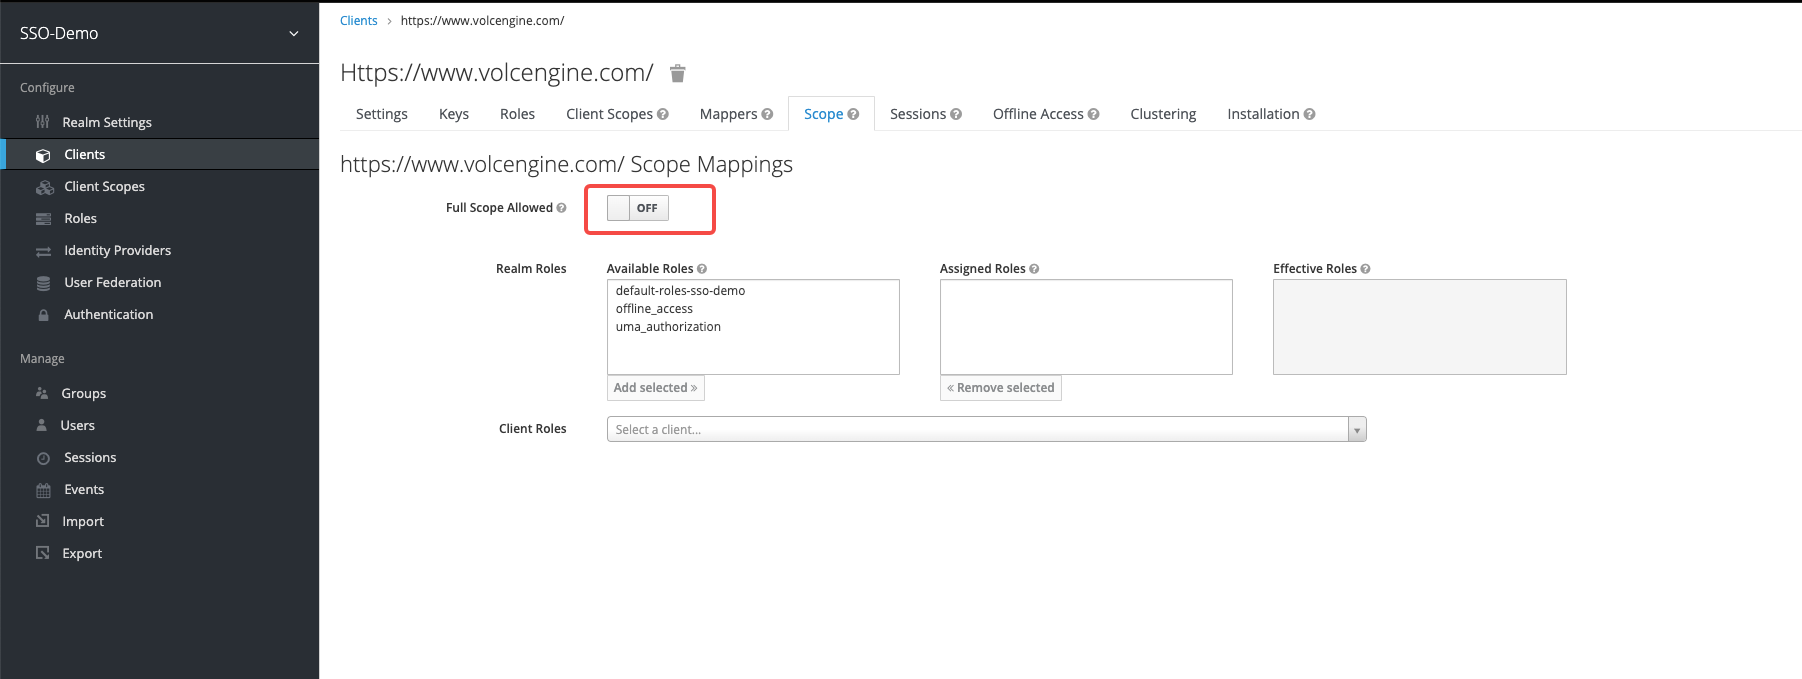
- Turn off full range mapping
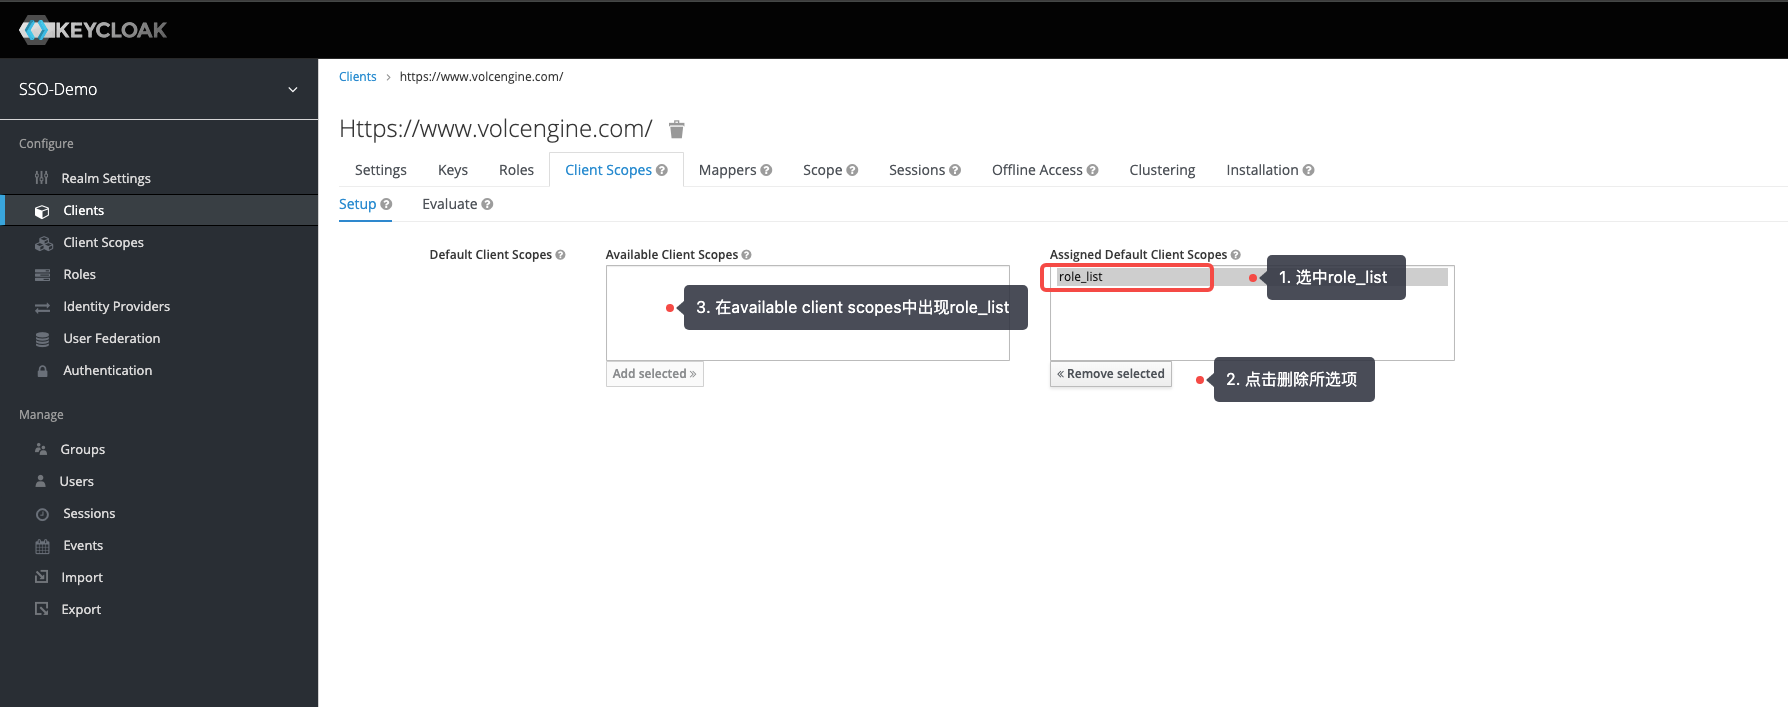
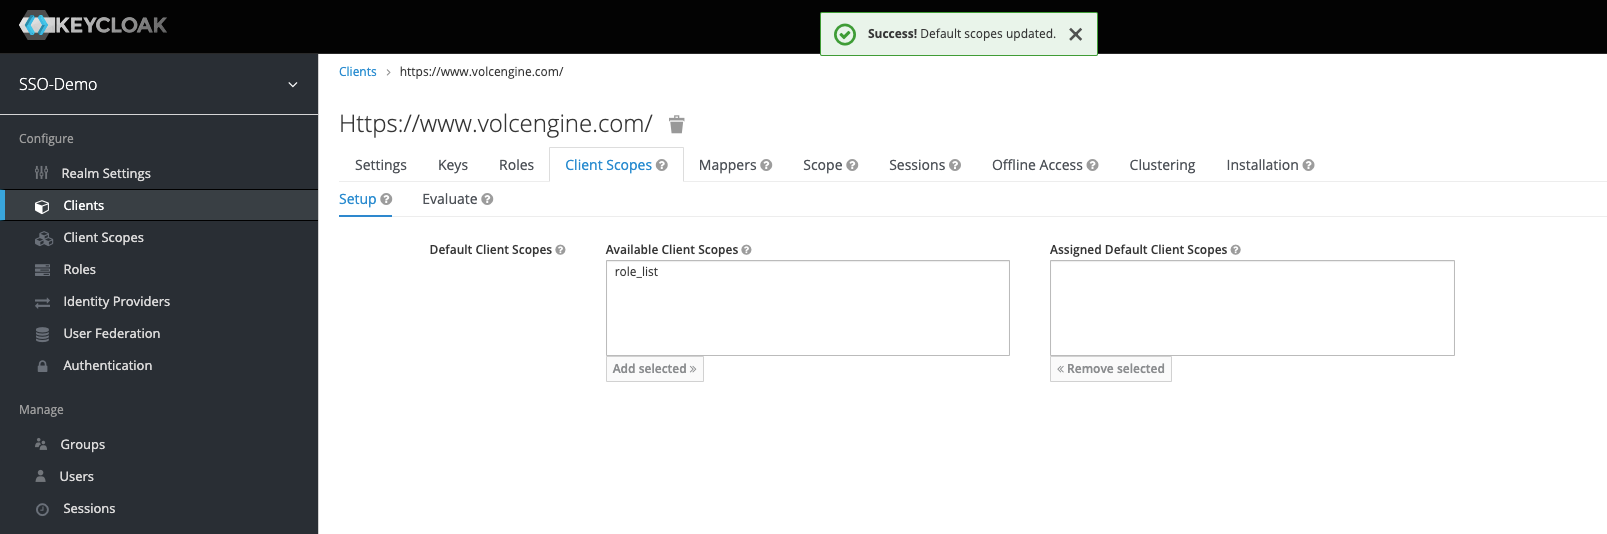
- In the KeyCloak created client side - client side template, delete the role_list in the Assigned Default Client Scopes.
- Create identity attributes, and refer to the following for configuration information:
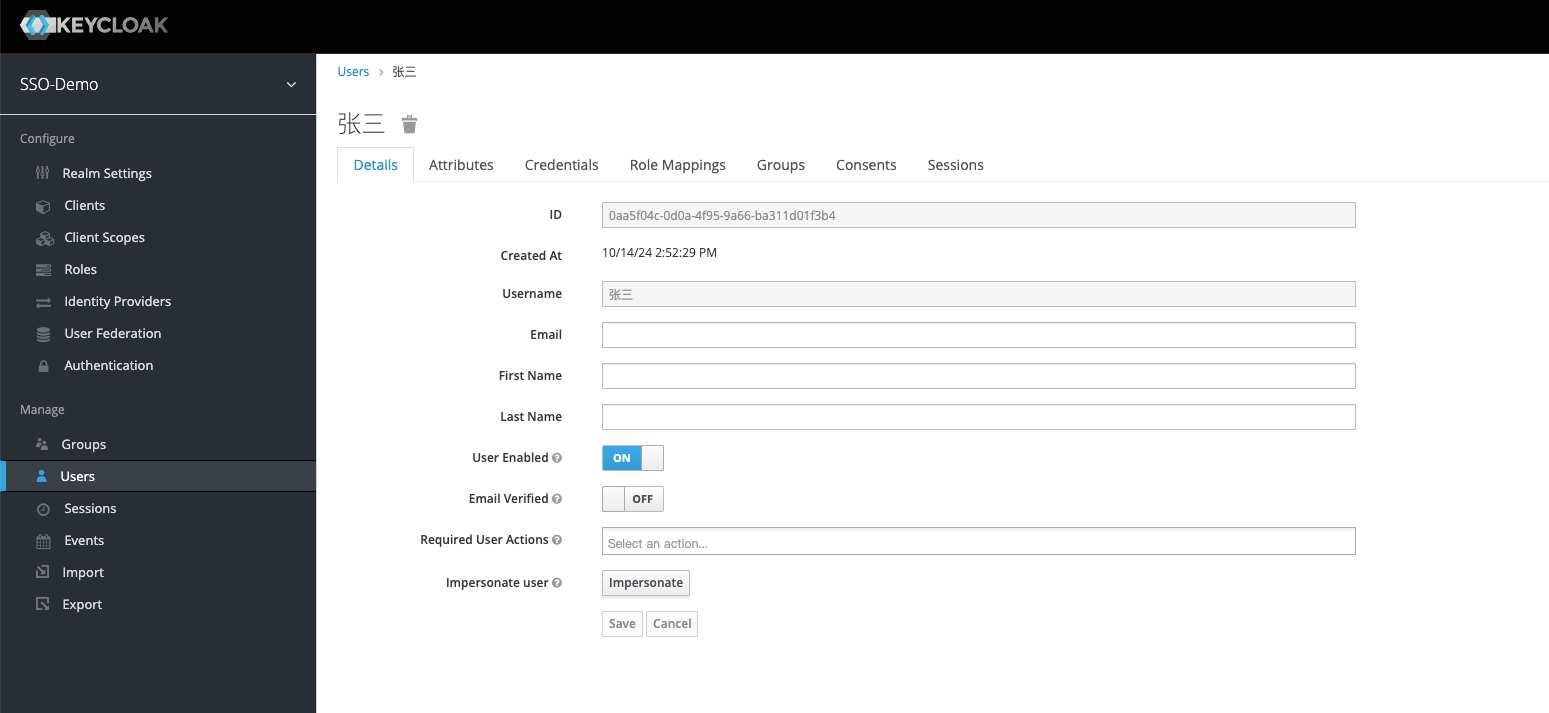
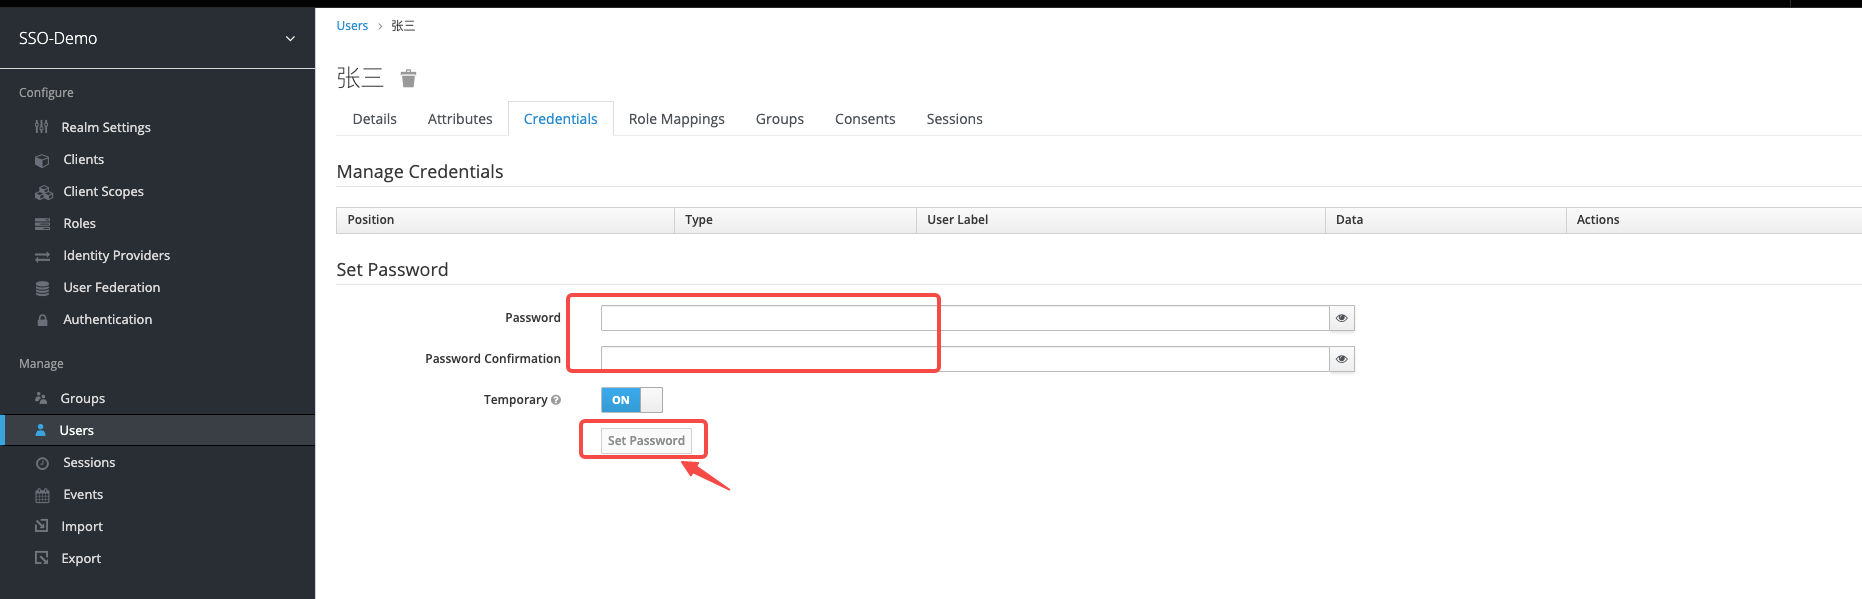
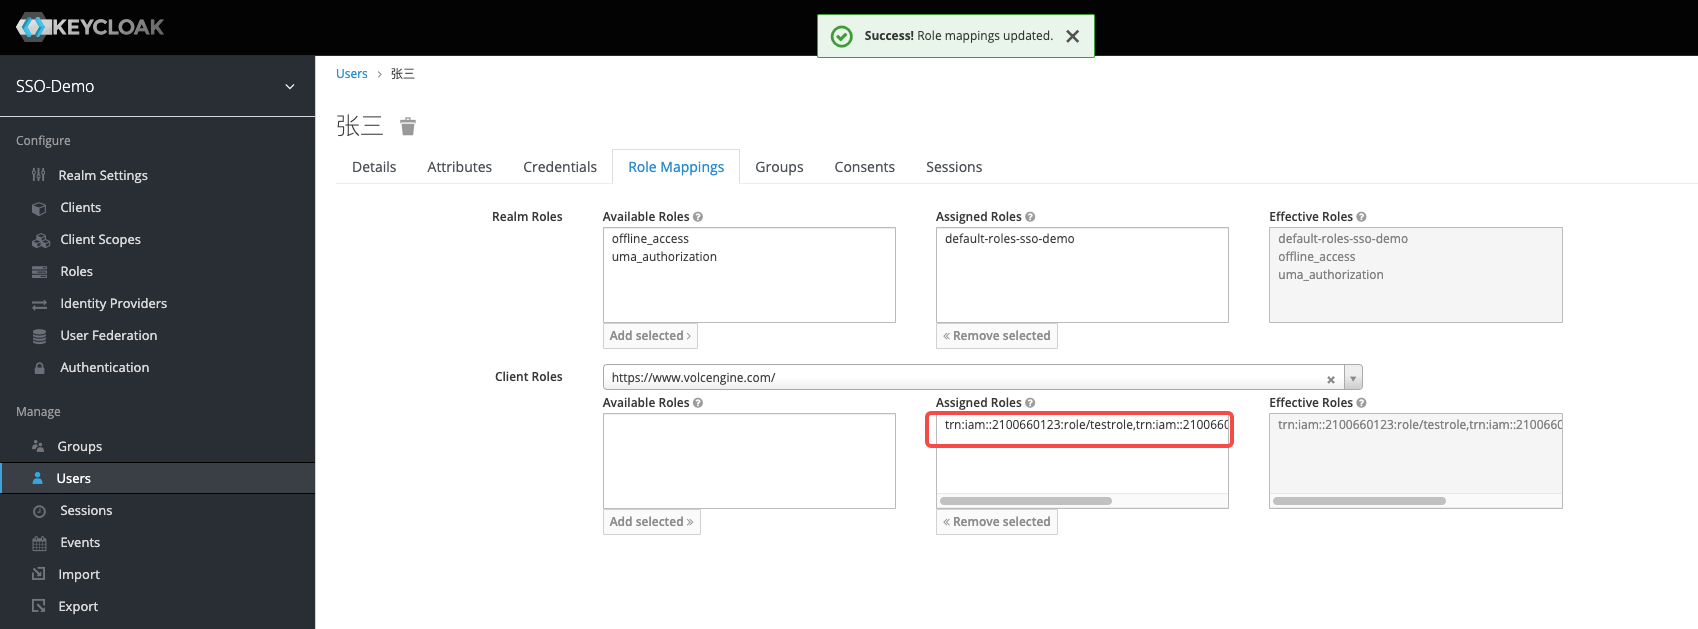
- Configure KeyCloak user information: Add user "Zhang San", configure login password information, and configure the user's role mapping information, select client side created role to add.

Initiate single sign-on from KeyCloak:
- Click the created client side root URL in KeyCloak.
2. Enter the username and password of the created KeyCloak user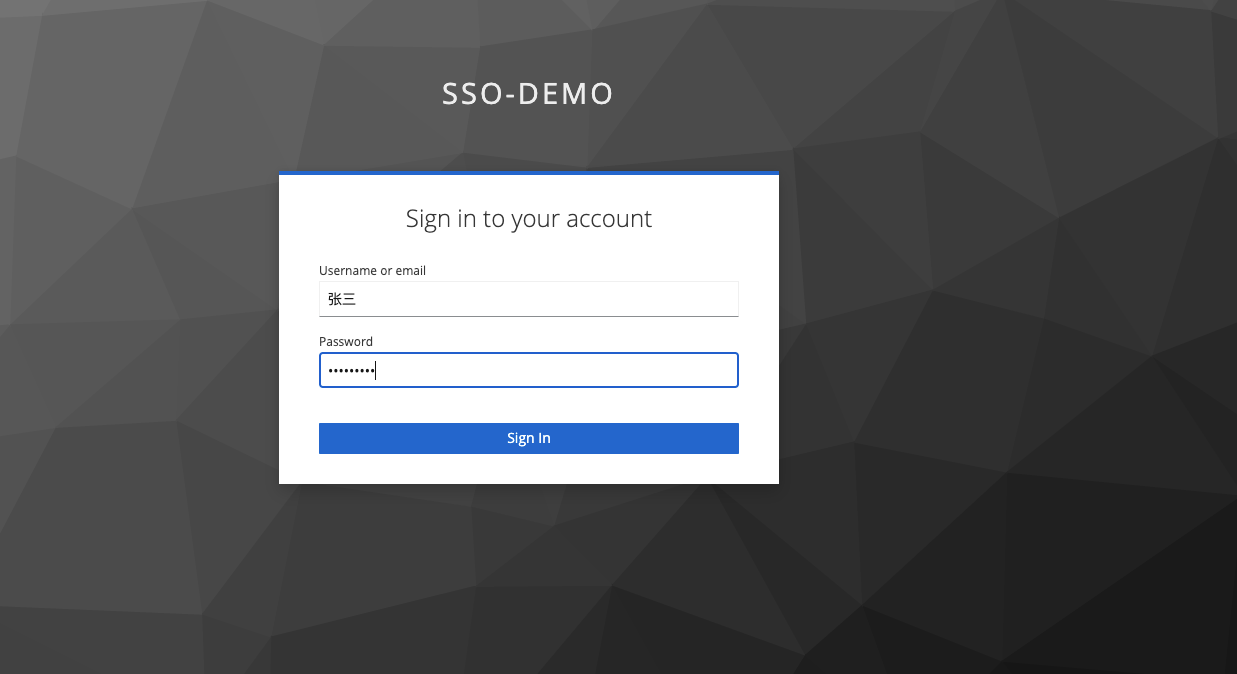
3. Successfully login to Volcano Engine
Initiate single sign-on from Volcano Engine:
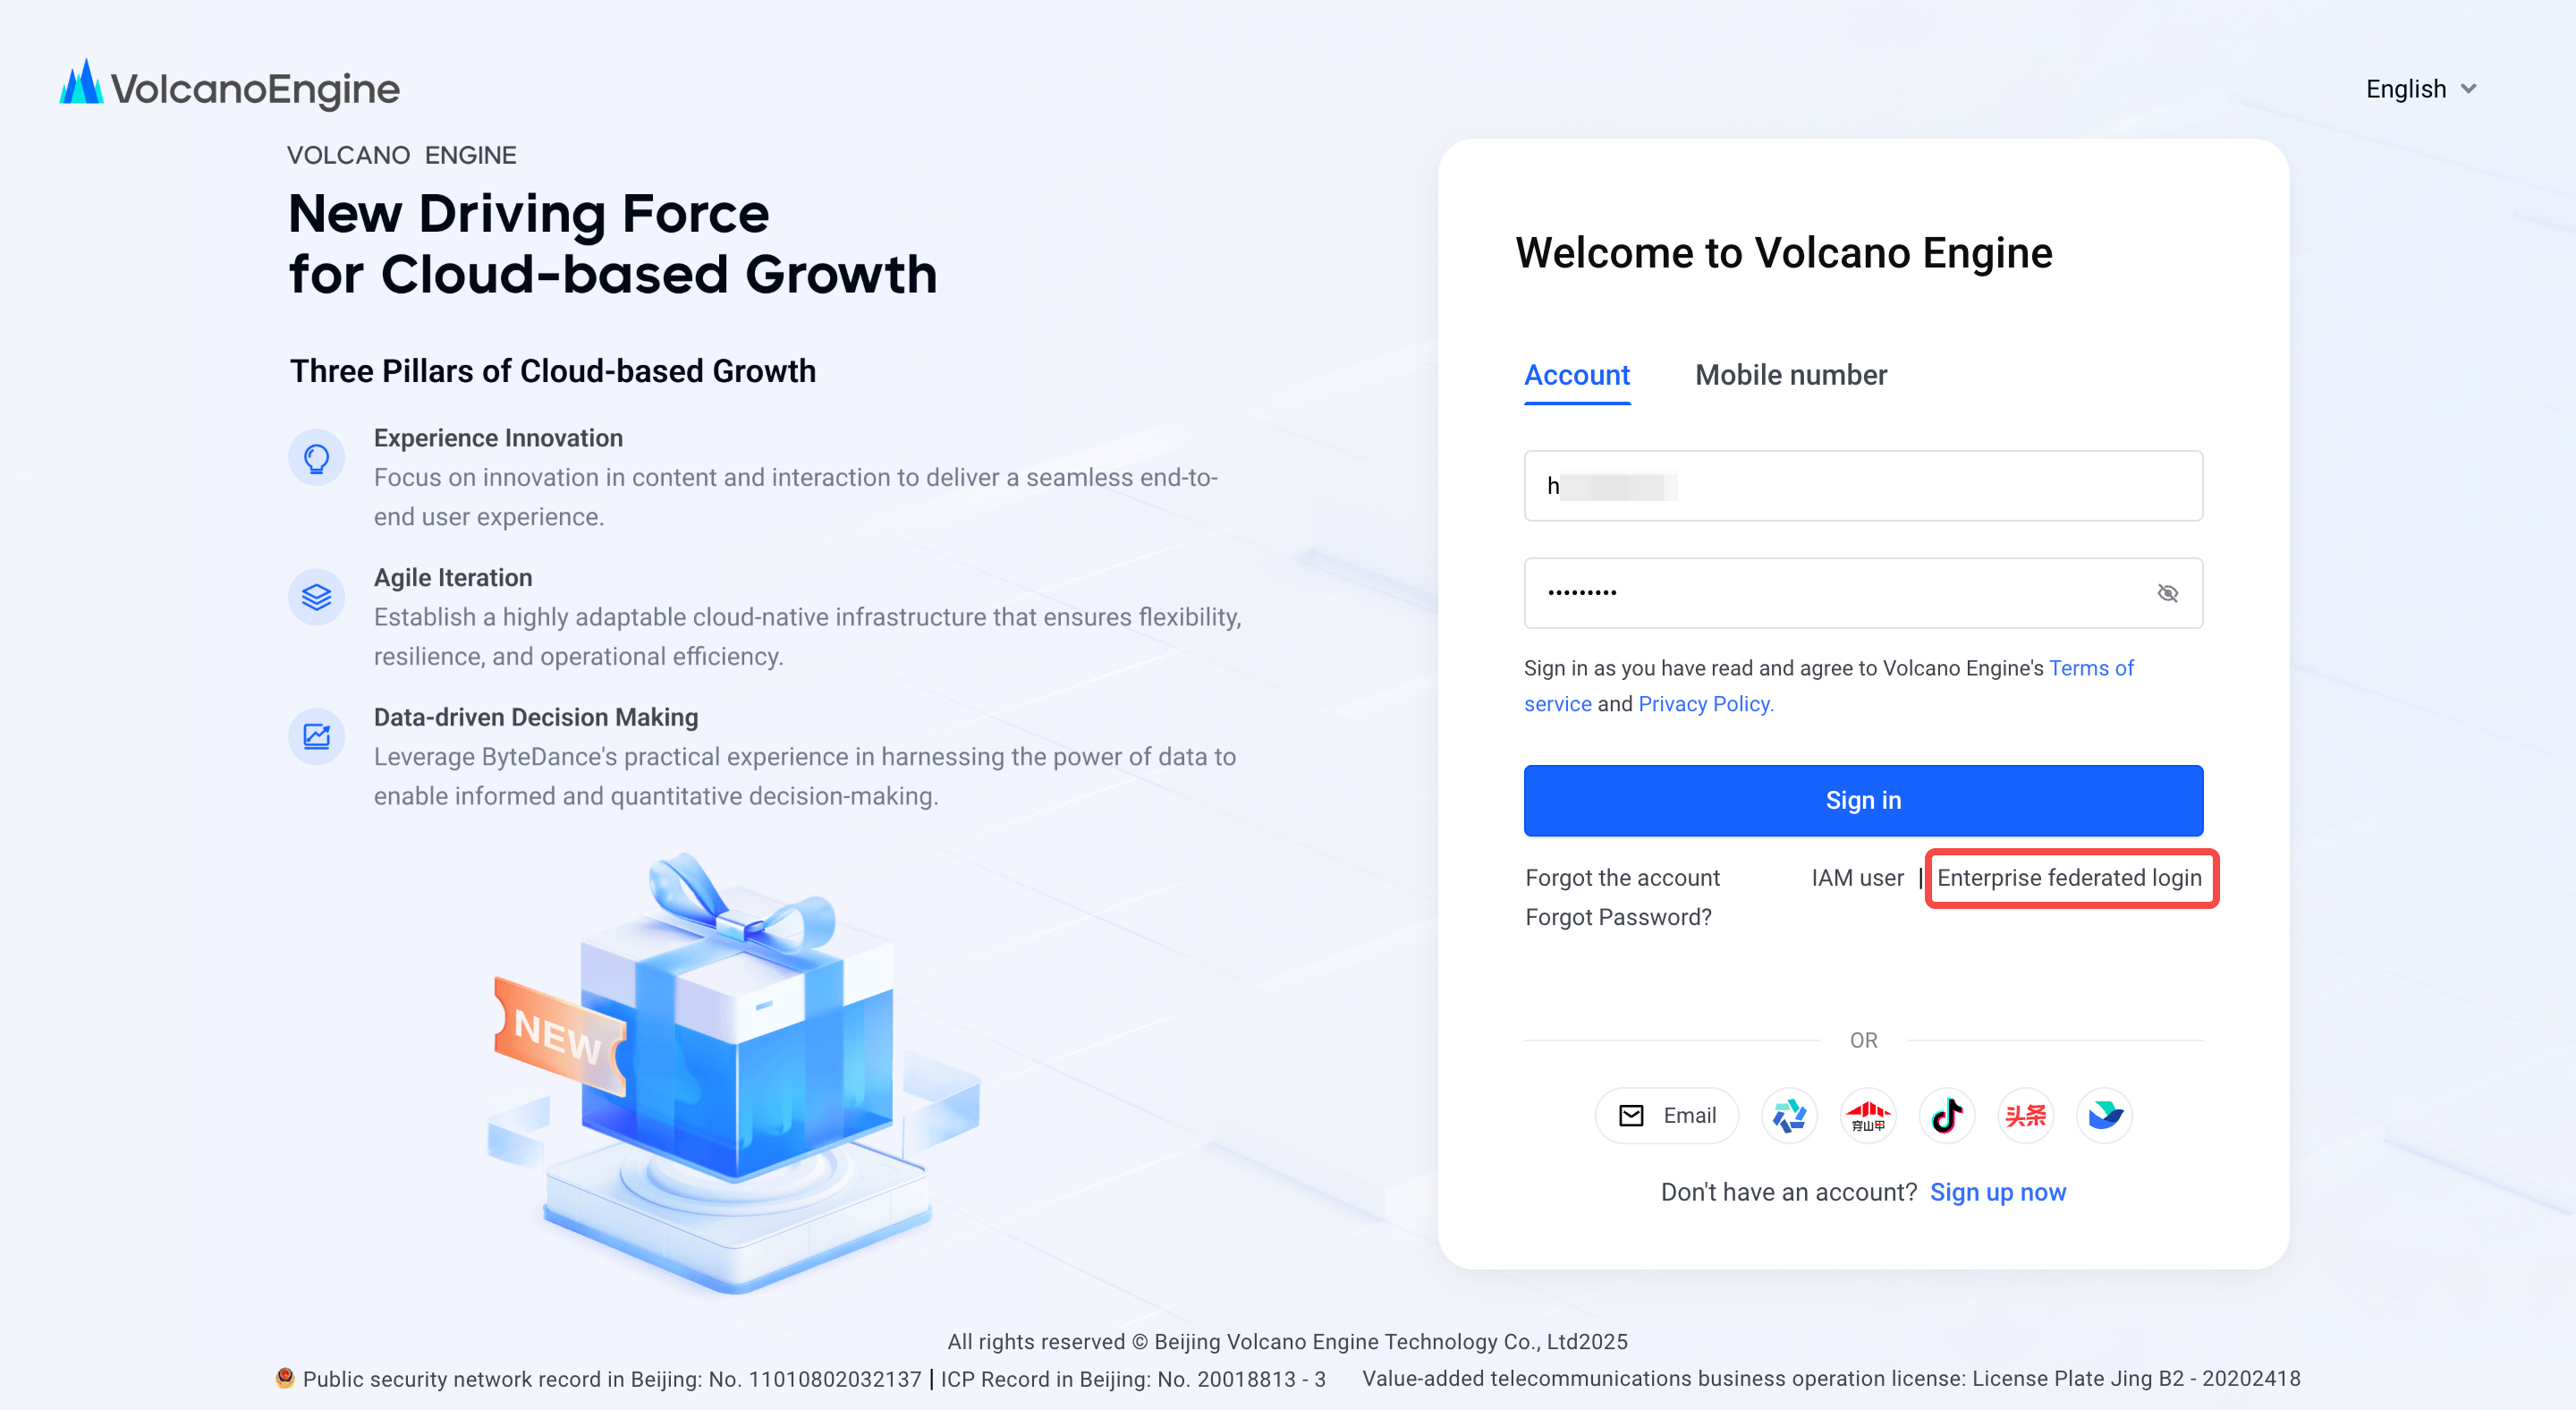
- Select "Corporate Federated Login" on the Volcano Engine login page, select the account and identity provider you need to log in to, and click "Login Now".
- Enter the username and password of the created KeyCloak user

3. Successfully login to Volcano Engine