本文主要面向 Kitex 的使用者,通过示例介绍如何使用 MSE Nacos 实现服务治理。
说明
MSE Nacos 服务注册发现功能是基于社区 config-nacos 与 Kitex 服务注册扩展实现。
- config-nacos 详细介绍参见 config-nacos Github。
- Kitex 详细介绍参见 CloudWeGo-Kitex 官网。
背景信息
在微服务场景下,部分服务尽可能的拆解到最小的颗粒,确保服务和服务间的深度解耦,方便业务的快速迭代。但是随之而来的服务管理和控制变得异常的复杂和繁琐,维护成本大幅提升。服务注册发现和配置管理的诞生就可以有效的解决这些问题,提高开发和运维的效率。
前提条件
已创建微服务引擎实例,并开启公网访问功能,操作说明参见 创建实例。
说明
本文基于公网连通的方式实现服务治理功能。通过私有网络实现服务治理的方法参见 基于 Kitex 使用 Nacos 服务注册中心。
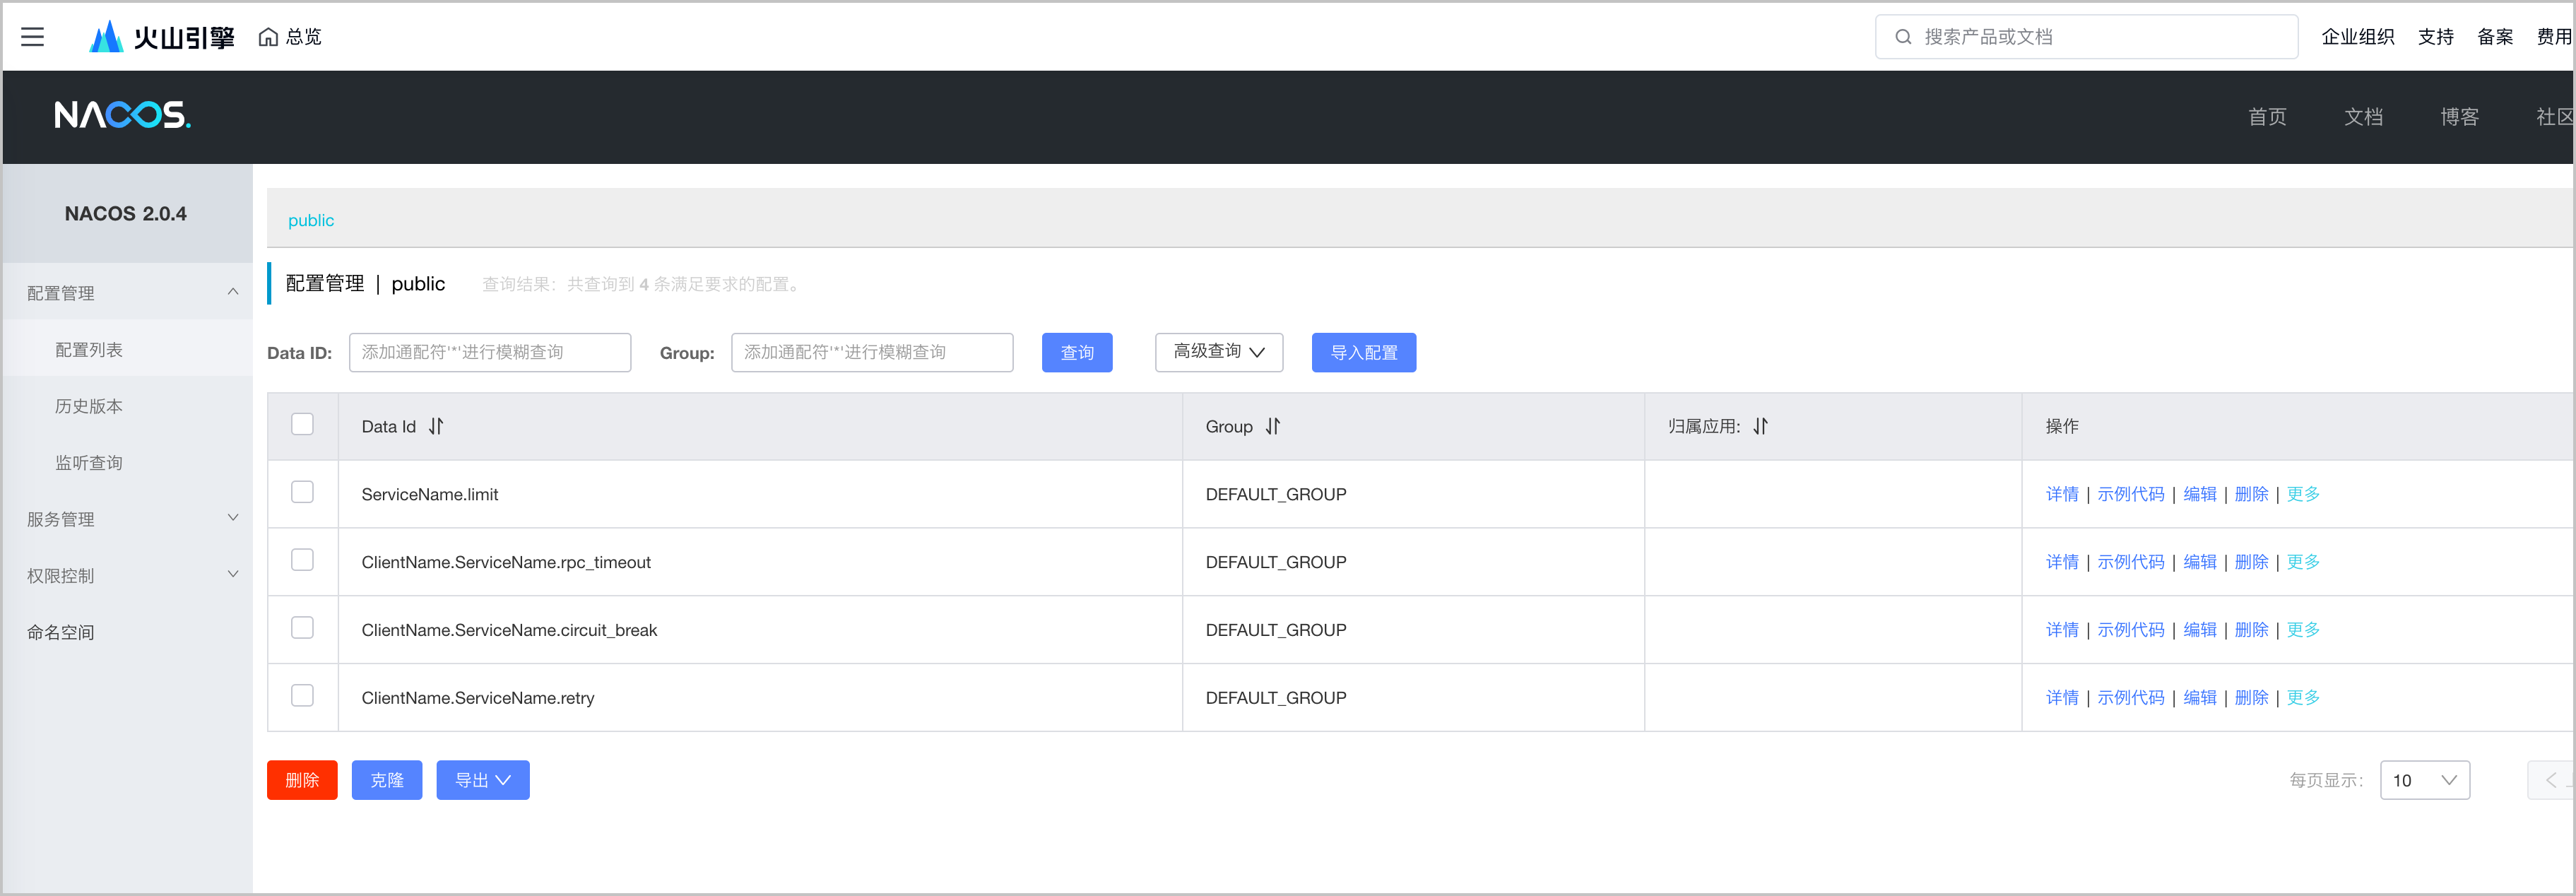
已在 Nacos 创建本示例的默认配置。在控制台创建配置的方法参见 基于 Spring Cloud 使用 Nacos 配置中心 中 通过控制台发布配置 章节。
参数 说明 Data ID ServiceName.limit 配置内容
{
"connection_limit": 50,
"qps_limit": 1000
}
注意事项
MSE Nacos 仅支持 config-nacos v0.3.0 及更新版本适配,低于该版本无法完成鉴权,将导致服务接入失败。
操作步骤
第一步:创建 Provider
修改 ./server/main.go 文件。修改后的文件如下所示。
package main

import (
        "context"
        "log"

        "github.com/cloudwego/kitex-examples/kitex_gen/api"
        "github.com/cloudwego/kitex-examples/kitex_gen/api/echo"
        "github.com/cloudwego/kitex/pkg/klog"
        "github.com/cloudwego/kitex/pkg/rpcinfo"
        "github.com/cloudwego/kitex/server"
        "github.com/kitex-contrib/config-nacos/nacos"
        nacosserver "github.com/kitex-contrib/config-nacos/server"
)

var _ api.Echo = &EchoImpl{}

// EchoImpl implements the last service interface defined in the IDL.type EchoImpl struct{}

// Echo implements the Echo interface.func (s *EchoImpl) Echo(ctx context.Context, req *api.Request) (resp *api.Response, err error) {
        klog.Info("echo called")
        return &api.Response{Message: req.Message}, nil
}

func main() {
        // set level as debug when needed, default level is info
				// klog.SetLevel(klog.LevelDebug)
        nacosClient, err := nacos.NewClient(nacos.Options{
           Address: "{{Nacos Public IP}}",
           Username: "nacos",
           Password: "nacos",
        })
        if err != nil {
                panic(err)
        }
        serviceName := "ServiceName" // your server-side service name
        svr := echo.NewServer(
                new(EchoImpl),
                server.WithServerBasicInfo(&rpcinfo.EndpointBasicInfo{ServiceName: serviceName}),
                server.WithSuite(nacosserver.NewSuite(serviceName, nacosClient)),
        )
        if err := svr.Run(); err != nil {
                log.Println("server stopped with error:", err)
        } else {
                log.Println("server stopped")
        }
}
在上述代码的 nacos.Options 中配置 Nacos Server 的地址(上述 MSE Nacos 实例公网访问地址)和用户名、密码。
参数 说明 Address Nacos Server 的地址,即 MSE Nacos 实例公网访问地址。 Username Nacos 账号用户名。 Password Nacos 账号密码。 说明
MSE Nacos 默认开启鉴权,用户必须配置鉴权后才能使用。初始用户名和密码为都为 nacos,与控制台访问用户名相同。后续如需更改,支持通过控制台或 OpenAPI 实现。
在 Terminal 执行以下操作。
go run server/main.go
第二步:创建 Consumer
修改 ./client/main.go 文件。修改后的文件如下所示。
// Copyright 2023 CloudWeGo Authors
//
// Licensed under the Apache License, Version 2.0 (the "License");
// you may not use this file except in compliance with the License.
// You may obtain a copy of the License at
//
//     http://www.apache.org/licenses/LICENSE-2.0
//
// Unless required by applicable law or agreed to in writing, software
// distributed under the License is distributed on an "AS IS" BASIS,
// WITHOUT WARRANTIES OR CONDITIONS OF ANY KIND, either express or implied.
// See the License for the specific language governing permissions and
// limitations under the License.
//

package main

import (
        "context"
        "log"
        "time"

        "github.com/cloudwego/kitex-examples/kitex_gen/api"
        "github.com/cloudwego/kitex-examples/kitex_gen/api/echo"
        "github.com/cloudwego/kitex/client"
        "github.com/cloudwego/kitex/pkg/klog"
        nacosclient "github.com/kitex-contrib/config-nacos/client"
        "github.com/kitex-contrib/config-nacos/nacos"
        "github.com/kitex-contrib/config-nacos/utils"
        "github.com/nacos-group/nacos-sdk-go/vo"
)

type configLog struct{}

func (cl *configLog) Apply(opt *utils.Options) {
        fn := func(cp *vo.ConfigParam) {
                klog.Infof("nacos config %v", cp)
        }
        opt.NacosCustomFunctions = append(opt.NacosCustomFunctions, fn)
}

func main() {
        // set level as debug when needed, default level is info
				// klog.SetLevel(klog.LevelDebug)
        nacosClient, err := nacos.NewClient(nacos.Options{
           Username: "nacos",
           Password: "nacos",
        })
        if err != nil {
                panic(err)
        }

        cl := &configLog{}

        serviceName := "ServiceName" // your server-side service name
        clientName := "ClientName" // your client-side service name
        client, err := echo.NewClient(
                serviceName,
                client.WithHostPorts("{{Nacos Public IP}}"),
                client.WithSuite(nacosclient.NewSuite(serviceName, clientName, nacosClient, cl)),
        )
        if err != nil {
                log.Fatal(err)
        }
        for {
                req := &api.Request{Message: "my request"}
                resp, err := client.Echo(context.Background(), req)
                if err != nil {
                        klog.Errorf("take request error: %v", err)
                } else {
                        klog.Infof("receive response %v", resp)
                }
                time.Sleep(time.Second * 10)
        }
}
在上述代码的 client.WithHostPorts 中配置 Nacos Server 的地址(上述 MSE Nacos 实例公网访问地址);在 nacos.Options 中配置 Nacos 用户名、密码。
参数 说明 client.WithHostPorts Nacos Server 的地址,即 MSE Nacos 实例公网访问地址。 Username Nacos 账号用户名。 Password Nacos 账号密码。 说明
MSE Nacos 默认开启鉴权,用户必须配置鉴权后才能使用。初始用户名和密码为都为 nacos,与控制台访问用户名相同。后续如需更改,支持通过控制台或 OpenAPI 实现。
在 Terminal 执行以下操作。
go run client/main.go
结果验证
- 登录 Nacos 实例控制台,操作说明参见 登录 Nacos 控制台。
- 在左侧菜单栏,单击 服务管理 > 服务列表,查看已被发现的 Provider 服务 ServiceName。

- 在左侧菜单栏,单击 服务配置 > 配置列表,查看初始配置。

- 运行工程后,ServiceName.limit 的连接数上限和 QPS 上限已由之前的 50,1000 更新为 100,2000。
