E-MapReduce
E-MapReduce


- 文档首页
 E-MapReduce组件操作指南Airflow快速开始

本文向您介绍如何通过火山引擎 E-MapReduce(EMR)控制台,快速使用 Airflow 组件进行工作流调度。
步骤一: 服务引入
注意
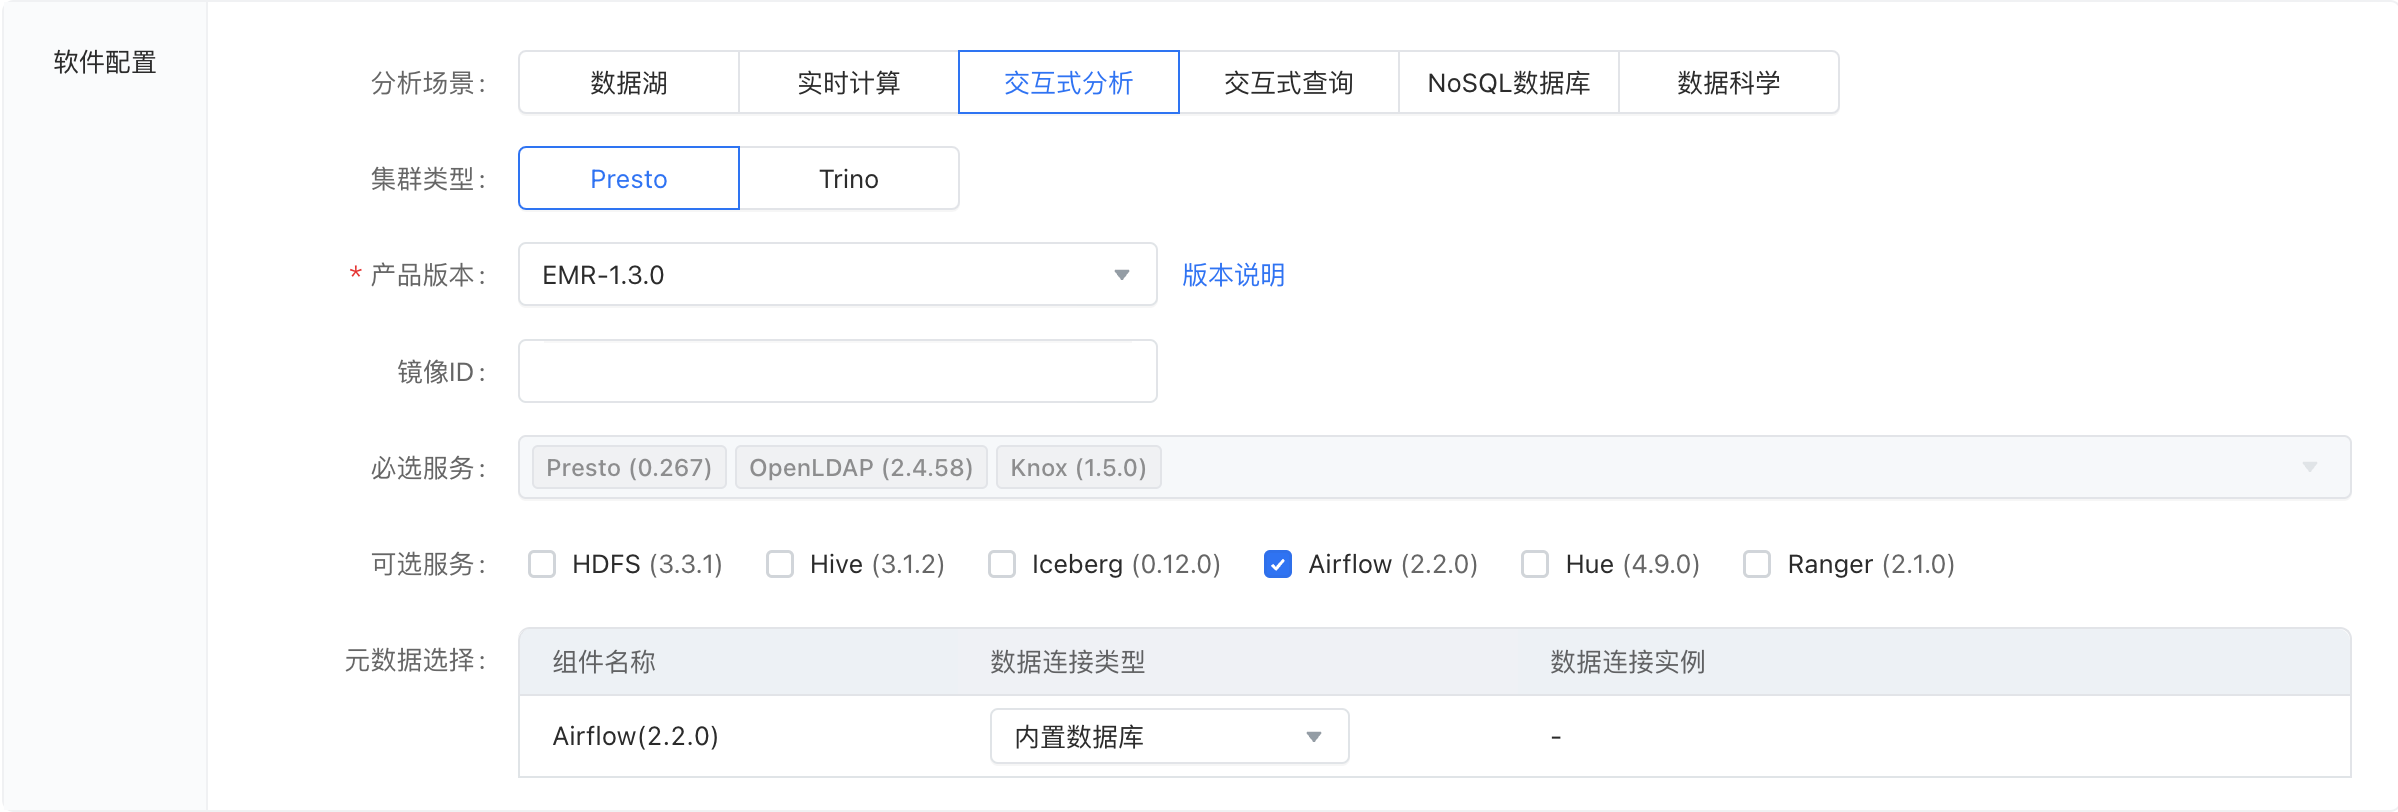
在 EMR 集群创建中,Airflow 服务能力存在于以下三种类型的集群中:Hadoop、Presto、Trino。
若您未创建集群,请在创建 EMR 的 Hadoop、Presto 或 Trino 集群类型时,勾选上 Airflow 服务。集群创建操作详见:创建集群。
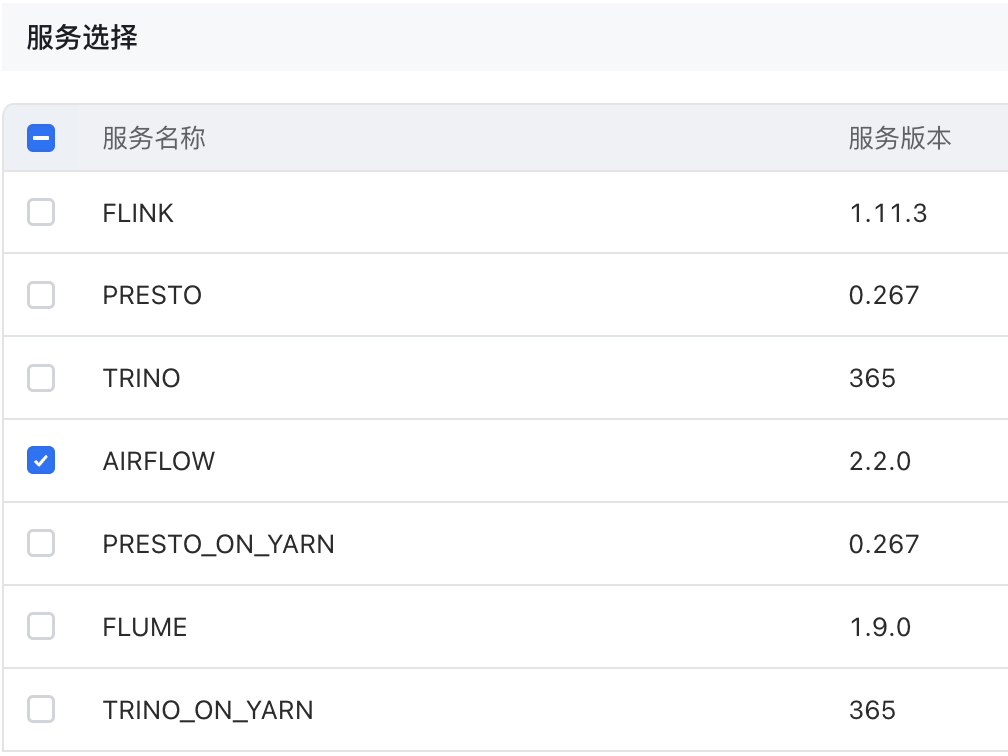
对于已创建的集群,若服务列表中没有 Airflow 组件,可以通过添加服务功能添加 Airflow。操作详情参考:服务管理章节。
集群服务创建成功后,您可以在 集群详情 > 服务列表 中看到 Airflow。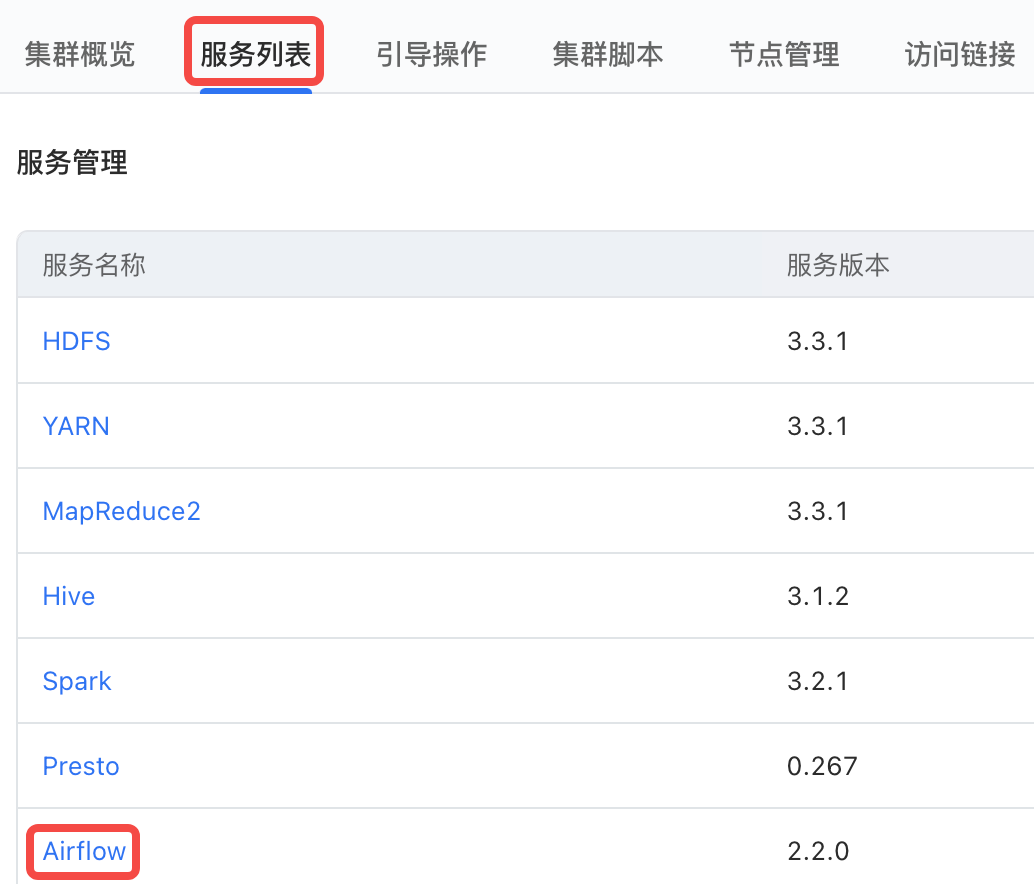
步骤二: DAG文件编写
Airflow 服务引入之后,接下来您需要用编程的方式创建工作流,让 Airflow 为您进行服务。
这里提供一个来自官方的示例 DAG,它不需要其他任何依赖就能启动运行,助您快速体验。
""" ### Tutorial Documentation Documentation that goes along with the Airflow tutorial located [here](https://airflow.apache.org/tutorial.html) """ # [START tutorial] # [START import_module] from datetime import datetime, timedelta from textwrap import dedent # The DAG object; we'll need this to instantiate a DAG from airflow import DAG # Operators; we need this to operate! from airflow.operators.bash import BashOperator # [END import_module] # [START instantiate_dag] with DAG( 'tutorial', # [START default_args] # These args will get passed on to each operator # You can override them on a per-task basis during operator initialization default_args={ 'depends_on_past': False, 'email': ['airflow@example.com'], 'email_on_failure': False, 'email_on_retry': False, 'retries': 1, 'retry_delay': timedelta(minutes=5), # 'queue': 'bash_queue', # 'pool': 'backfill', # 'priority_weight': 10, # 'end_date': datetime(2016, 1, 1), # 'wait_for_downstream': False, # 'sla': timedelta(hours=2), # 'execution_timeout': timedelta(seconds=300), # 'on_failure_callback': some_function, # 'on_success_callback': some_other_function, # 'on_retry_callback': another_function, # 'sla_miss_callback': yet_another_function, # 'trigger_rule': 'all_success' }, # [END default_args] description='A simple tutorial DAG', schedule_interval=timedelta(days=1), start_date=datetime(2021, 1, 1), catchup=False, tags=['example'], ) as dag: # [END instantiate_dag] # t1, t2 and t3 are examples of tasks created by instantiating operators # [START basic_task] t1 = BashOperator( task_id='print_date', bash_command='date', ) t2 = BashOperator( task_id='sleep', depends_on_past=False, bash_command='sleep 5', retries=3, ) # [END basic_task] # [START documentation] t1.doc_md = dedent( """\ #### Task Documentation You can document your task using the attributes `doc_md` (markdown), `doc` (plain text), `doc_rst`, `doc_json`, `doc_yaml` which gets rendered in the UI's Task Instance Details page.  """ ) dag.doc_md = __doc__ # providing that you have a docstring at the beginning of the DAG dag.doc_md = """ This is a documentation placed anywhere """ # otherwise, type it like this # [END documentation] # [START jinja_template] templated_command = dedent( """ {% for i in range(5) %} echo "{{ ds }}" echo "{{ macros.ds_add(ds, 7)}}" echo "{{ params.my_param }}" {% endfor %} """ ) t3 = BashOperator( task_id='templated', depends_on_past=False, bash_command=templated_command, params={'my_param': 'Parameter I passed in'}, ) # [END jinja_template] t1 >> [t2, t3] # [END tutorial]
步骤三: 上传 DAG 文件
当您完成 DAG 文件的编写后,接下来需要将代码文件提交到集群中,让 Airflow 得以发现该工作流。
您可以按照如下的步骤操作进行:
DAG 开发完成后,您有多种途径可以将其上传:
您可以为集群机器进行公网绑定,然后本机通过命令行工具/终端,将代码文件上传到集群中。
不开启公网时,您也可以通过 ECS Terminal 登录到机器上,具体方式请参见:集群运维-登录集群 。 登录后通过系统内的文本编辑,将您的代码保存为 py 文件放置在集群节点内。
假设代码顺利以文件形式存在于集群内,名为
test.py,接下来您需要将文件放置在和 Airflow 约定好的 DAG 目录中,这个目录位置您可以通过 Airflow 组件中的服务参数dags_folder来配置确定。EMR 在系统内提供了一个便捷的命令
dagdispatch,作用是将某文件快速分发到集群所有机器的某目录中(需要目录提前存在)。
其使用格式是dagdispatch [dag_file_path] [dags_folder_path],若您没有改变过系统默认的dags_folder配置,那么 path 是可选的;否则,需要将您自定的目录作为第二个参数传入。
注意
dags_folder 组件配置参数仅在 EMR-1.3.x 及以后的版本中支持自定义,在 1.3.x 之前的版本中,已默认指定路径为: /usr/lib/emr/current/airflow/home/dags。
步骤四: 进入 Airflow 服务 UI 操作
在您顺利上传 DAG 文件之后,接下来您可以进入 Airflow 自带的 WebUI 进行工作流启动,并在页面上查看运行情况。关于服务组件自带 UI 的访问,详情请参见:集群管理-集群配置-访问链接。
进入 Airflow UI 后,首页会列出已经被 Airflow 成功解析的可运行 DAGs,如果您用的是示例 DAG,界面上会看到一行名为tutorial的 DAG 信息,将其触发即可展开调度。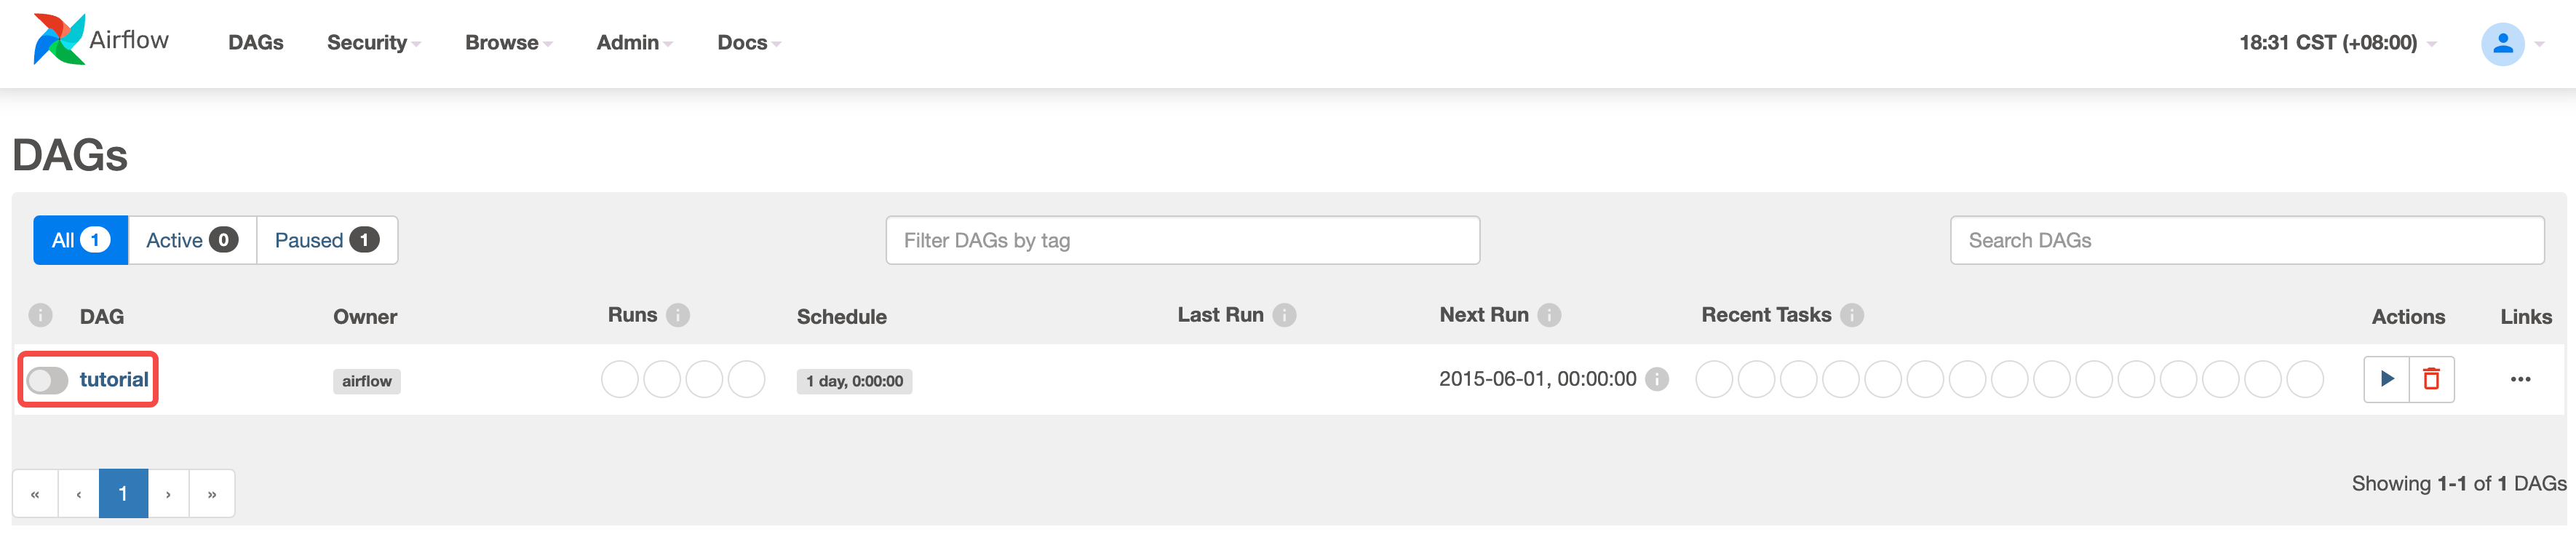
某些情况下,您可能在界面上暂时看不到该 DAG,请前往 常见问题 了解详情。
步骤五: 查看 DAG 运行状态
Airflow UI 提供了对 DAG 运行的全生命周期管理。当一个工作流开始调度,Airflow 会提供 DAG Run 与 Task 的关键信息、运行状态和执行日志的查看:
DAG 首页概览

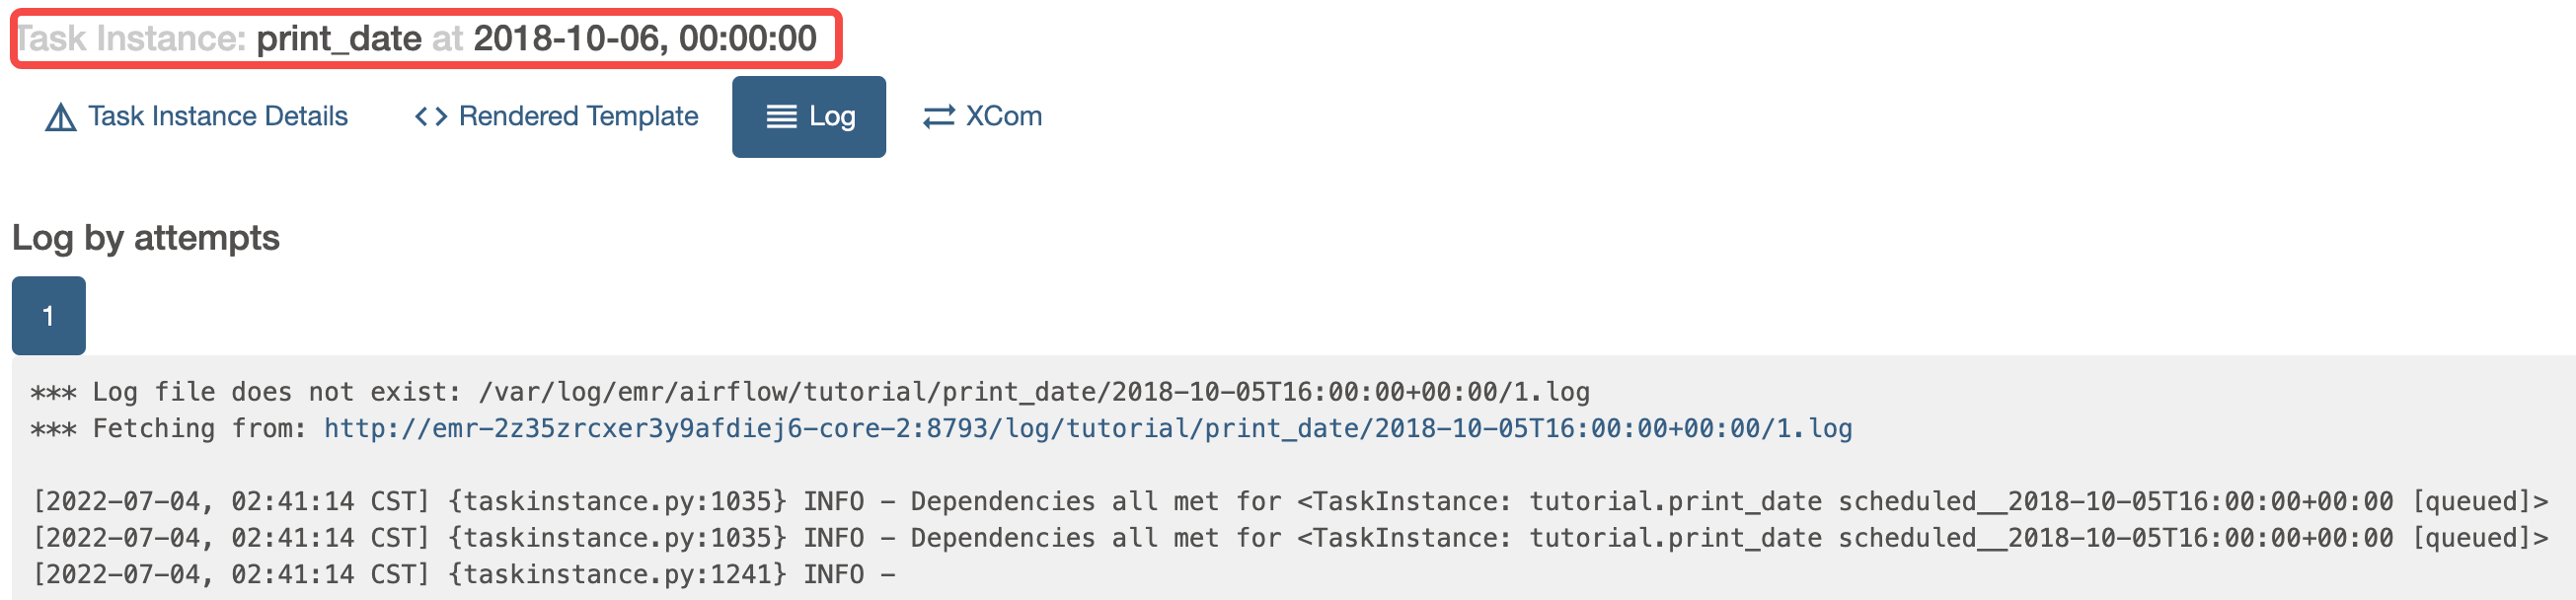
运行日志查看
日志是由一个个 Task(步骤)运行时产生的,这个运行时称之为一个 TaskInstance,我们对日志的查看也需要定位到具体的某个 TaskInstance。
关于Airflow UI的完整内容,请查看:官方文档。